See details below
That’s right. Now you can see the latest and greatest reviews for FREE from Right On Replicas in Full HD color video at the YouTube link below.
On this page you’ll find the latest video reviews and you can look for the Playlists menu tab (red circle) to search through the type of kit reviews you like best.

When you select the Playlists menu you’ll see the different model review categories currently available.
After a brief video clip from our sponsors you’ll be able to watch the entire video kit review for FREE.
Thanks,
Doug – RoR

Right On Replicas, LLC Step-by-Step Review 20170629*
How to Build the Convair RB-36H Peacemaker 1:72 Scale Revell Kit #85-5710 Review

Review and Photos for Right On Replicas, LLC by Kevin Lawton 
The Convair B-36 was the largest bomber ever deployed by the United States Air Force. Its wing-span of 230 feet is 45 feet greater than the B-52, it was 3 feet longer and 6 feet taller at the tail than a B-52. It is often referred to as ‘six turning and four burning’ in reference to its six radial engines and four jet engines. The B-36 was, in fact, obsolete from the day it was delivered because of the development of the jet.  It served from 1948 until 1954. A total of 384 were built (including all variants) at a cost of approx. $4.1 million each. By 1955, the swept wing Boeing B-52 Stratofortress was entering the Air Force inventory in substantial numbers, replacing B-36s.
For the Modeler: This review covers the vintage 1997 release of the Convair RB-36H Peacemaker 1:72 Scale Revell Kit #85-5710.  Revell rated this a Skill Level 2 kit at the time for for the intermediate builder due to some intricate assemblies including glue and paint. 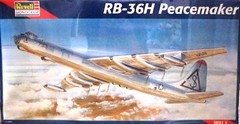 We’ve taken the review a step further with aftermarket decals and finishing techniques that would require at least a new level 4 skill set. This is a re-release of the kit with a different box art from the 1980 original.  There are 155 pieces molded in silver with transparent clear parts fold out instructions and waterslide decals. Included is a display stand and a four figure crew. This kit features a highly detailed interior and moveable machine guns. It can be assembled with the bomb bay doors open or closed.  Overall Length  is 27¾â€.
Â
See the FREE Step-by-Step review by clicking on the YouTube link below
Convair RB-36H Peacemaker Review
Â
Â
Right On Replicas, LLC ©2017 All rights reserved. *All registered trademarks are the property of their respective brands. Follow the manufacturer’s safety recommendations for any product mentioned here.
Right On Replicas, LLC Step-by-Step Review 20170614*
How to Build the Lost In Space Robby the Robot Polar Lights Model Kit #5030 Review
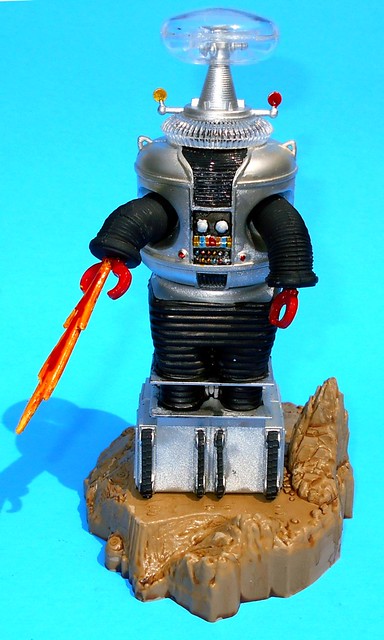
Review and Photos for Right On Replicas, LLC by Alan Mann 
 For the Modeler: This review covers The Robot from the Lost In Space TV Series that was release by Polar Lights while under the Playing Mantis company. The date on the box is 1997 but this kit can still be found in hobby shops and online and was Kit #5030 in their catalog. The kit itself has been around 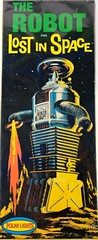 for years and was recast by them from another company. There are no Skill Levels on this but I would give it a Skill level 2 as it requires glue and paint and the box states ages 8 to adult. You get 40 parts molded in Cream and Clear styrene and a sheet of fold out instructions. There are no decals with this kit. The assembly is very simple and this is a weekend project. Paint the details are the key to making this kit standout. Overall dimensions are: Width: 4â€, Depth: 7â€, Height: 8â€.
See the FREE Step-by-Step review by clicking on the YouTube link below
Robby the Robot Review
Â
Â
Right On Replicas, LLC ©2017 All rights reserved. *All registered trademarks are the property of their respective brands. Follow the manufacturer’s safety recommendations for any product mentioned here.

