48 Ford Woody Monogram 85-4282

RoR Review 20110317 – 1948 Ford Woody Monogram 85-4282
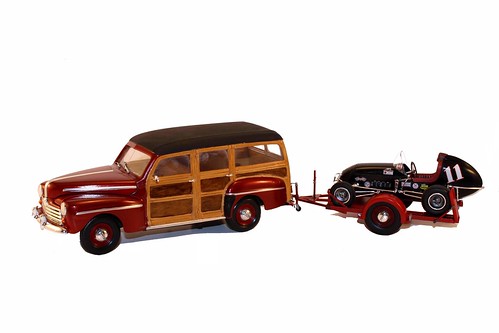
Buy This Kit (Midget Racer and Trailer not included)
Review and Photos by  Tony Gibson (w/Al Rogers)

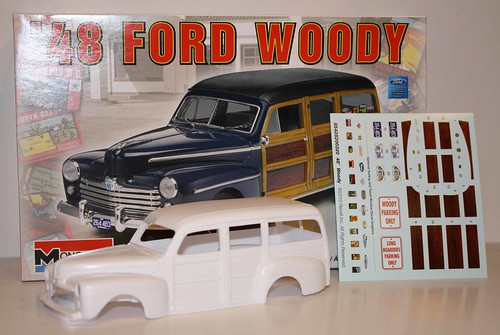
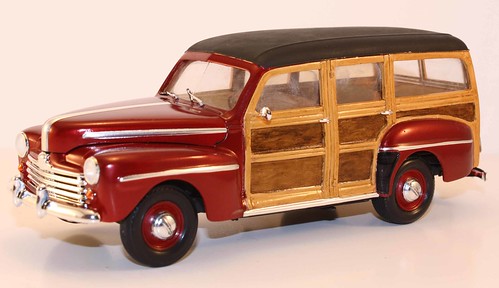
#1 Monogram 1948 Ford Woody. There are 127 pieces molded in white, chrome and clear. An easy to follow direction sheet for this 1/25 scale level 2 kit is included.
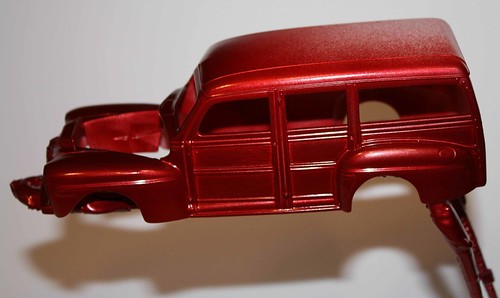
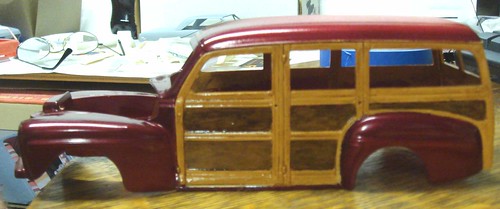
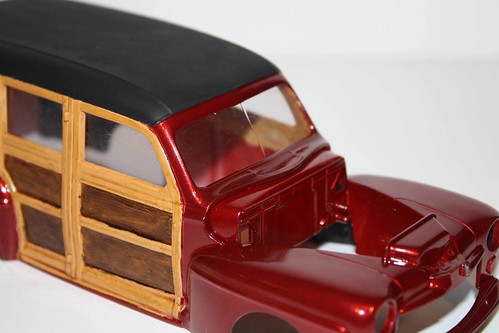
#2 Give the parts a quick look to see if anything needs cleaning up before painting. There was very little flashing. Two small die marks were seen on the top of the fenders, but these were easily sanded with 600 grit sandpaper. The body for this model seemed very oily, possibly from the molding release agent. Everything was given a good wash with mild dish soap and warm water. The body parts were washed twice. Allow these to dry completely before painting. The body parts were given a coat of white Duplicolor™ sealer and allowed to dry in a warm area for about an hour. The surfaces were wiped down with a piece of t-shirt fabric. Two light coats of Duplicolor™ gold metallic, 30 minutes dry time between coats. This will bring out a brighter color in the final top coat. Finally, two even coats of Duplicolor™ Red Bordeaux were applied, 30 minutes of dry time between coats. In the areas of “wood grain†the paint was applied a little lighter than the rest. Also, the top of the model was not painted heavily since another color would be applied later. No clear coat was applied at this time.
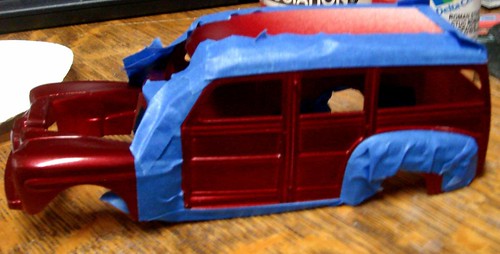
#3 The paint dried at least 24 hours in a warm area. The areas of “wood grain†were then taped off with 3M™ blue painters tape. This brand seems to leave the least amount of tape residue. (Builders note: The wood grain areas of this model were painted by Al Rogers from Flint Area Auto Modelers. Special thanks to him for showing me this technique. This part may look complicated, but after walking through it with Al I found it was easier than I thought)
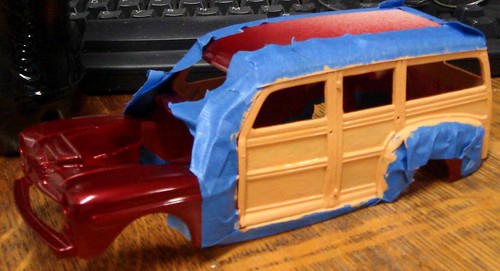
#4 The taped off areas and all inner panels were painted with craft paint; the color here is Roman Stucco by Delta.Â
#5 Two coats were applied using a soft, ¼ inch brush. 30-40 minutes were allowed between coats for drying. Use light, soft strokes and go in the same direction. Don’t worry too much about brush strokes in the paint; these will be your friend later on.
#6 After the last coat of brown was applied it was allowed to dry for about an hour.Â
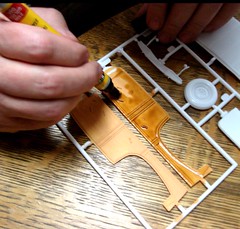
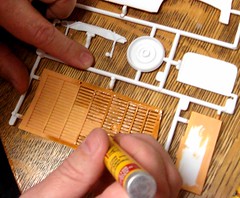
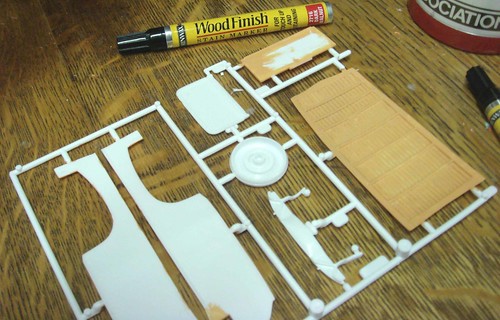
#7, 9 A Minwax™ stain touch up pen was used; the color here was Golden Oak. Apply to one piece or section at a time or it will get gummy before the next step can be completed.
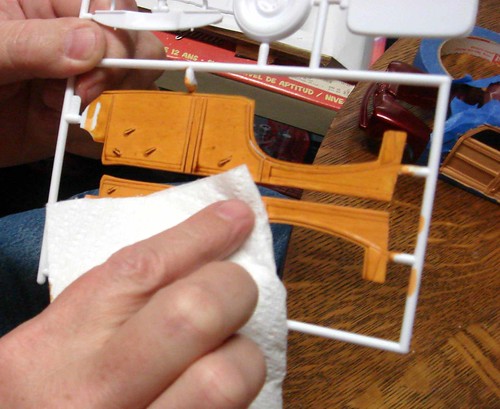
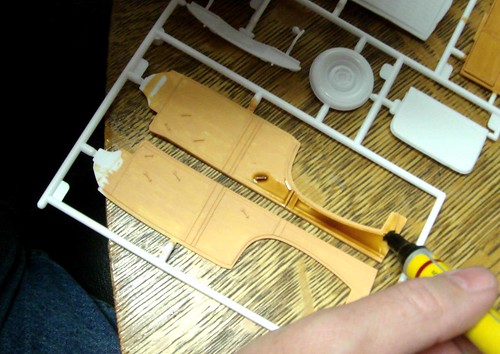
#8 With paper towel, wipe off the excess stain very gently. Do not blot, wipe in one direction only. Do not use much pressure at all. At this time you’ll start seeing the texture of the wood grain and brush strokes start to pop out. Even small dirt nubs or imperfections in the craft paint will start to look like knot holes.
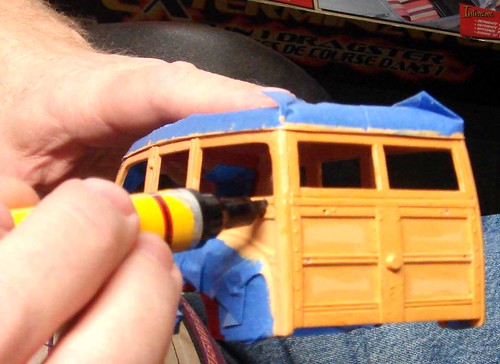
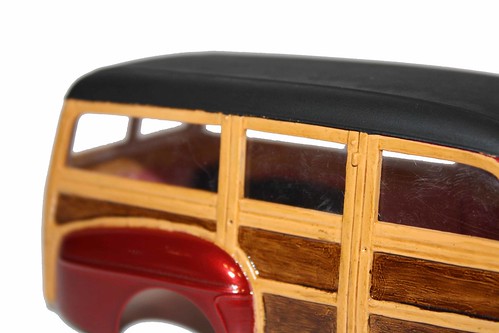
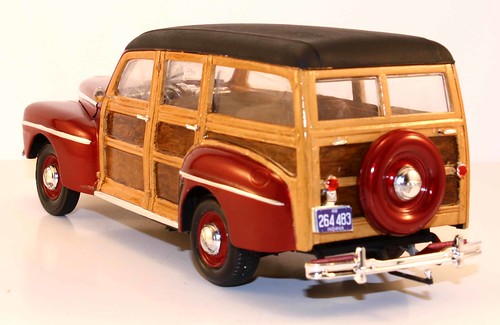
#10 On the exterior, the raised areas of the panel were given the same treatment as the interior parts.
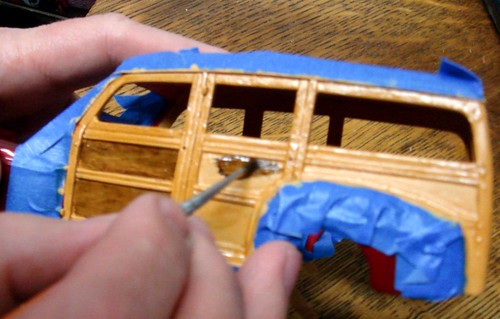
#11 Decals are offered for the darker insert panels but instead it was decided to use stain on these also. Minwax™ Dark Walnut touch up stain was used for the darker areas. The pen was pressed to the area so a small puddle of stain was left. Then a small brush was used to spread the stain around. This color was not wiped off, just allowed to dry completely. Be very careful not to get this darker color on the lighter raised areas. If you do, you will have to touch up these areas with the craft paint then retouch them with the lighter color stain.
#12 This process took about 4 hours to complete. The stain was allowed to dry for 2 days before clear coat was applied.
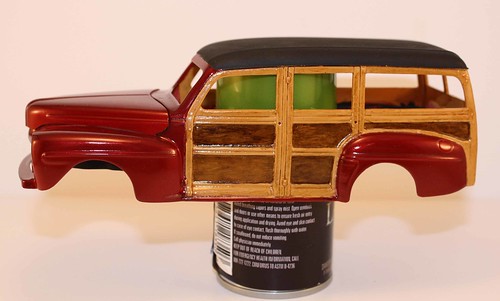
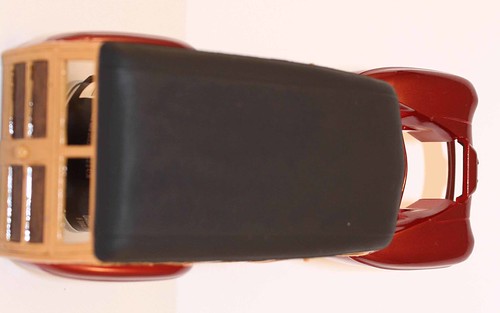
#13 The wood grain areas were given a “dusting†coat of Duplicolor™ Crystal Clear and allowed to dry for about 30 minutes. Then the entire body was given two light even coats of the same clear. (There is no picture of this taken before the roof was painted black…sorry).
#14 The roof was painted with American Ivory Black craft paint. A soft, ¼ inch brush was used. one coat was given using long, even strokes front to back. After drying for 30 minutes, a second coat was applied, brushing side to side. This made the roof look like canvas. After being skeptical at first, it was found that this technique really does work.
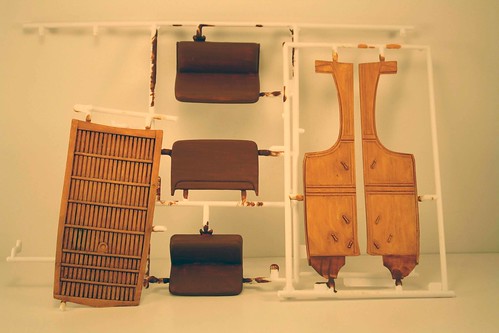
#15 The seats were given two coats of craft paint in a medium camel color. Allow 20-30 minutes of dry time between coats. Use the same soft, ¼ inch brush. The effect looks like a heavy cloth.
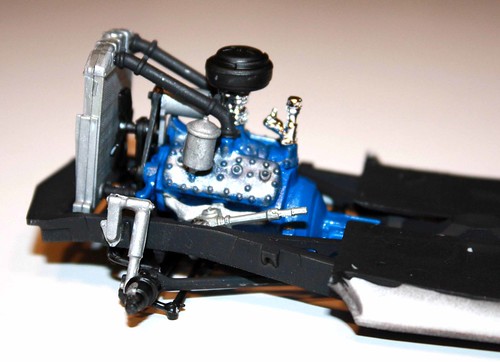
#16 The engine assembly went according to the directions without problems. All parts were test fit and mocked up before gluing.
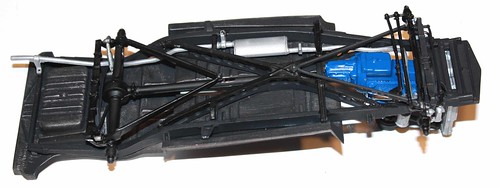
#17 The undercarriage parts were painted with rattle can flat black and semi gloss black. A little silver paint was thinned with lacquer thinner. After dipping the brush in paint, wipe it gently on a paper towel to remove most of the paint then lightly brush over the underside of the floor pan. This will give it a little more character. The chassis was assembled without issue. Study the directions carefully; the order that parts are assembled is important.
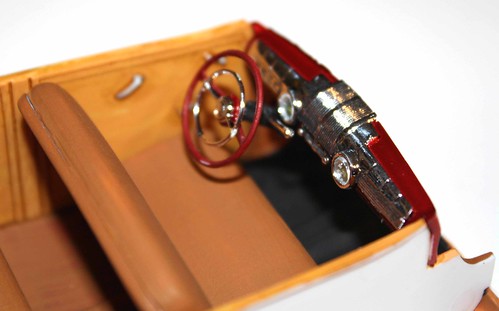
#18 The interior was assembled without any issues. The steering wheel and dash were painted the same color as the exterior. The door handles and window cranks were painted silver.
#19 The clear plastic from the kit was not used for this model. It seemed too thick and heavy. Instead, some thin, clear plastic sheet was cut to size and glued in.
#20 In the pictures the glass pieces look scratched or fogged. Fast drying glue was used to set them into place. The vapors from this glue caused this. These defects were polished out later with a fine polish and a q-tip. Unfortunately, when the body was set into place, it happened again on the inside due to the same glue. It would have been much better to use either windshield glue or regular old Testors. A big lesson was learned! Final assembly went according to plan (except for the window fogging problem). Bare metal foil was used on the feature lines on the fenders and hood. The rear tires from the kit were not used on this build. Tires from another kit were used because they were a little wider. Because this car was to be displayed pulling a trailer, the wider tires seemed appropriate.
#21 I really enjoyed this kit. It was quite a departure from my usual builds and a nice change. Other than the model having some twists and bends to the chassis, it was a fairly clean kit. I was disappointed that there was no white wall tire option. Painting was the toughest part of the whole thing, but the challenge made it enjoyable. The level 2 rating was probably accurate, but it might be a little tough for a first time builder. The directions are good but can be confusing if the builder hasn’t studied them a little.
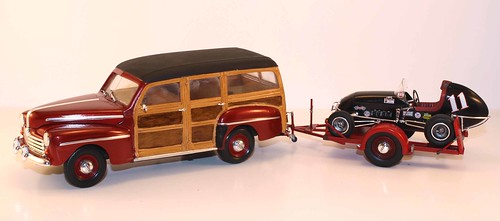
#22 The trailer and car displayed with the Woody are from the Revell Curtis Midget Racer. The trailer hitch assembly was from the Midget kit, it was not offered in the Woody kit but a hitch can easily be made from scratch.
#23
Have Fun!
Keep the glue off the windshield!
Tony Gibson
