Northrop Snark Missile SM-62 Revell #85-7810 Review

RoR Review 20110517 – Northrop Snark Missile SM-62 Revell #85-7810 Scale 1:81 Review
Buy This Kit
For the modeler – this is a review of one of Revell’s SSP series kits that returns to a kit to the market that had long since been out of production. I have to give kudos to Revell for doing that because there are a lot of great modeling subjects that deserve another run to make them available to today’s hobbyist. That said, this kit has some areas where the casual and contest builder will need to pay special attention to make it display ready. The order of construction and some molding errors are highlighted to make this an easier build. The decals are outstanding but they also present a challenge.
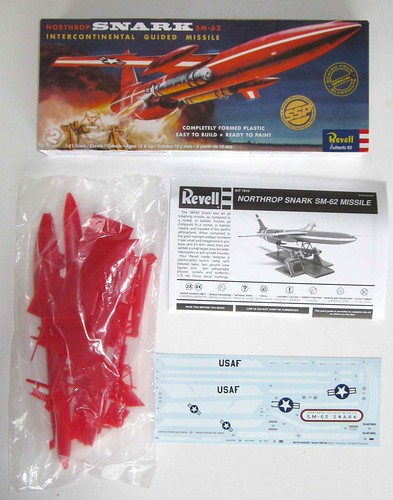
005 Overall this kit can be finished and detailed to great extent even though there are only 31 pieces but it takes some patience to install the decals so I would rate the kit a skill level 2+. This kit also includes two figures and good instructions.
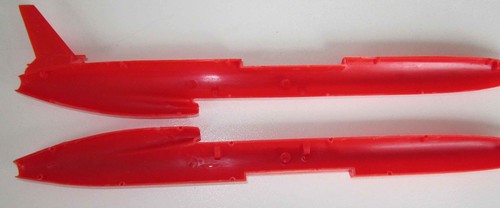
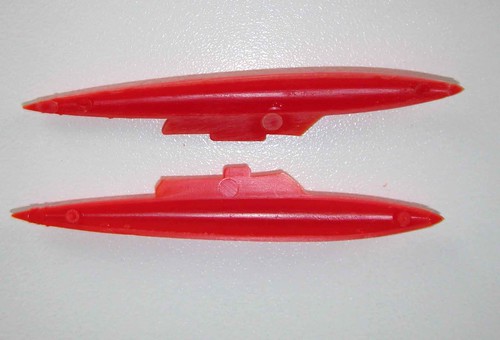
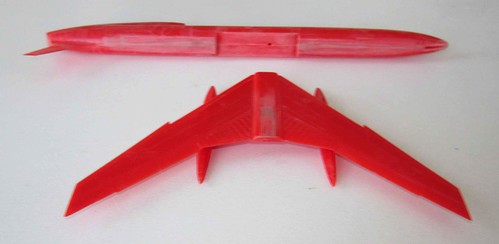
010 The first step is to locate the two fuselage halves.
015 You’ll notice that there are some molding issues that need to be addressed even before you can assemble these two parts. The most obvious is a large sprue mark in the middle of each half. Thankfully, these are mostly covered later by the long lateral stripe decal that goes on later. Just use a rounded blade or rotary tool to smooth out the center mark.
020 On the right half (part #1) there are some pin marks left from the molding process. You’ll need to cut or sand these off so the center seam will be less noticeable.
025 Use some slow setting glue sparingly to cement the two fuselage halves together. After a few minutes, shift the two halves into the best matching position and then band the assembly with some rubber bands and set it aside to cure.
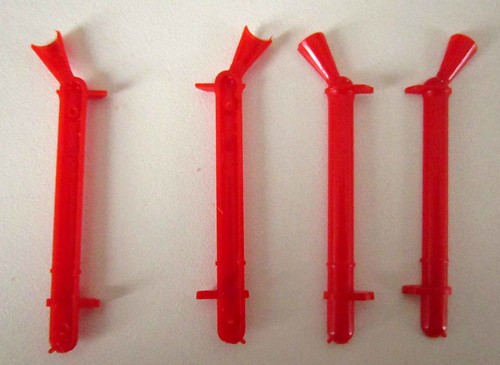
030 Locate the four halves of the JATO pods and sand off the pin marks like the fuselage halves and glue them together.
031 At this point I deviated from the instruction sequence to assemble the (2) fuel tanks (parts 7 & 8). You’ll need to prep them the same way as the JATO halves.
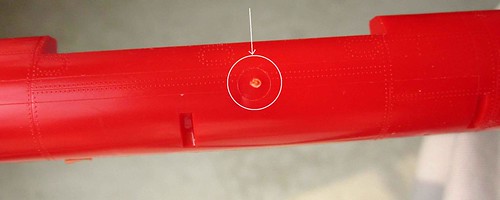
035 In the center of the wing there is a large circular feature that I thing is a fuel port. I used a rotary tool to smooth out the mark in the middle then used a little filler like Squadron Puttyâ„¢ make it look smooth. Glue the fuel pods to the wing assembly.
040 Here you be faced with a decision regarding the seam lines on the fuselage halves, fuel tanks and JATO units. To fill or not to fill – that is the question. Since the seems are so prominent they really should be filled in with some putty or glazing and sanded smooth. This separates the casual build from the contest entry because by filling and sanding the seams, much of the raised panel and rivet detail will be covered or removed in the process. There are ways to restore those features through the use or products like Mr. Surfacer™ and rivet tools but that was not done for this build for the sake of expediency.
045 Apply a couple nice even coats of sandable primer to the fuselage, wing assembly and JATO units. Give them a light sanding with 1000 grit sandpaper and wipe them clean with a soft cloth and set them up to paint with the color coat. Start light and then add a couple wet coats of color until it looks even. For this kit I used Krylon® Banner Red™ for the main body. Let these parts dry at least overnight but a few days is better to make sure the model doesn’t pick up prints.
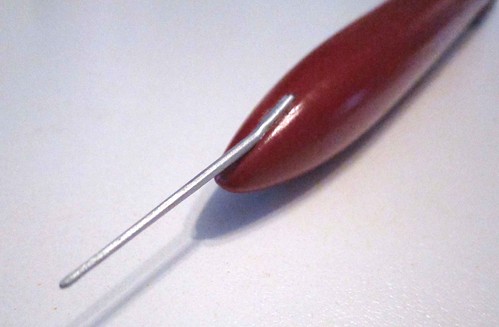
050 Paint the pitot aluminum and install it on the front of the fuselage.
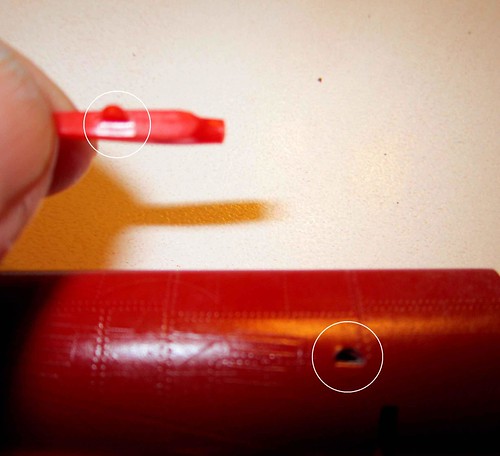
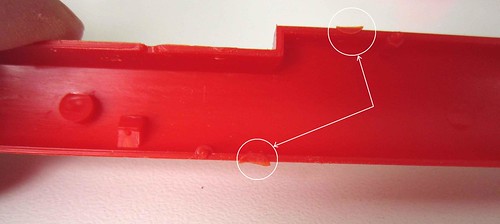
055 This where you’ll notice the biggest error in the kit that needs to be corrected. The tab on the air scoop (part 5) is upside down when matched to the female tab on the right fuselage half. There are two ways to fix this. Drill out the rest of the hole on the fuselage and remove the male tab from the air scoop and replace it with a piece of round stock -or- remove the male tab on the air scoop and eyeball the location with some slow setting glue to place it on the fuselage. For time’s sake the later was chosen and it worked out pretty well; but it turns out this location is critical because the side body decal (decal 20) with the air force insignia is notched to fit the trailing edge of the air scoop.Â
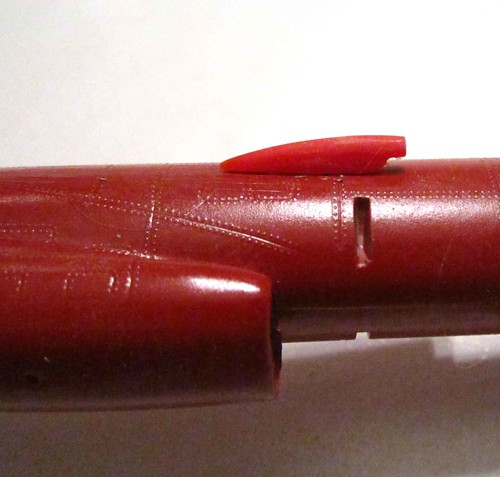
060 The air scoop should have been installed onto the fuselage prior to painting but here it is in proper relation to the right side of the missile. Because it is so small it is easily hand painted by decanting a little spray paint from the can.
061 Carefully handle the decals and wet down the areas where they are being placed to ensure that you can get them into position. Once in place use a soft tissue to soak up excess water and remove bubbles under the decals. Once they’ve set for about 10 minutes use some setting solution to get them to really settle into the contours of the body detail. I used Micro Set™ for this project and it worked very nicely.
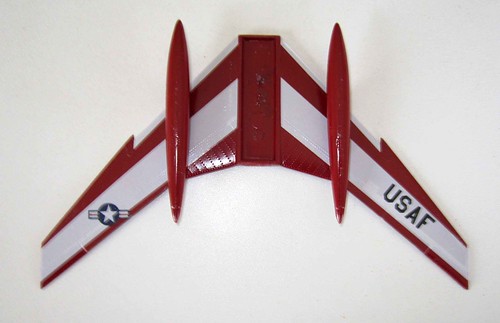
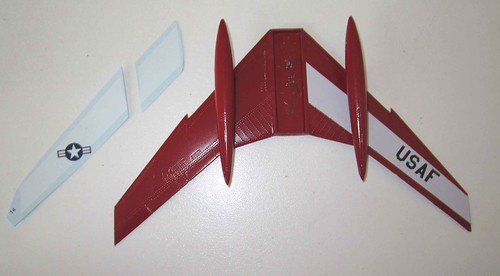
062 Here’s what the underside of the wing assembly looks like with most of the decals in place

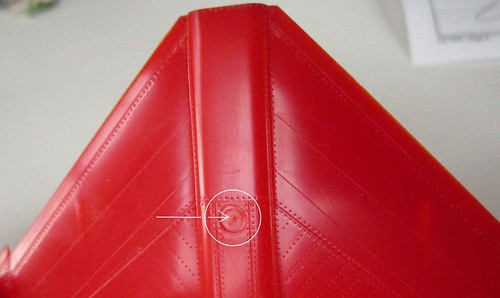
065 The base for the launch pad (part 18) is warped and has quite a few challenges to make it competitive. For purposes of a diorama it might be best to scratch build the metal rails. To use it you should fill some of the ink marks (white circles), remove the nib in the center ring (white arrow) and sand off the nameplate decal locator (black arrow). Alternatively, you could cut off the release latch (the feature between the white circles) and lay down a piece of thin sheet stock to cover most of the molding issues and replace the latch. After you decide what to do with this piece, spray it medium gray. I followed the suggested paint scheme for the entire model due to the lack of ready sources of information for coloration of the Snark.
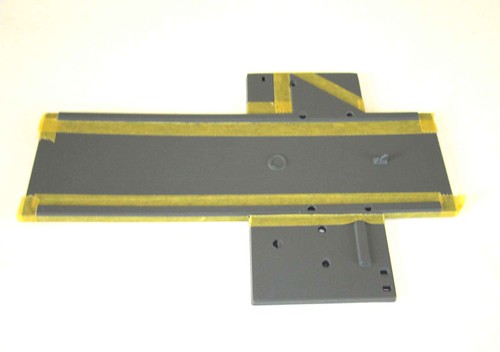
070 Tape off the metal portions of the launch base.
075 Assemble the two halves of the fueling tank (parts 16 & 17).
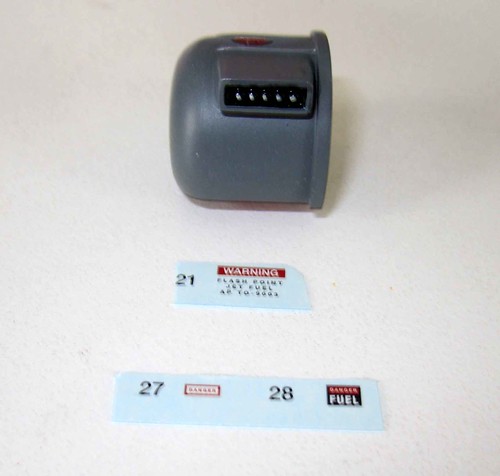
080 The fueling tank is shown here with a gray finish to match the launch base and some detail to front panel. Add the decals at this pint to avoid having to manipulate them after they’ve been obstructed with other parts.
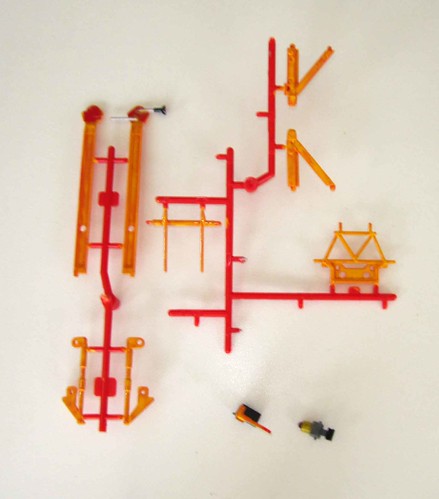
085 Paint the parts on the trees for the launch pad. In hindsight these should have been sprayed with primer first because they took a couple extra coats to get good color depth. Set them aside to dry.
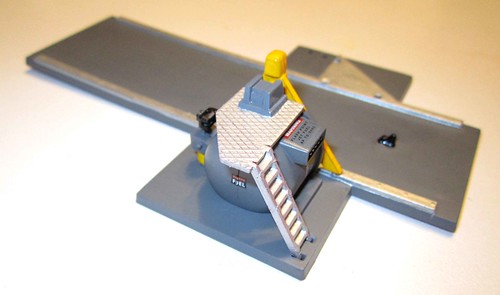
090 Assemble the parts of the launch pad shown and that completes step five.
091 Add some detail to the launcher bearing support panel (part 24 ) using a toothpick to highlight the dial gauges with some silver paint or use to gauge decals from other kits to make the panel appear more functional.

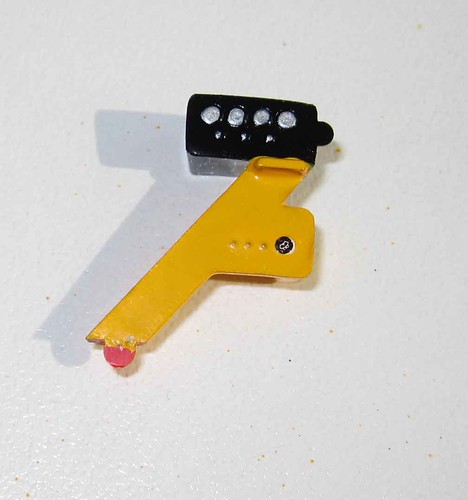
095 Assemble the launch frame according to the instructions.

100 Here’s the completed launch assembly.
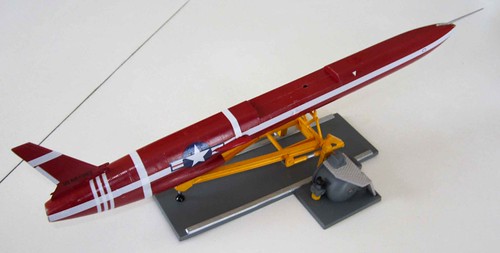
105 Apply the fuselage decals using the launch pad to let them set and dry on. Once they’ve dried glue the wing assembly to the top of the fuselage and follow that with a light coat of clear paint. I never determined whether it should be flat or gloss and since the Snark doesn’t appear to be trying hide Krylon® Crystal Clear™ was used to make it shine.
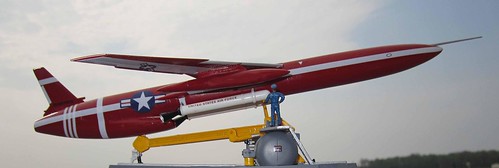
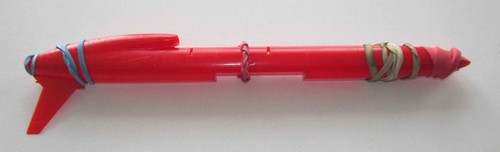
110 Here she is pointing east as she would have in the fifties.
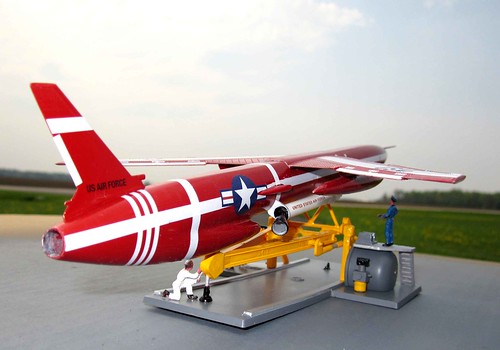
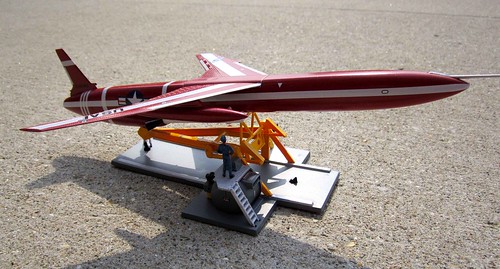
115 Undergoing flight prep and inspection – always ready to defend.
