1970 Ford Mustang Boss 302 Revell 1/24 #85-4943 Review

RoR Step-by-Step Review 20111005* – 1970 Ford Mustang Boss 302 Revell 1/24  #85-4943 Review
Click Here to Buy This Kit—>Â Revell 1:24 ’70 Ford Mustang Boss 302
Review and Photos by Todd McWilliams 
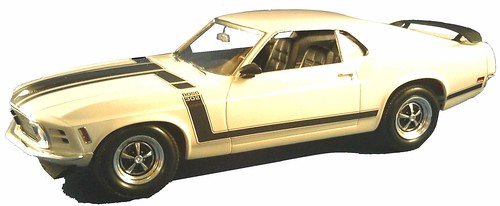
Timeline 1970: In an effort to compete with the other American auto makers on the track in the Trans Am racing series of the late 1960’s, Ford dropped their lighter weight 302 V8 into the redesigned 1970 Mustang. The result was a balanced supercar that could handle the corners as well as it could go in a straight line. This is the street legal version of the car that gave Ford the 1970 manufacturer’s title win by one point over its rivals. Quite an accomplishment and a beautiful car to boot!
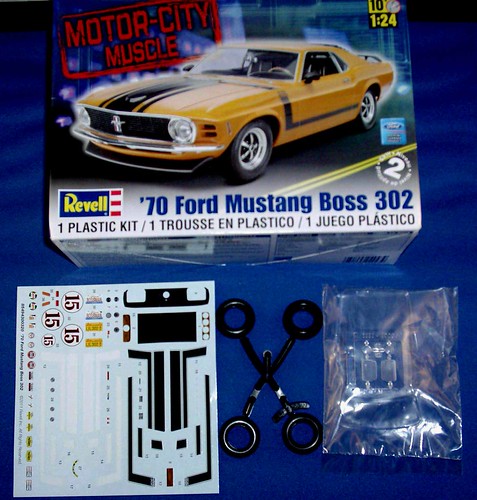
The 1:24 scale kit parts count is over 94 pieces and is molded in white plastic, clear glass/headlight lens, clear taillight panes, chrome and black tires. A well detailed decal sheet is included for engine, interior and exterior details.
The first time this kit was issued was as the ’70 Boss Mustang (429) in the early 1980’s. Remember the orange plastic? I was living in Chicago land at the time and had the pleasure to see first hand at a car show, the actual 1970 Mustang Boss 429 that the original issue was based on.
The detail is very crisp with this current Boss 302 white plastic version issue. Not bad for 26 year old molds and many variation reissues later. There was very little flashing as far as the parts went that needed to be cleaned up. The only thing I had to contend with is the ejector pins leaving quite a few protrusions sticking up which needed to be cut off or ground off using my Dremel Tool. In the past, some of builds I may add spark plug wires, plumbing and brake lines. I wanted this ’70 Mustang Boss 302 to be a box build with paint and Bare Metal Foil details only. I did use photos of a restored ’70 Mustang Boss 302 as reference for this build.
I have always tended to deviate from the provided instruction sheet on any model I build. This is just my technique I have as I build in sub-assemblies, body with similar parts, engine with similar parts, etc, etc. For me, this always keeps the overall picture and end result in mind. The provided instruction sheet is a good basis for the build for the average modeler, but for me, I do things differently.
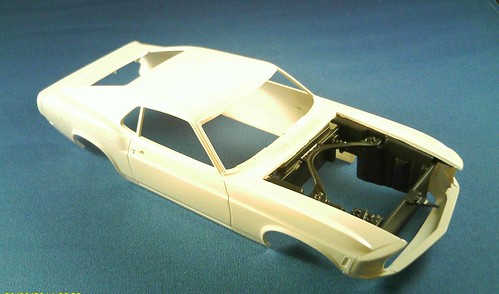
The first order of building business was to clean up the body, sanding where necessary and using Testor’s putty to fill any depressions, etc. I pretty much start with the body because while any putty or paint is drying I can work on other assemblies such as the interior, chassis and engine. I added all the small detail parts that will be sprayed black under the hood.
I mated the interior shell to the chassis after working on the body so to treat these as a sub-assembly. The interior placed inside the body (alignment pins assure the right position) and taped in place. I then placed the chassis in place and aligned it with the interior. Positioning marks, with a pencil, insured proper alignment when the interior and chassis was removed. Outside the body, the interior was again fitted to the chassis and glued together.
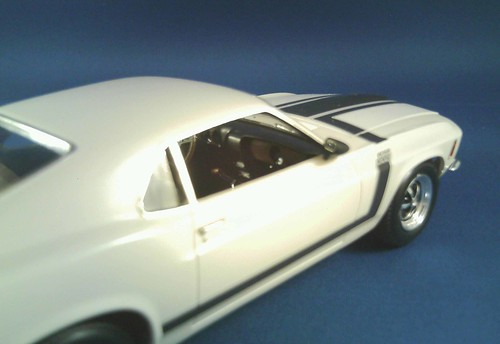
With the interior/chassis assembly glue curing, I moved back to the body. For the last 30 years, I’ve pretty much used automotive rattle can primers for prep work and touchup paints for the color. This has always worked for me. You, the reader, use whatever works for you. I have a nice size spray booth, so I applied the primer and then the color. For this model, I wanted to step aside from the usual colors that Mustangs are painted in. This model was sprayed with Dupli-Color Wimbledon White with black interior. Not a plain looking color at all.
While all this is being done, I started on the engine. I stopped at the local auto supply store and bought a large can of the Ford engine blue engine enamel paint. This actual engine paint will dry (withstands 400 degrees!) overnight. This can of paint will last me for quite a while! I painted the pulleys, starter, etc as needed in their colors. Prior to installing the engine to the chassis, I masked off and sprayed the interior with DupliColor black primer. When this dried, I sprayed the interior with an artist acrylic matte spray to give it a nice Naugahyde vinyl color, a little above flat, but not quite semi-gloss. Perfect for me!
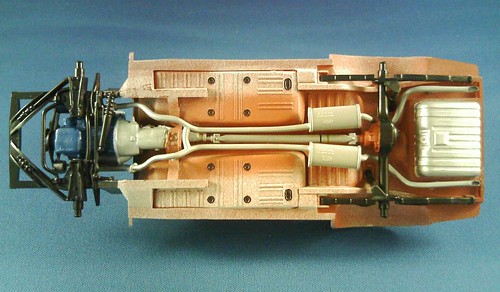
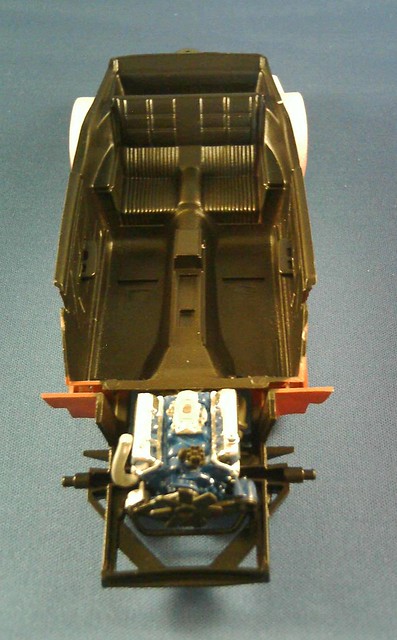
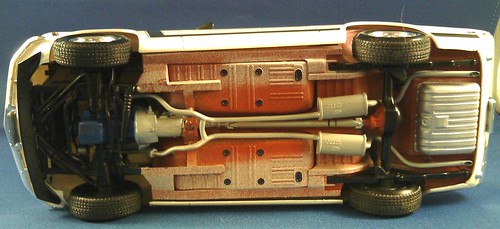
Once the interior shell was painted, I masked it off and sprayed the underside of the chassis in Iron Oxide red primer to represent the actual car. After the primer dried, I added Wimbledon white, ever so slightly to match the distinct overspray from the Ford factory as shown above. With this painting done, I then masked off the rear 3/4’s of the chassis and proceeded to spray the front end assembly. This was done with semi-gloss spray paint similar to the way the interior was done.
Prior to painting, as I’ve mentioned after masking over other colors, MAKE SURE to double check your masking to avoid any unneeded overspray to touch up later. I like to try and get it right the first time! Remember, all this painting detail is being done prior to attaching the exhaust system, driveshaft/rear end and rear shocks. These will be added once all the painting is done and dried as shown above. I did add black detail to the grommets (beautiful detail Revell!) on the bottom of the chassis. Note: In staying close to the details of the restored Boss 302 I used for reference, I added the two factory color stripes on the driveshaft and a number 94 painted on the rear cover of the rear end. It’s hard to see but a nice detail.
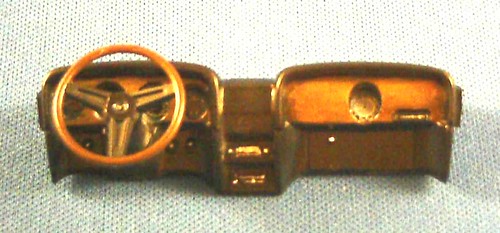
While all this paint and glue is drying, I tended to the dashboard. It was sprayed in the same manner as the interior black. The kit decals are provided for the gauges and the wood grain detail. They have great detail but need to be trimmed close and are tricky to apply. I opted to paint all the wood grain detail on the face of the dashboard and steering wheel. I did use the kit supplied speedometer/clock (etc) decals where needed. I cut these out with scissors but left the paper back on and glued them in place with white glue. Nice finishing touch!
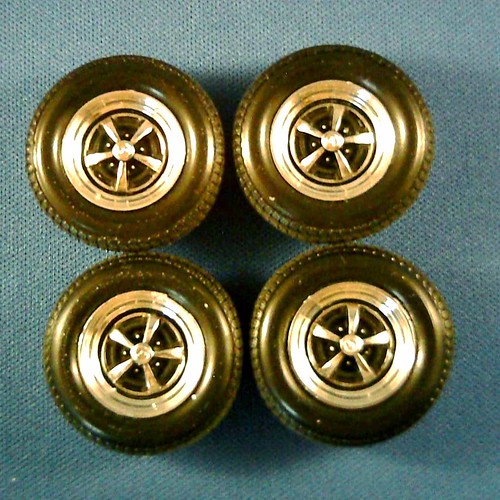
Next I sprayed the brake backing plates semi-gloss black and hand painted the flat black to the face of the kit supplied Magnum 500 wheels. It takes time, but well worth the effort! Once done the backing plates and the wheels were glued together as shown.
Final Assembly: The interior door handles were painted Pactra chrome silver and the dashboard with steering wheel installed. The glass was installed and the interior/chassis was installed and glued in place. The rear valance/taillight panel was dry fitted to check for fit. The bottom of the valance had three molded stud protrusions that had to be trimmed off (the protrusions didn’t apply to anything) but was interfering with the fit. Once all was OK the rear valance/taillight panel was glued in place.
The chrome trim was done with Bare Metal Foil along with the exterior door handles. Decals are supplied for the turn signal lights, but I opted to apply BMF and use Tamiya clear red and amber where needed, much more realistic.
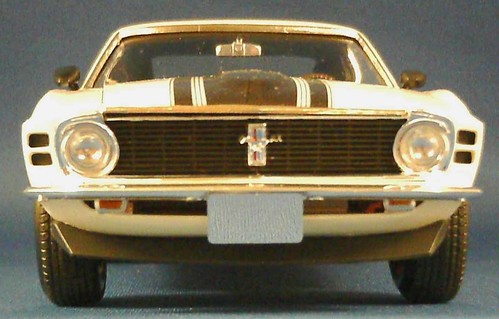
The grille (blacked out as per the factory) using Tamiya flat black was hand painted and bumpers were installed. I’ll note here that the Mustang emblem in the center of the grille on the 1:1 car has a red, white and blue vertical indent lines in the background of the emblem. On the kit supplied grille, there are only two, as Revell (or Monogram back then) only put two vertical indent bars, so I opted to use only the Tamiya clear red and blue for sake of space to highlight these vertical bars.
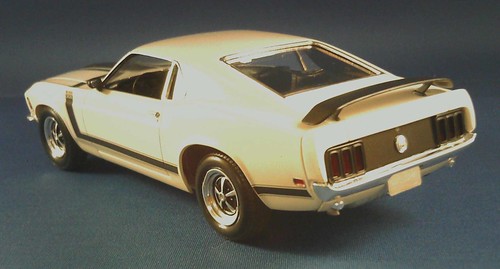
To prevent the rear spoiler from becoming dislodged in the future, after the paint dried, I drilled two .018 diameter holes in the upright supports and glued a short length of wire for support. I matched where the spoiler would mount on the rear trunk lid and drilled two holes. Glue was applied and spoiler mounted! Similar was done with the side mirrors using one hole each and mounted the same way. No pesky mirrors falling off in the future!
Final impressions: Revell did hit the proverbial ‘nail on the head’ with this kit! This kit builds up into one “Boss Mustang”! Lots of detail, excellent decals and the proportions look right on! Would I build this kit again? Yes I would. As a matter of fact I do have the ’70 Mustang Mach I Special Edition version of this kit which builds either the Mach I or the Boss 302. Can anyone say “Twister”?
Remember: This is a hobby, keep it fun and enjoyable!
Todd McWilliams
Â
 *All Registered trademarks are the property of their respective brands.
Â
Â
