The Gold Knight of Nice 1/8 Revell Review 85-6525

RoR Step-by-Step Review 20111014* – The Gold Knight of Nice 1/8 Revell Review 85-6525
Click Here to Buy This Kit–>Â Â 1/8 Gold Knight w/Horse
Â
Review and photos by Pat Ackerson 
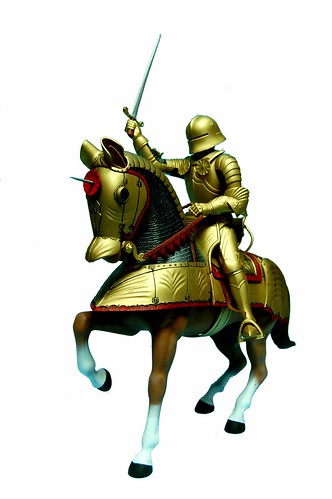
During the middle Ages, Nice participated in the wars and history of Italy but over time it became part of France. This kit represents the typical type of armor worn from the mid 1400’s to the early 1500’s. This type of armor was called Gothic armor and was used both for battle and jousting. Sir Galahad in his search for the Holy Grail was often pictured in armor very much like the armor represented in this kit.

FIG 1Â Â The Revell /Monogram release of The Golden Knight of Nice is a reissued model originally produced in 1957.
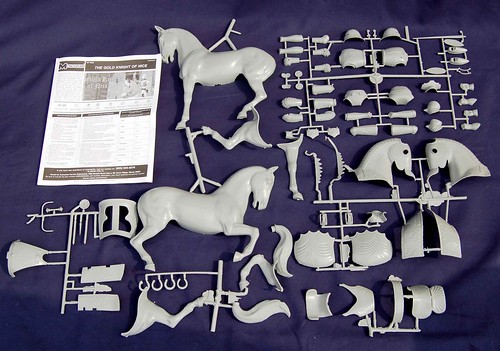
FIG 2  The model consists of 84 light grey plastic parts. No decals are included as they are not used in its assembly. Easy to follow instructions are provided that lead the builder through an 8 step assembly process. The model is recommended for builders with a skill level 2 building ability aged 10 years or older. The model is rendered in 1/8th scale and when complete it measures roughly 11 5/8†in length.Â
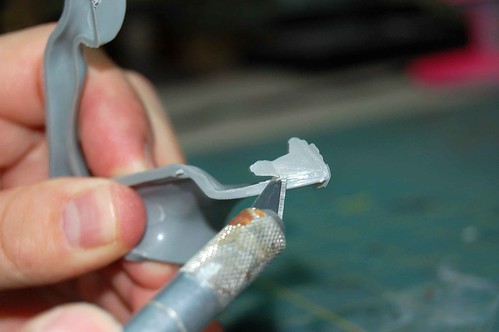
FIG 3Â Â After washing the unassembled kit in warm soapy water, parts were identified and then cut from the sprue. Mold flash was then removed using a sharp hobby knife.
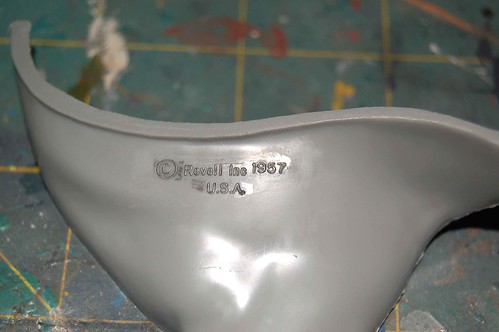
FIG 4Â Â Prior to assembly of the horse body the copy right mark on the right inner back leg had to be removed. This area was sanded smooth with a medium grit sand paper and then coated with Mr. Surfacer 1000 for a nice smooth finish. The body of the horse was then assembled in accordance with the kit instruction.
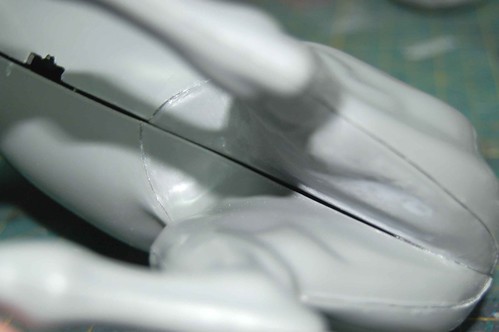
 FIG 5  These photos show the large gaps between the body parts that needed to be addressed prior to painting.
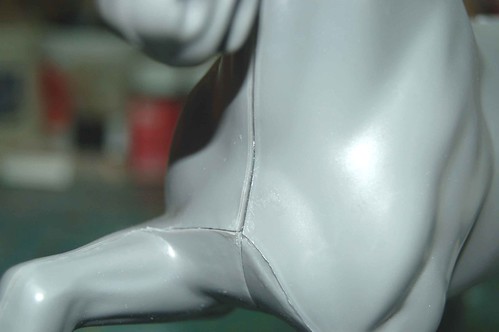
FIG 6Â Â The fit of the body parts is poor, so the builder is going to spend a lot of time refinishing it in order to make the kit show ready.
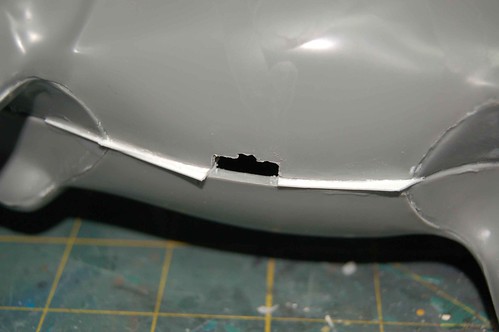
FIG 7  I’ve wedged some sheet styrene into one of the gaps on the belly of the horse. For big jobs this method of plugging gaps with save the builder time and model putty.
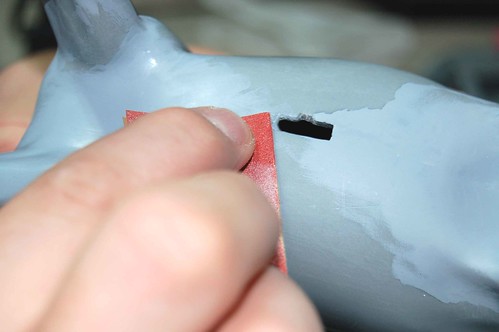
FIG 8  After super gluing the styrene in place it was then trimmed flush to the surface. Next the entire area was coated with Mr. Surfacer 1000 and sanded smooth.
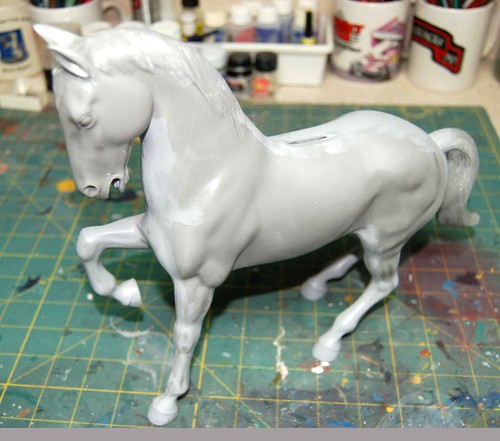
FIG 9  Here’s the completed body of the horse prior to painting.
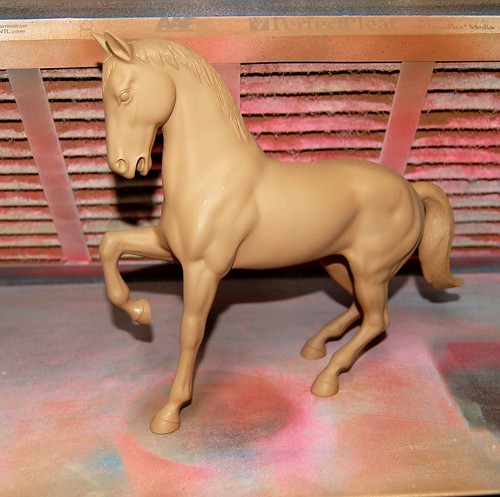
FIG 10  Next the horse body was given a couple coats of Krylon boot brown spray paint. This was allowed to dry for a couple days before moving on.
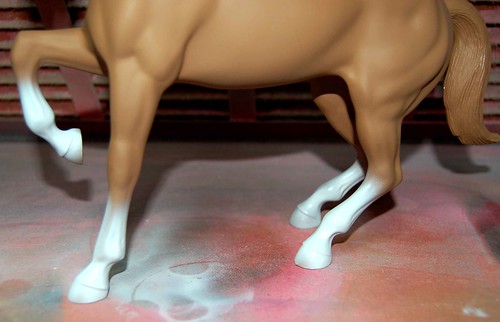
FIG 11  I then decided to give the horse a little personality. Here I’ve airbrushed Model Master flat white to the lower portion of the legs before painting the hooves and tail.
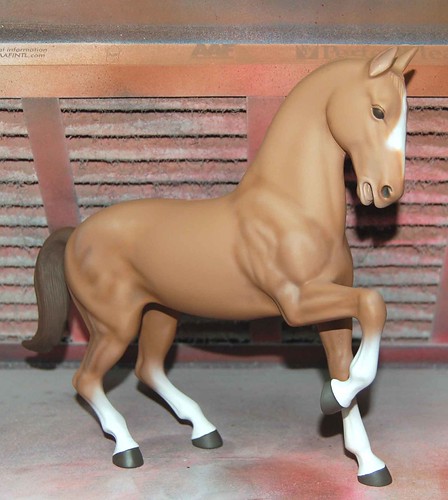
FIG 12  Take a look at the complete paint job of the horse prior to adding the saddle and armor. All the shading and highlighting was done with an airbrush using darker and lighter shades of brown. Finally, the entire body was coated with Testors dull coat. Of note, the builder will not have to paint the horses main because this will be hidden by the armor.
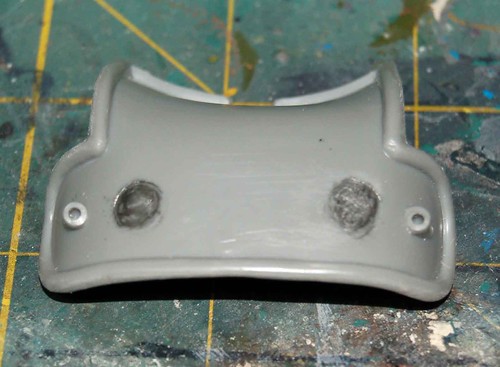
FIG 13 Once I had the horse body painted I turned my attention to the saddle and armor. Here I ran into a couple pin marks on the saddle back rest. These two pot holes were filled with Zap-A-Gap super glue before being sanded smooth.
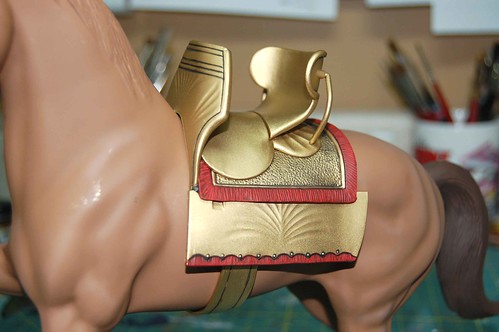
FIG 14Â Â Once I had the saddle parts painted and assembled I attached them to the horse.
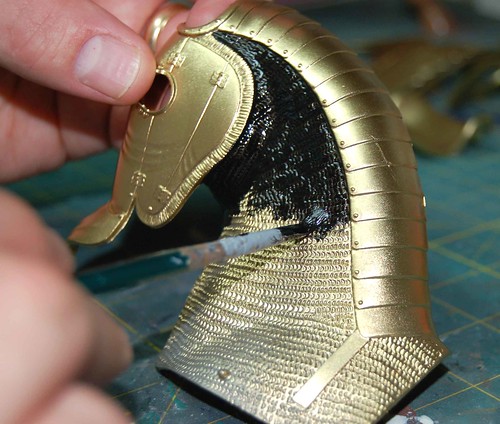
FIG 15Â Â I painted the armor using Rust-Oleum gold spray paint. Once dry I painted the chainmail areas flat black. This was followed up by dry brushing with Model Master Steel silver.
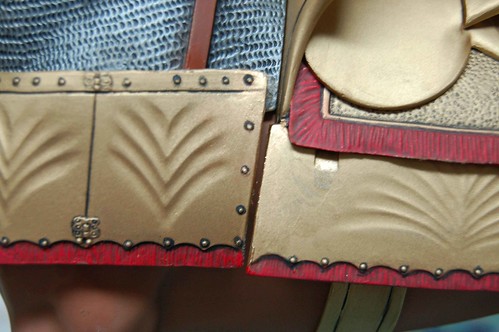
FIG 16  Once I had the armor plates painted I attached them to the horse. The left front body armor didn’t fit well (part 5L). This resulted in it not sitting flush against the left side armor plate (part 10L). The end result was a large gap between the two parts.Â

FIG 17 The hind quarter armor went on without any problems.
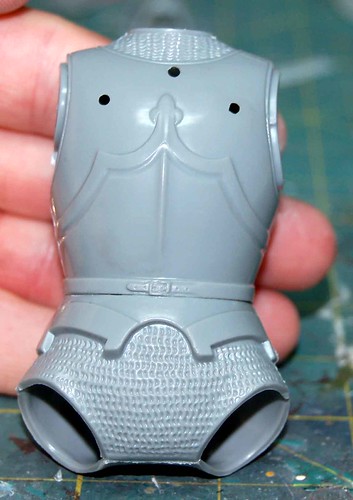
FIG 18 The next step in the assembly process was to begin putting together the knight. Here I’ve assembled the breast plate and back plate.
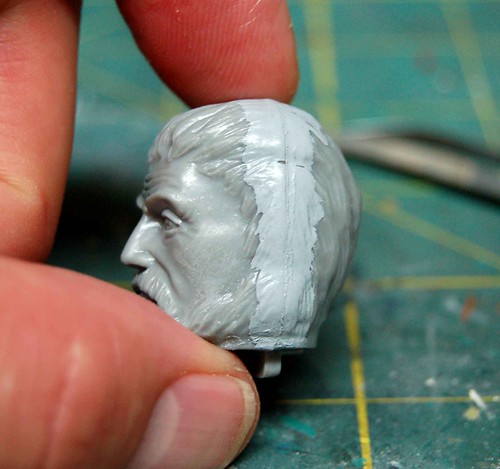
FIG 19 I then assembled the two halves of the head and mounted it to a small block of wood for painting. Mounting the head to a small block of wood for painting will make it much easier to paint and keep you from getting finger prints all over it.
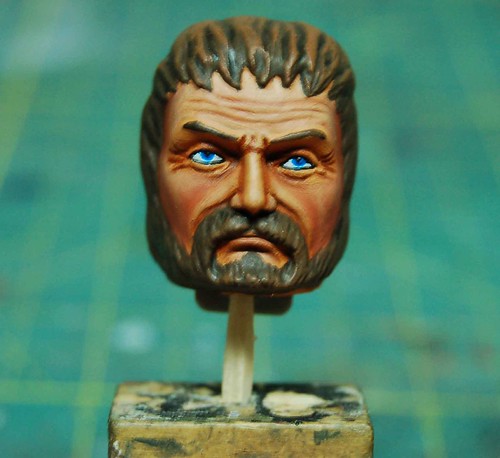
FIG 20  To paint the face I used slow drying artist oils. This type of paint is perfect for painting skin tones as they take several days to dry which leaves plenty of time to manipulate and blend the colors. Artist oils are much more forgiving than enamel or acrylic paints if you happen to make a mistake. Because of the slow drying time, you have plenty of time to wipe the paint off and start over if you don’t like the way it’s turning out.
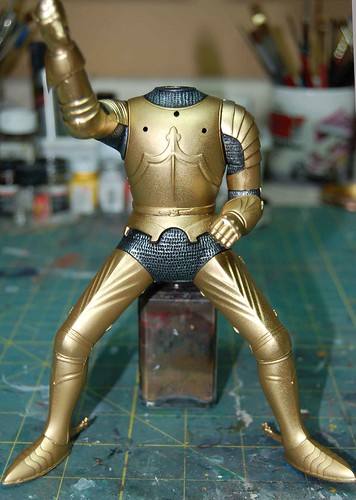
FIG 21 After the head I finished up the rest of the body. Here I’ve assembled the arms and legs and attached them to the torso. Once again, I painted the armor using Rust-Oleum gold spray paint. Once dry I painted the chainmail areas flat black. This was followed up by dry brushing with Model Master Steel silver. I then went ahead and attached the smaller armor accessories, sword and head.
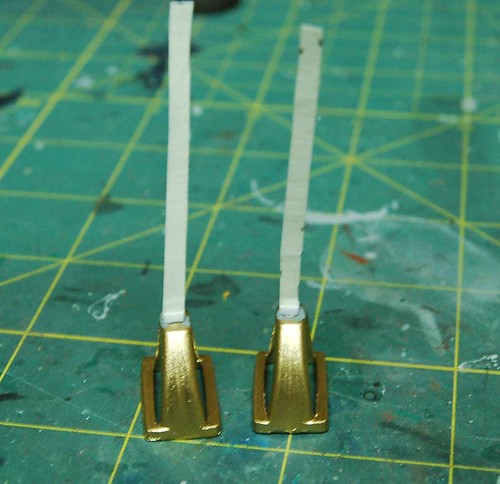
FIG 22  Once I was finished with the knight I placed him on the horse. At this point I attempted to install the stirrups but the plastic straps were about ¼†too short.
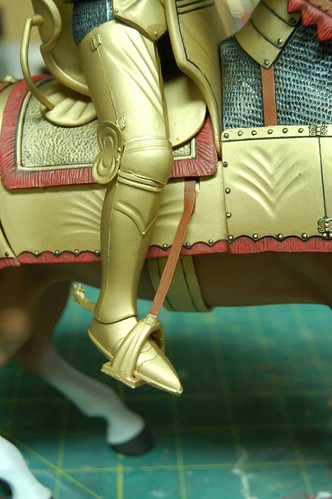
FIG 23Â I then decided to make my own straps using masking tape and some scrap styrene.
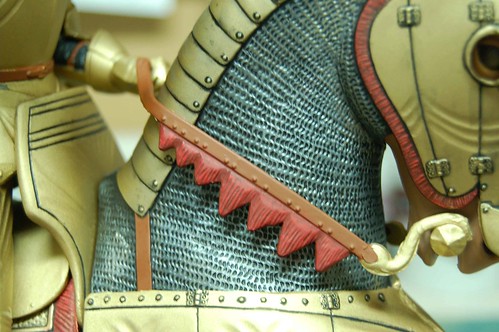
FIG 24Â Finally the last step was to paint and attach the helmet, bit and reins.
In conclusion, the Golden Knight of Nice by Revell /Monogram was a fun kit to build. However, the builder should be prepared to spend a considerable amount of time finishing the horse as the large gaps and seams will need to be properly addressed in order to make this a nice looking model when complete. Builders should also be prepared to discard the kit stirrup straps and construct their own. Overall, this kit would be perfect for any model builder looking to enhance their model building and figure painting skills.
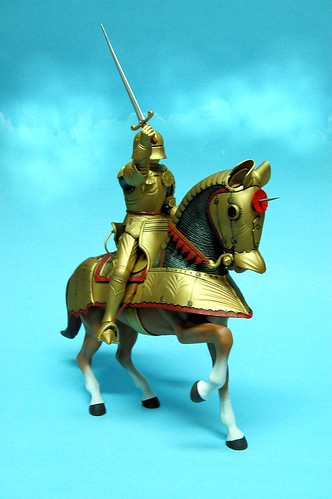
FIG 999
Happy Modeling,
Pat
Â
*All Registered trademarks are the property of their respective brands.
Â
Â
