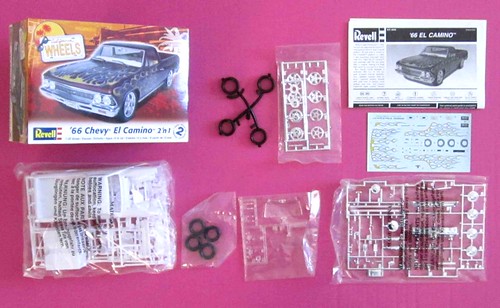
1966 Chevy El Camino 1/25 Revell 85-2045 Review

RoR Step-by-Step Review 20111223* – 1966 Chevy El Camino 2n1 1/25 Revell 85-2045 Review
Click Here to Buy This Kit
Review and Photos by Stephanie and Marty Oberman 
Â
I have built not only the original issue El Camino but her sister kit, the ’66 Chevelle wagon as well, both share the same tooling. I remember my experiences building both these kits fondly, so I jumped at the chance to build the California Wheels version of the Elky for review. This time it was decided that the car would be built similar to the custom version on the box art, which is a bit out of my comfort zone as a factory stock builder, but knowing the kit I was willing to do so.
Â
Â
(Fig. #0a) – I began by assembling and painting the two-piece engine block/tranny, separate oil pan, water pump, and fuel pump in DupliColor Chevrolet Engine Orange as one unit. I detail-painted the fuel pump bowl silver after the assembly dried. The intake manifold was painted aluminum, exhaust manifolds Testor’s magnesium buffing metalizer, alternator stainless steel buffing metalizer, carburetor gold, distributor, coil, starter, fan, and fan belt assembly gloss black. The alternator pulley was detail-painted the same color as the alternator itself, and the fan belt was detail-painted flat black. The separate oil filter was painted my signature silver base with Tamiya clear orange over it.
Â
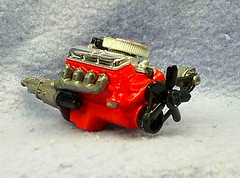
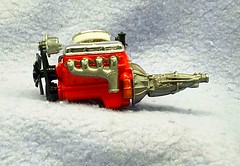
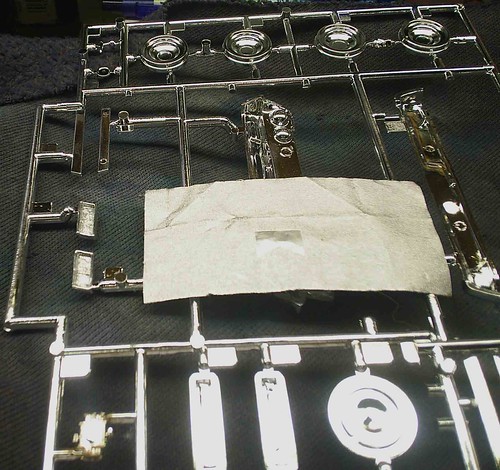
(Fig. 3 & 4) – Although there are actually two air cleaners in this kit; one stock two-piece double-snorkel stock unit, and one custom round unit with exposed air filter, the custom piece is the only one shown in the instruction sheet, although the stock unit is listed in the parts glossary. Because the Elky and the wagon share many parts, there are parts for each in the other’s boxes. Since I was building this kit as a custom, I detail-painted the air-filter flat white and used the custom air cleaner for my engine. I left the valve covers chrome. The potent 396c.i. Chevy power plant is extremely well-detailed and looks beautiful when completed. It practically fell together with no fit issues whatsoever.
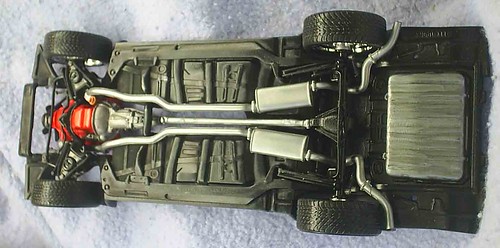
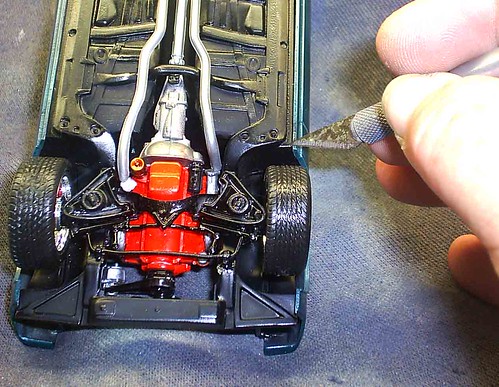
(Fig. #5) – Next up was the chassis and its components. There are two upper A-arms, one-piece front suspension, three-piece rear axle assembly, sway bar, two rear coil springs, two front coil springs, two rear shocks, and two-piece exhaust system. Everything but the exhaust system, which was painted Testor’s stainless steel buffing metalizer, was painted gloss black to offset the semi-gloss black chassis pan. The coil springs were rubbed with a silver Sharpie to give realism and depth, as is my norm. Like the engine assembly, installation of these components was a seamless operation. The driveshaft was installed during this assembly sequence as well
Curiously though (and I have seen this with a lot of later Revell releases) the instruction sheet calls for the builder to assemble the interior into the body, then place the body onto the chassis before installing the chassis components. This is where the moderate to advanced builder should read the instructions carefully before beginning these types of kits and decide whether to follow the instructions step-by-step or deviate from them to accommodate ones particular building style or comfort zone. Speaking for myself, I would feel quite uncomfortable placing a finished, polished body upside-down while installing chassis components, simply because as fumble-fingered as I am, I’d most certainly manage to get glue-spot fingerprints on the body while attempting to install chassis parts…maneuvering the body to get a good angle on say, the shocks. Personally I start a kit by building the engine, then chassis, then interior, and finally the body. But that’s just me…to each his/her own. ;c)
Â
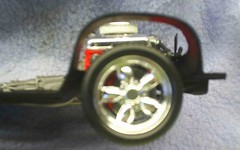
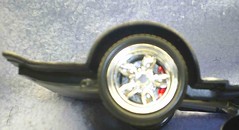
(Fig. #6, 7) – Since I built this kit in the custom style, I used the custom tires and rims, which also include separate chrome disc rotors with brake calipers molded in, and decals to simulate drilled/vented rotors. I detail-painted the calipers with Tamiya clear red to give a “Brembo” look to them and applied the rotor decals. It is advised that the builder pay particular attention to the part numbers of not only the custom tires, but the two-piece custom rims as well, since front and rear tire/wheel assemblies are different sizes, and tire treads are directional.
Â
Â
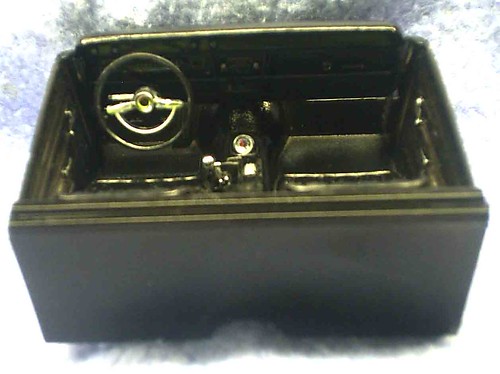
(Fig. #9) – I then moved on to the interior. I wanted to focus the attention on the body, so I painted the interior and its components semi-gloss black so as not to distract from the body and the flame decals that decorate it. The interior is platform-style with separate door panels, two-piece bucket seats, two-piece dashboard with brake, parking brake, and clutch pedals molded in, steering column with turn signal stalk, steering wheel with separate chrome horn ring, center console, and chrome shifter. The shifter in my sample kit was snapped at the point where it attached to the tree. I jumped online and ordered one from Revell’s parts replacement section of their website (www.revell.com/parts). In less than a week I received a complimentary shifter from them. Having said that, I need to pass on kudos to Revell…if I were to purchase a kit from a model kit manufacturer, I would rather buy one from a company who stands behind their products by offering free replacements of damaged/missing parts, decal sheets, and/or instruction sheets. To me, it’s a HUGE feather in their cap, and gives the potential buyer confidence in his/her decision to buy a Revell kit.
Â
(Fig. 10) – After detailing the door/window cranks and applying the decals to the dashboard and center console, I began to assemble everything. All components installed without a hitch, except for the dashboard to the interior door panels. For whatever reason, the tabs on the dashboard would not seat into the accompanying slots in the door panels. The bottom side of the dashboard made the panels bow out, preventing the tabs located on the upper part of the dashboard from seating or even coming close to contact. Even after shaving down the tabs some I was unable to get them to seat properly. I ended up slicing off the tabs, and “guesstimating” the proper position of the dash into the interior. I was unable to test this setup since I had already painted the body, which was still drying at the time. Regardless, I’m fairly confident the position of the dash is correct, having built this kit and her sister the wagon before.
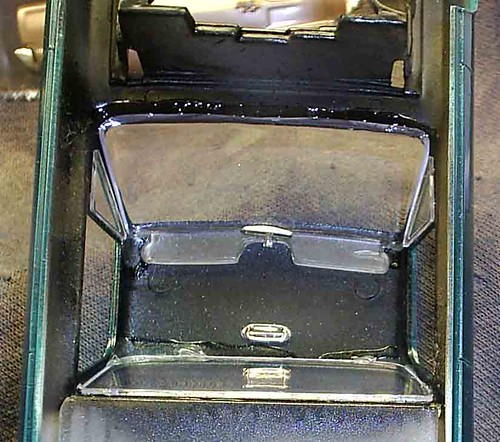
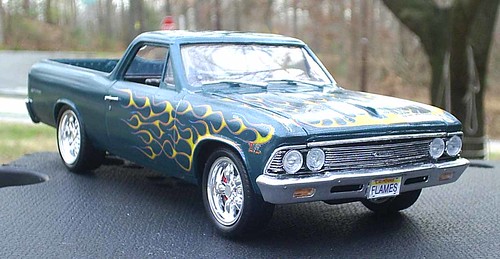
(Fig. 12) – I painted the car Testor’s “Colors By Boyd” CheZoom Teal Pearl enamel, for an “oomph” effect. Once the body was dry, I installed the windshield, rear window, and vent windows. They all installed flawlessly with tight tolerances, which is a plus when gluing them in while in place like I prefer to do. I then glued the dome light and rear view mirror in place. I had previously sprayed the interior headliner semi-gloss black to match the interior color. I then installed the interior into the body, hoping my alignment of the dashboard would not adversely interfere with the placement of the interior. It didn’t. The interior snuggled right into place, and I was able to breathe a sigh of relief. It looks right, level, and square within the body.
(Fig. #13) – Next up was installing the chassis onto the body. Again, as I previously mentioned, I deviated from the instruction sheet in saving the chassis for last. Although it’s a tight fit, a bit of opening the body shell with an Exacto knife (gently, of course) allowed the chassis to slip into the body with a minimum of glue. The body seems to grab hold of the chassis and keep it in place, literally by itself!

(Fig. #14) – The radiator wall was then installed, which consists of the radiator itself, a separate shroud, and washer bottle. I’m thankful the washer bottle was molded in clear plastic with a hollow interior…I swathed the interior of it with Tamiya clear blue paint to simulate a full washer bottle, then paint-detailed the cap and hose flat black. The battery was molded into the engine bay…silver accents for the battery terminals and Tamiya clear green paint over a silver base for the caps rounded it out. The upper radiator hose installed without issue. The heater hoses and brake master cylinder installed nicely into the firewall
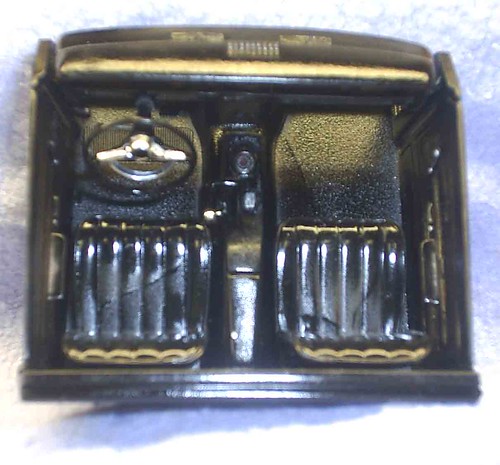
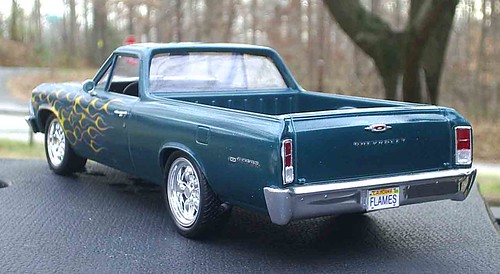
(Fig. #1) – The final assembly of this kit consisted of installing the front bumper/grille unit, rear bumper, taillights, windshield wipers, door handles, and side view mirror. Clear headlight and parking light lenses fit snugly into their corresponding bezels, as do the red taillight lenses and clear backup lenses. I took the opportunity to glue in textured foil from a cigarette pack (one of my favorite “tricks”) onto the chrome bezel before installing the taillights/backup lights. The foil provides depth and realism to the lights. The rear bumper and taillight bezels installed smoothly, as did the windshield wipers, door handles, and side view mirror. The only issue I encountered while installing the front bumper/grille piece is that it protruded about 1/16th of an inch past the side of the front fenders…on each side. I’m wondering if that particular piece originated from the wagon version of this kit series, since I know for a fact that the wagon’s hood is wider than the El Camino’s…and that leads to figure that the front bumper/grille piece is wider as well. Regardless, it’s not very noticeable from a distance. ;c) The kit also provides chrome rocker panel trim pieces, but since I did not wish to distract from the main focus of the custom wheels I left them off. I think it looks better that way.
  Â
(Fig. #16) – Since I built this kit as a custom, the flame decals provided were obviously mandatory. There are five separate decals for the flames…one for the hood, two for each front fender top which are meant to blend into the hood decal, and two for each side of the front fenders. I started with the hood decal, which applied seamlessly. After allowing the decal to dry, I placed the hood on the body and applied the top fender decals to match up with the hood’s decal. They matched up perfectly. The trick is to cut the decals from the sheet as close to the edges where fender/hood separation occurs so that no overlapping decal film interferes with placement and/or separation from each other, remembering that all decals have an overlapping film on them which could possibly interfere with proper placement. After all the flame decals were dry, I applied the script decals to the rest of the body, and they went on perfectly. The finished product looks great!
 Â
Â
999) – Final impressions: As loathe as I was to build this kit as a custom from the start, I’m glad I did. It gave me a chance to go outside my “comfort zone” of building stock vehicles and allowed me to let my imagination take over. A better kit could not have been selected for this venture. Despite the minor dashboard and grille/bumper issues, this kit was a joy to build and I gladly give it 4 1/2 stars out of a possible five stars. Would I build this kit again? Yes, I would, and I already have a color scheme for the stock version I’d like to build…Cameo Beige exterior with Honduras Maroon interior, stock hubcaps, and whitewalls. I can already picture it in my mind.
 Â
Donations Humbly Accepted
*All Registered trademarks are the property of their respective brands.
Â
