1958 Chevy Impala 2n1 Kit Revell #85-2073 Review

RoR Step-by-Step Review 20120117* – 1958 Chevy Impala 2n1 kit #85-2073 Revell Review
Click Here to Buy This Kit
 Â
Review and Photos by Todd McWilliams 
Â
Timeline 1958: Dwight D. Eisenhower is President. The United States launches its first earth satellite, Explorer I. Hula hoops are the latest fad.The Baltimore Colts outlast the New York Giants in overtime in the NFL Championship game and the Yankees defeat the Milwaukee Braves in the World Series. The number one hit song of 1958 is “At The Hop” by Danny & The Juniors.
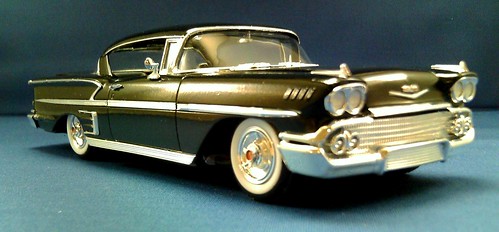
Days gone by and loads of memories for some of us “old-Timers”. Yes, I remember these as I was an ornery 9 year old at the time and the 1958 Chevrolet Impala was my most favorite car of all time! It was also the very first year for the Impala badge that is even in use today by Chevrolet. I had the pleasure of owning a 1:1 1958 Chevrolet Impala Sports Coupe in 1983-85. A dream come true! The Revell ’58 Impala pictured here in this review is a 99% correct replica of the actual vehicle I owned, only difference is that my Impala had a single 4-barrel carb whereas the kit has a tri-power setup. I chose to build this kit as a stock offering to represent my car.
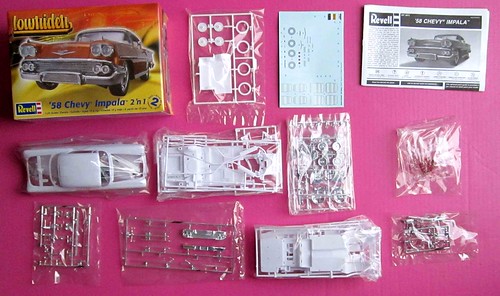
For The Modeler: – This Revell 1958 Chevy Impala 2 in 1 kit #85-2073 is a skill level 2 with over 143 parts count in white, clear and red colored plastic. This particular kit has more than enough parts to build an accurate stock vehicle or a beautiful crusin’ low-rider custom version. This plastic model kit was originally a diecast offering by Revell. In doing this crossover from diecast to plastic, Revell changed a few parts to accommodate the plastic kit. For accuracy – trunk modifications are detailed as well.
 Â
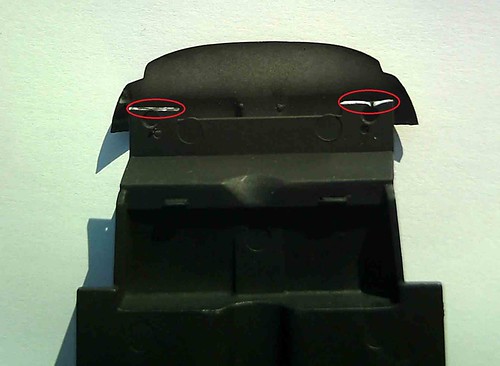
(Photo 000a) – The kit instructions are well defined and easy to follow. All parts fit well with the exception of some changes I made for a better fit. This is something I did and does not necessarily take away from the kit itself. When the kit is assembled normally, the spare tire well extends way too low below the rear fender on the passenger side. Having loved ’58 Chevrolets for over 53 years, I take notice of things like this.
Â
 Â
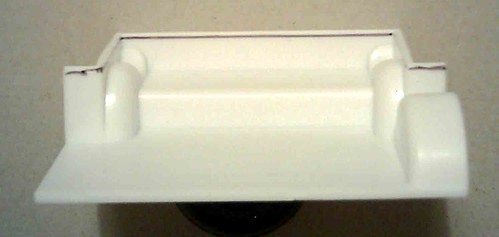
(Photo 001) – This is what I did to correct this. In this photo, I took my dial calipers and scribed 1/32 around the top edge of the trunk floor (part #130). I then took my X-acto knife and simply cut this top area off, allowing the trunk floor to sit a little higher against the body.Â
Â
 Â
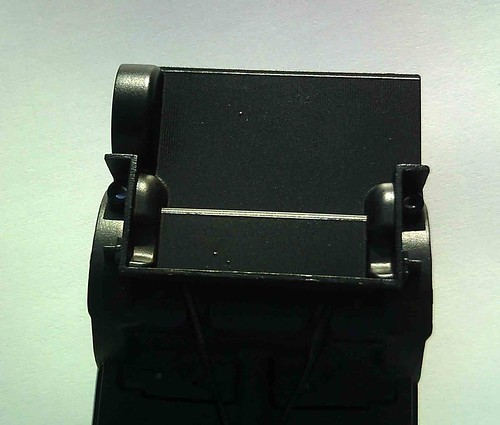
(Photo 005a) – At the same time, I cut off the small locating pins off the bottom of the trunk floor so the trunk floor will sit flat on the rear chassis floor.
Â
 Â
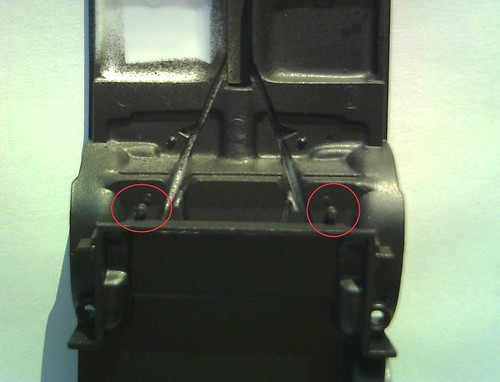
(photo 003A) – I also cut the rear part of the interior floor (part #21) behind the two locating holes right behind the rear seat with just my sprue cutters. You want to retain these two locating holes to for proper alignment of the interior floor to the chassis during assembly. I then glued the altered trunk floor directly to the chassis. For me as I am spraying the model a black color, I just glued the trunk floor (part #130), interior floor (part #21) and the chassis (part #6) together to be black primer painted.
Â
 Â
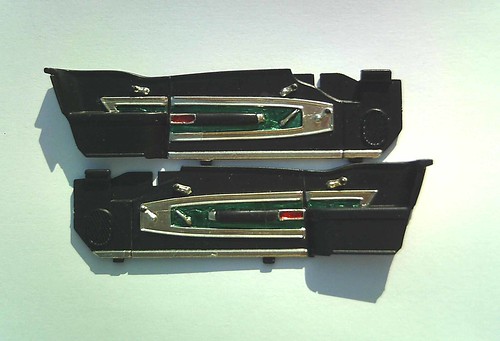
(photo 004) -Once the assemblies were black primed and dried and seeing as the chassis is actually a semi-gloss finish and the interior Naugahyde is a close finish match, I sprayed an artist’s acrylic matte spray over everything. Voila’ as close as close can be! At least I’m happy with the results.
Â
 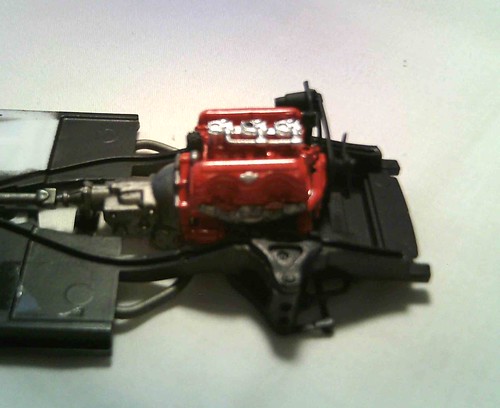
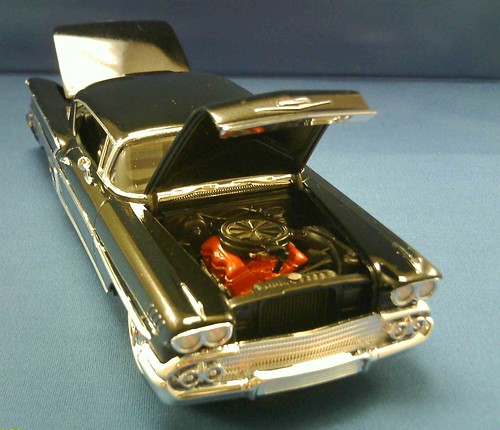
(photo 013) The detailed engine was assembled and painted with Testor’s Chevrolet engine orange (slight red actually). The belts, carbs and other parts were painted as needed to match. Once dried, the engine was glued in place along with the exhaust system.
Â
(photo 002) Seeing as there are separate interior side panels, I was able to detail these with Bare Metal Foil, Pactra Chrome paint and a mixture of Tamiya clear blue and green to replicate the anodized panels. The seats were painted in such color and manner as mentioned.
Â
 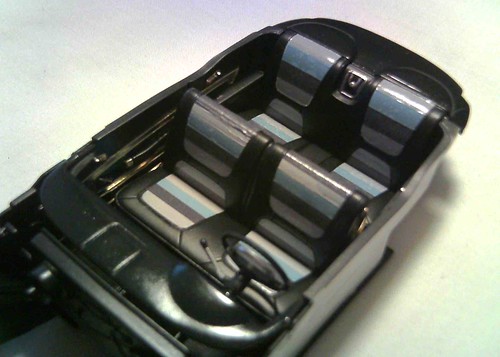
(Photo 010) I sent of for a set of correct color pattern seat insert decals from Keith Marks. Keith’s seat insert decals were right on the mark!! No pun intended! The interior was finished and detailed as shown. Revell included all the gauge decals too. This was a great addition too! All of the interior side panels, seats and dash were assembled to install.
Â
Â
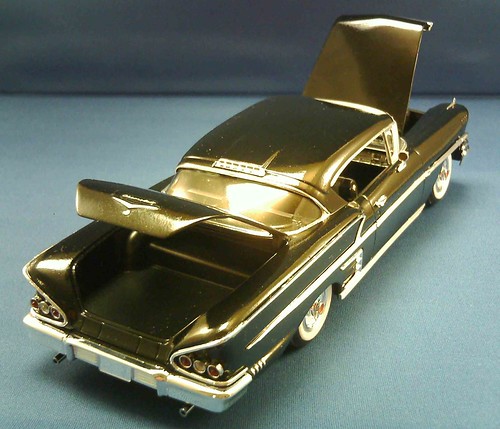
(photo 016) The body, hood and trunk were prep sanded, cleaned and sprayed with Krylon black automotive primed. More sanding and sprayed with Krylon black automotive paint. I color sanded the paint with 4000 grit wet/dry sanding cloths. This was followed with another cleaning bath, dried and clear coated with Krylon automotive clear.
 Â
Â
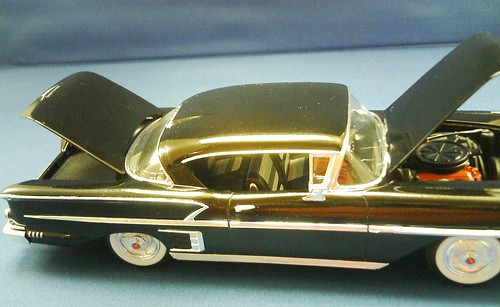
(photo 021) All of the kit supplied exterior chrome pieces were attached and the front and rear windows were given the Bare Metal Foil treatment. The glass was installed using Testor’s clear window glue.
Once everything was dried, everything was ready to assemble. Prior to installing the chassis/interior, place the trunk and hood in place, make sure the hinge points work freely. I used blue low tack painters tape to hold the hood and trunk in position. Then the completed chassis/interior was installed in the body as per the instructions.
Final Impressions: I never pass up a chance to build my most favorite vehicle, the 1958 Chevrolet Impala Sports Coupe. Even without the changes I chose to make in this build, Revell has hit another homerun with this ’58 Impala kit. Would I build this kit again? I sure would, in a Heartbeat America! Remember: Anytime you can help a fellow modeler by passing on the tips, info and help to keep this hobby alive do it and make a difference!
 Â
999
Remember: This is a hobby. Keep it fun and enjoyable!
Todd McWilliams
Â
Donations Humbly Accepted
*All Registered trademarks are the property of their respective brands.
Â
