1964 Pontiac GTO 2n1 Monogram kit 85-0890 1:24 Review

RoR Step-by-Step Review 20120213* – ’64 Pontiac GTO 2n1 Monogram kit 85-0890 1:24 Review
Click Here to Buy This Kit
Â
Review and Photos by Marty and Stephanie Oberman 
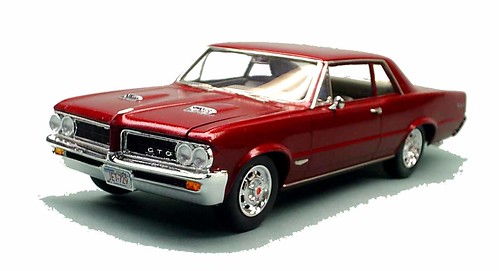
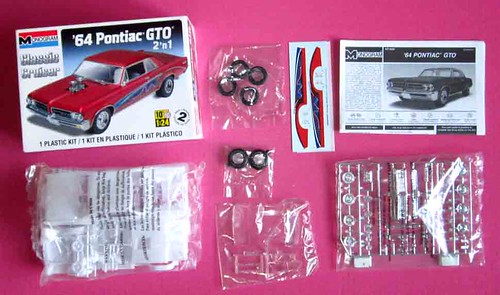
The newly re-issued Monogram 1/24th scale ’64 Pontiac GTO 2n1 in the “Classic Cruisers” edition has actually been around for some time. I remember building it “back in the day” so this build was somewhat of a refresher course for me. I was anxious to see how it would stand up to today’s newly-tooled kits. This kit can be built as either a stock or street machine version. Since I’m a stock aficionado, I chose the former version for my build.
Â
Â
(Fig. #0a) Despite the aged tooling, the engine assembled without issue, and looks quite reasonably realistic. There is even GM engraving on the transmission part, identifying the tranny as a 4-speed. Flash on all parts was noticeably absent…a definite sign the tooling had been cleaned up.
 Â
Â
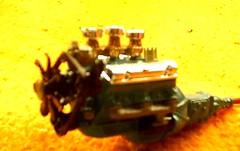
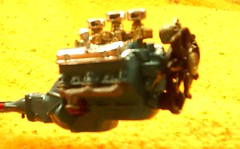
(Fig. #1, 2) The drive train consists of a two-piece engine block/transmission, with oil pan, starter, and oil filter molded in. Separate front cover (with molded-in fuel pump), cylinder heads with spark plug detail (a nice touch!), “Tri-Power” intake manifold, exhaust headers, distributor, power steering pump, fan belt, and fan round out the non-plated parts. Plated parts include valve covers, breather, “Tri-Power” carb setup, three air cleaners, alternator, and fan clutch…the latter two components I stripped of chrome and painted Testor’s stainless steel for a more realistic look. I painted the triple carbs gold. The street version includes a 3-piece blower assembly, separate intake manifold and belt pulley assembly, dual 4-barrel carbs, and two velocity stacks.
Â
Â
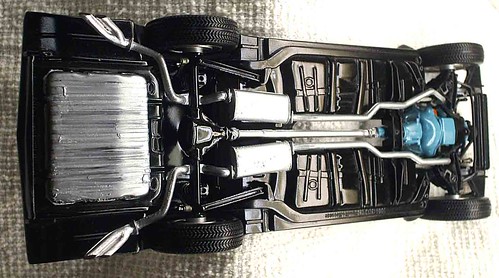
(Fig. #6) I moved on to the chassis. Although rather simple in parts count, it builds up to a quite nice appearance. The front suspension consists of three pieces: one lower suspension assembly and two upper A-arms…that’s it. Fit and contact points were direct and snug. The rear suspension components consist of a one-piece rear axle/exhaust system which, in order to look right, must be painted separately. Two coil springs and shock absorbers round out the stock rear suspension. For the street version, two exhaust support blocks and spring supports enable the modeler to “jack up” the back of the car to fit the wide rear tires used for that version. Besides the stock wheels and tires, there are a set of Centerline rims for the street machine.
Â
The entire chassis assembly installed smoothly. Despite the simplicity of it, I marveled at the finished appearance. Contact points for all components were sure and snug. The finished wheels and tires snapped onto the axle ends smoothly and tightly even with the parts having been painted.
My only complaint is the fact Monogram felt it necessary to emboss trademark information not only on the frame rail of the chassis, but also in a recessed area between the trailing edge of the gas tank and the rear splash panel…which is no more than 1/8″ wide. Removing this embossing is next to impossible. I’m sure the folks at Monogram could have selected a better location for this information, which may be “legally” necessary, but not practical for the modeler.
Â
Â
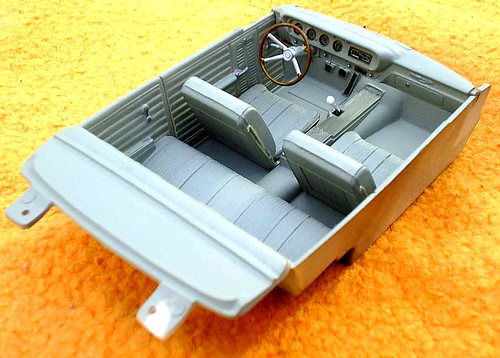
(Fig. #8) Next up was the interior, which consists of a bucket-style affair with rear seat, console, pedals, and engraved door panels molded in. Separate pieces include two-piece bucket seats, arm rests (a nice touch!), floor shifter, dashboard, steering column with molded-in turn signal stalk, and the distinctive X-spoked GTO steering wheel. As with the previous sub-components, there were no issues in the assembly and installation. I painted the interior Testor’s Light Sea Gray military flat, and simulated the wood steering wheel rim by first painting it Testor’s Russian Earth Brown, then over coating it with Tamiya Clear Orange. It gives a nice “shellacked” look to the wood rim. The spokes were painted Testor’s Aluminum Plate buffing metalizer. Door and window handles were touched with silver paint, as was the center of the console. The chrome shifter’s ball was painted flat white. The front seat supports were chrome-foiled. The instrument panel’s gauges were detail-painted, as there were no decals included in the kit for this application. The finished product looks quite decent, however.
 Â
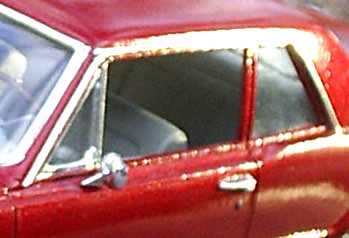
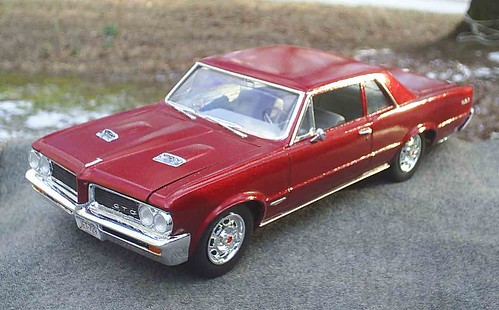
(Fig. #8a) I moved on to the body, which I painted Testor’s Honduras Maroon lacquer with Dupli-Color clear coat. After polishing it out, I applied BMF (Bare-Metal foil) to the windshield frame, rear window frame, vent window frames, rocker panel moldings, and drip rail moldings. The instructions state that the builder can delete the B-pillars and parts of the side window frames if he/she wishes to build the car as a hardtop, or leave them intact for a two-door coupe version. Not only did I leave mine intact, but I decided not to chrome the B-pillar and surrounding frames, just the drip rail molding and vent window frames, so as to give the appearance of a “baseline” GTO, with no extra frills. I’m a big fan of base models, no matter what the genre of car may be. The engraving around all windows is extremely crisp, allowing me to foil the car with no issues. The molded-in windshield wipers and Pontiac and GTO emblems were equally as crisp, and foil application was a breeze.
 Â
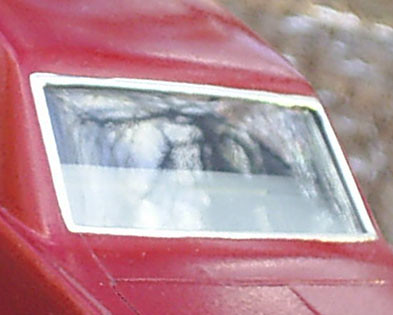
(Fig. #8b) The windshield/rear window glass is a single piece, joined by two runners, and there are positive contact points for this unit inside the body, making installation trouble-free. If the builder opts for the coupe/sedan version, separate side rear windows are included. Although there are no indicative contact points for these, they installed issue-free nonetheless. The rear-view mirror installs in a hole in the glass for a positive fit.
I then installed the interior into the body. Pins at the leading edge of the rear of the body allowed for a snug and sure fit, and the front of the interior mates up solidly with the bottom of the firewall. The chassis was then installed into the body with only a bit of finagling, which is to be expected. Two pins on the bottom of the interior tub mate with corresponding holes in the chassis for a sure and square fit.
Â
Â
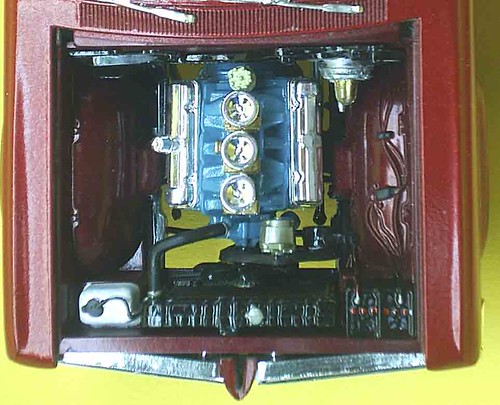
(Fig. #9) The engine bay consists of a molded in battery and washer bottle. I painted these units gloss black and flat white respectively. I detailed the battery caps and terminals as well as the washer bottle cap and fluid line. A separate firewall component panel holds the heater box and brake master cylinder, the latter of which I painted steel with a gold cap. The radiator slid into place easily and snugly, at which point I installed the upper radiator hose, and it mated with the radiator and intake manifold perfectly.
Â
(Fig. #19) Final assembly consisted of the front and rear bumper/grille, taillight panel, and rear view mirror. The front bumper/grille unit contains separate clear headlight lenses, and they fit snugly into their chrome bezels using Elmer’s clear school glue gel…the slight blue tint giving the headlights a realistic appearance. I blacked out the grille with flat black paint, and detailed the turn signals with Tamiya clear orange. The nose piece fits into the center of the grille, and it installed with no issue, as did the entire unit onto the body. The rear bumper also installed issue-free onto the body. The taillight panel, which was given a black wash, contains separate clear red taillight lenses. Extreme care must be taken when removing the thin, delicate taillight lenses from the tree! In the process of doing so, I managed to snap one lens completely in half, and broke the second one at the contact point with the tree. Luckily, being a clean break, the lens still installed into its bezel with no issues, and the break is virtually unnoticeable. My advice to Monogram would be to mold the taillights into the panel, and allow the modeler to detail-paint them using red paint, preferably a clear red which Tamiya offers, and which I use extensively for such applications.
I then installed the separate chrome hood scoops to the hood after a blackwash for depth, I then installed the hood onto the body. The last item was the chrome side-view mirror. The finished product looks great, sits right, and has a nice muscular stance to it.
Final impressions: The more I worked on this kit, the more I was impressed with the quality of fit and finish, despite the age of the tooling. This is probably, in my humble opinion, one of the best engineered and designed kits I’ve built from Revell/Monogram. In terms of fit and finish, this kit definitely deserves a perfect 5-star rating from me. Unfortunately, and this has nothing to do with the kit itself, the embossing of “legal” info on the outside of the frame rail and recessed area between gas tank and rear chassis panel knocked it down from an “A+” to an “A-“. But it’s an “A” nonetheless. In fact, I believe this kit would be ideal for the beginning modeler who currently builds only snap kits and wishes to venture into the realm of glue kits. I highly recommend this kit for beginning and intermediate modelers (such as myself) for an enjoyable and trouble-free experience, and I wouldn’t hesitate to build it again.
Â

(Fig. #999)
*All Registered trademarks are the property of their respective brands.
Â
Â
Â
Â
Â
Â
Â
Â
