MiG-21PF Revell #85-5482 kit Review

RoR Step-by-Step Review 20120220* – MiG-21PF Revell #85-5482 kit Review
Click Here to Buy This Kit
Review & Photos by Felix Plaza 
The Mikoyan-Gurevich MiG-21 (NATO reporting name “Fishbed”) is a supersonic jet fighter aircraft, designed by the Mikoyan-Gurevich Design Bureau in the Soviet Union. It was popularly nicknamed “balalaika”, from the aircraft’s plane form-view resemblance to the Russian stringed musical instrument or ołówek (English: pencil) by Polish pilots due to the shape of its fuselage. Some 50 countries over four continents have flown the MiG-21, and it still serves many nations a half-century after its maiden flight. The fighter made aviation records. At least by name, it is the most-produced supersonic jet aircraft in aviation and the most-produced combat aircraft since the Korean War, and it had the longest production run of a combat aircraft (1959 to 1985 over all variants).
Â
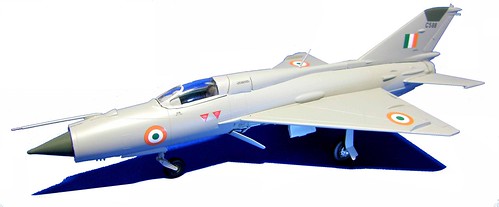
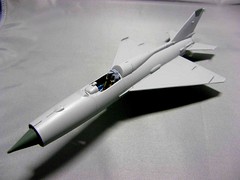
(Fig 000a) The Revell MiG-21PF model kit has been around for over 35+ years. This was a pleasant modeling experience at Revell’s Skill 2 Level. It was generally an easy kit to build and it came with Russian and Indian markings. I decided to use the India Air Force Markings.
Â

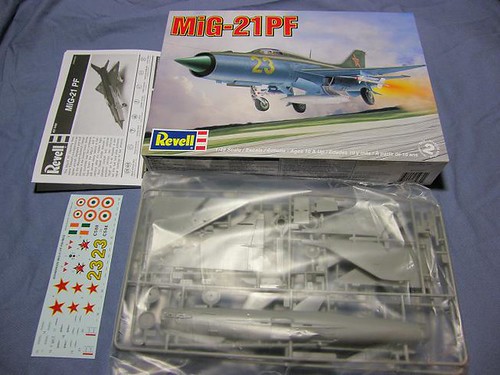
(Fig-006b) I built this MiG-21PF straight out of the box. What you would see here is what you will get from this Revell Kit. As this is an old kit (has copyright marking inside of one of the wings with the year 1977).
Â
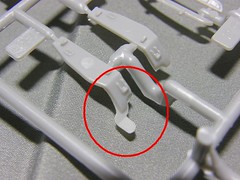
(Fig-004, 006) This kit has been pressed so many times that there’s a few flash places on the spruces.
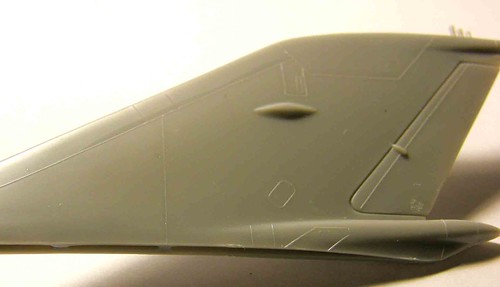
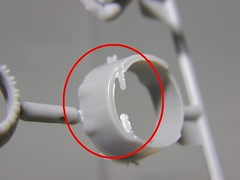
(Fig-022) Aside from that, the kit has raised panels and soft detail.
Â
Step 1 Cockpit Assembly
To make a straight out-of-the-box build look good, it’s all in the detail you apply to the build. Doing research on the subject and locating as many pictures of the actual subject would insure that you are at least building and detailing it as accurate as the kit allows. Some modelers prefer to add after-marker products to make the build more accurate to the real thing. For this build, review I decided to build it from the box to show what you get.
Â
Â
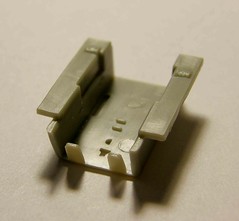
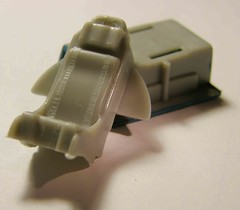
(Fig-008 and 009) The Cockpit the kit came with is very simple and plain. For those who would like to really detail the kit, there are resin kits (like Black Box) out there that you can purchase to build an accurate cockpit.
Â
Â

(Fig-011) I started detailing the cockpit by painting the seat and gadgets and switches of the side panels.
.
Â
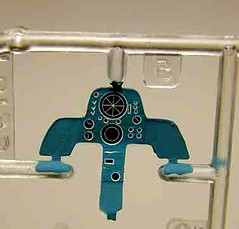
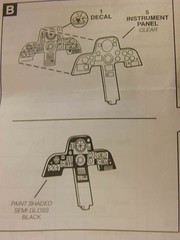
(Fig-012 & 039) Then I painted the Instrument Panel while it was still on the sprues and I also applied the decal while still on the spruces. On a side note, the decal that comes with this kit does not give you an accurate Instrument Panel design. Even the instruction sheet shows a completely different decal set.
Â
Â
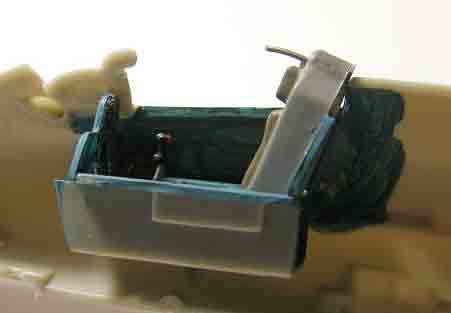
(Fig-015) I then attached the cockpit to the Fuselage Assembly.
Â
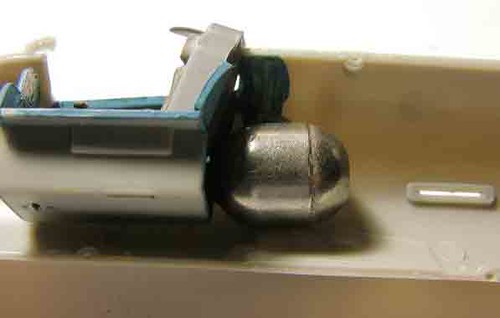
(Fig-016) I added a lead weight right behind the pilot seat so I would not have to use the Tail Support that the kit came with. This was the only thing that I added that did not come with the kit. Just couldn’t make myself use the Tail Support. It takes away from the look of the jet.
Â
Â
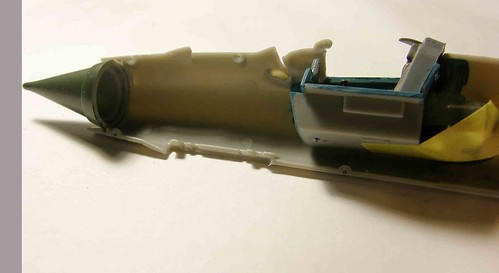
(Fig-038) Painted the Intake Cone and Afterburner prior to attaching them to the Fuselage. After attaching the Intake Cone and Afterburner I then attached each halves of the Fuselage together.
Â
Â
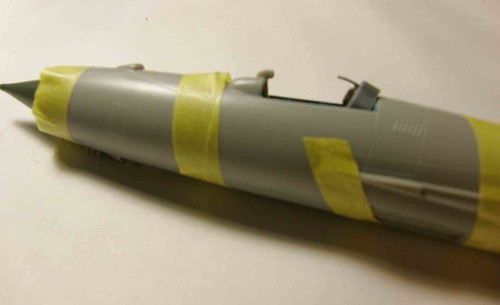
(Fig-023) To keep the two halves of the Fuselage together without holding them until they are dry, I used Masking Tape to hold them in place. Some people use rubber bands to hold them together. You can use whatever works best for you. At this point I have not painted the Fuselage as I’m planning to sand the seams to blend them together.
Â
Â
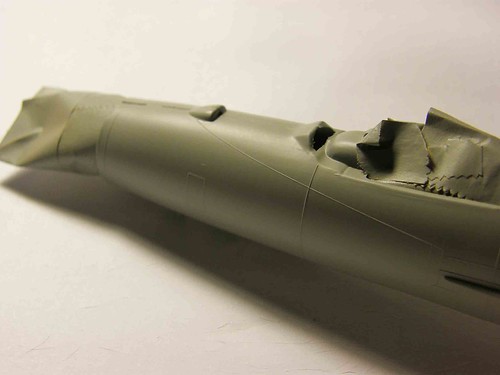
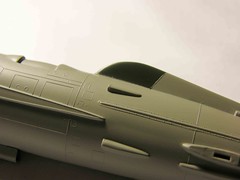
(Fig-025) After a couple of hours, I removed the tape and sanded the seams. Then I masked the Cockpit, the Intake Cone and Afterburner to avoid painting them. Then I started by painting the base coat of the Fuselage.
Â
Â
(Fig-022) Â While the Fuselage is drying, I started working on the Vertical Tail, the Horizontal Stabilizer and Wings. I did the same thing as I did with the Fuselage; I attached each halves of the wings and vertical tail and waited until the glue dried and sanded the seams of the wings to blend them and give it a smooth surface.
Â
Â
(Fig-040 & 041) After sanding the wings and vertical tail, I applied the base coat paint color to them. When the paint was dried, I masked the Vertical Tail and the lower fuselage to apply the Dark Green paint to them.
Â
Â
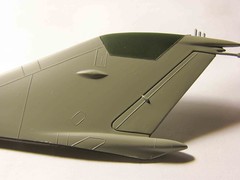
(Fig-42 & 043) When that paint was dry, I removed the masking tape. On a side note, the instruction mentions to paint the upper part of the vertical tail Dark Sea Gray, but in truth it’s more like Dark Green. If you look the actual pictures of MiG-21PF’s the Dark Green matches more accurately for the Indian Air Force. The colors you use depend on which nation the MiG-21 belongs to.
Â
Â
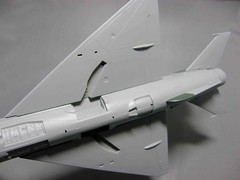
(Fig-028 & 030) I attached the Vertical Tail, the Horizontal Stabilizer, the Exhaust Shroud, the wings and the Front and Rear Dorsal Fairing.
Â
Then I applied all the decals. It’s easier to apply them if you do it before you attach the landing gears.
Â
The Landing Gear

(Fig-035) I then worked on the landing gears. You have the option of building it with the landing gears up. The landing gears are simple. Not much detail on them. You can buy after-marker landing gears to give it a more realistic look, but as I mentioned, I wanted to build this one straight out-of-the-box.
Â
This kit includes a set of Atoll Missiles (not accurate) and a Center Fuel Tank. I decided not to apply them. This is a good kit for the value.
Â
Â
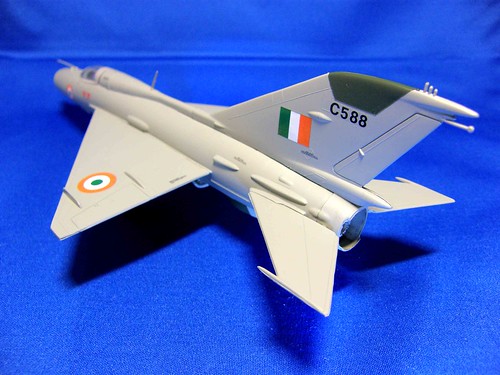
(Fig 999)
Hope this review was helpful to you. And don’t forget, it’s a hobby, keep it fun!
Sir Felix Plaza Jr.
Â
Â
*All Registered trademarks are the property of their respective brands.
Â
Â
Â
Â
Â
