RoR Review 20110220 – Hawaiian Charger NHRA Funny Car 85-4287

Hawaiian Charger NHRA Funny Car 85-4287
Review and Photos by Tony Gibson
#1
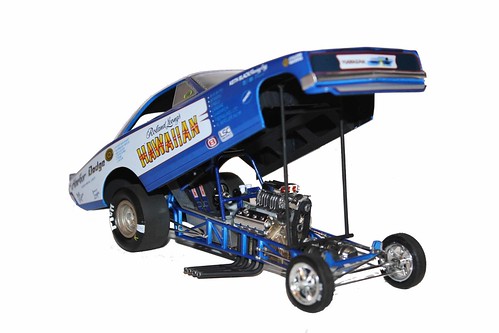
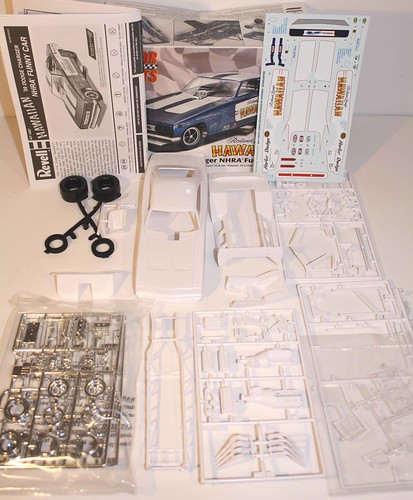
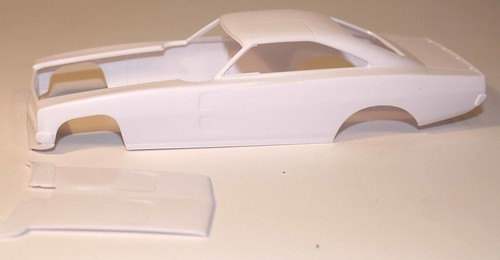
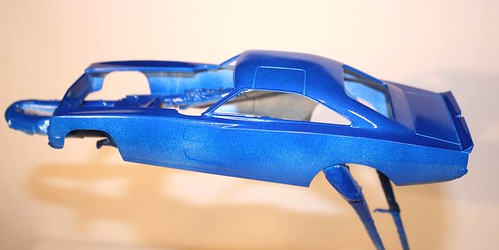
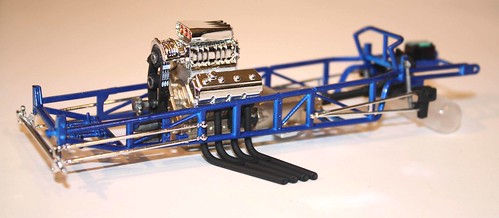
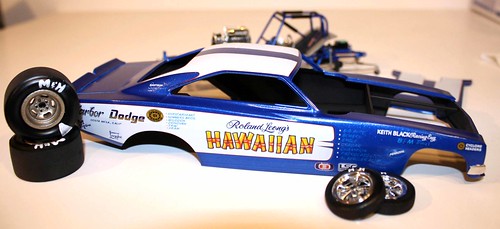
This review examines the Revell 1/25 scale Hawaiian Dodge® Charger™ NHRA Funny Car. A skill level 3 kit with 102 pieces molded in white, chrome and clear. The decals were outstanding with clean, bright chrome and a nice direction sheet. After looking at the sheet it was clear that this kit and the Chi Town Hustler kit were totally different including the size of the body, chassis, engine, wheels and tires. Five slot wheels were provided for the rear versus the Keystone® wheels (on the Chi-Town Hustler) and five star front wheels.

#3
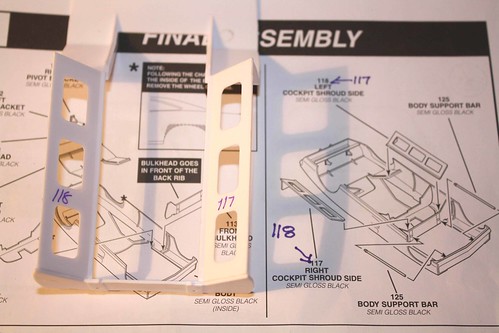
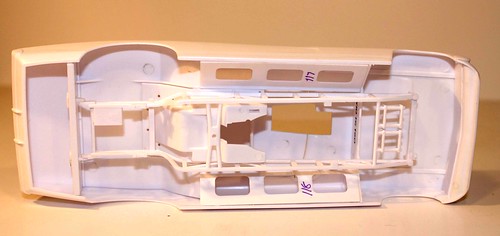
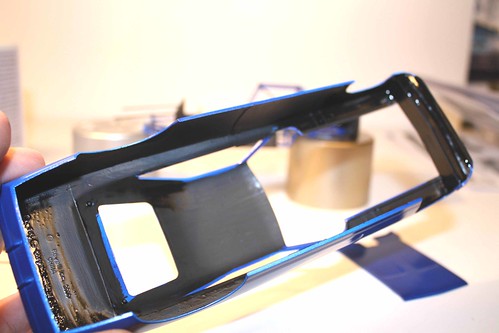
This build was started at step 9. This was done first so it could be painted in one piece. On the direction sheet pieces 117 and 118 (left and right cockpit shrouds) are marked incorrectly. 117 should be on the left side and 118 on the right.
#4
A quick test fit and you’ll see why and how they connect with parts 113 and 115. This is an example of why mocking pieces up and test fitting everything is so important. After this was completed the build continued from step 1.
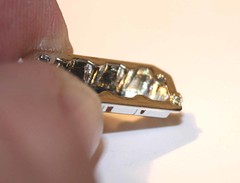
#2
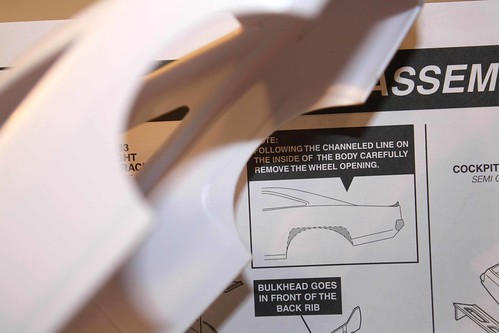
The direction sheet gives an option to cut out an area around the rear wheel opening. This is correct for some of the Hawaiian dragsters, but not all of them had this done. For this build the wheel openings were left as they came in the kit. There is a clear tooling mark on the inside of the body that shows exactly where to cut if you want that configuration.
#5
The body was fairly clean and didn’t need much clean up at all. There were some small tooling marks that were sanded with some 600 grit sandpaper. The body was given a quick wash with mild dish soap and allowed to dry completely before painting.
#6
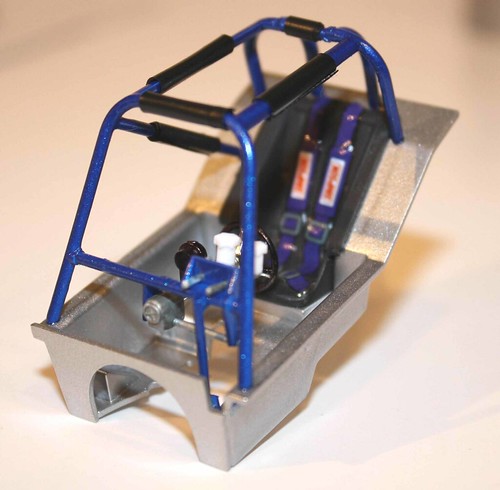
The cockpit shroud was assembled before painting.
#9
The car was mocked up and checked for fit before painting. If there are any issues it’s easier to fix before paint is applied.
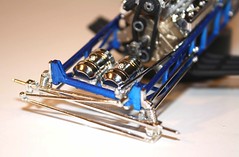
#10
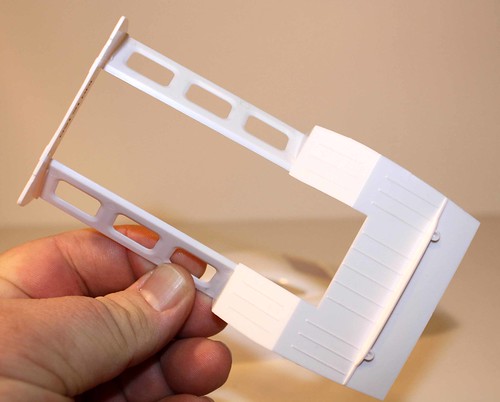
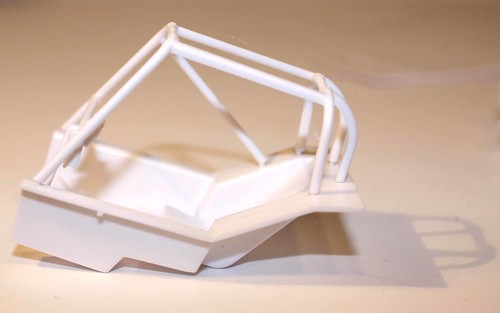
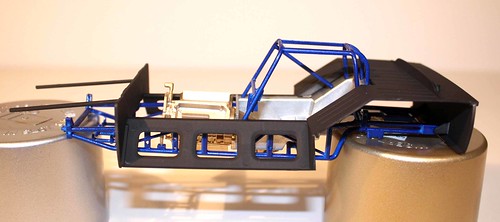
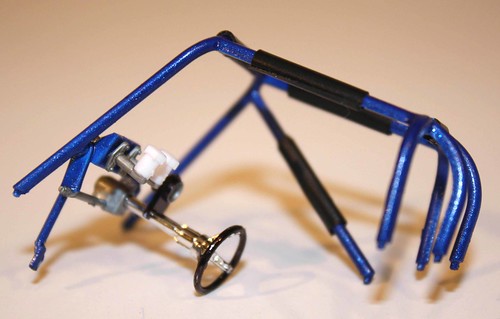
Step 6, building the roll cage, was a little tricky. The roll bars have to be assembled first then place onto the cockpit bucket to align, but don’t glue into place. Let the glue on the bars dry completely. Once the bars are dry they can be removed from the cockpit bucket without twisting or warping and then painted. The bars and the cockpit bucket can be assembled after they are painted. Use regular model glue instead of fast drying glue. You will need the extra time while the bars are flexible to get them aligned.
#11
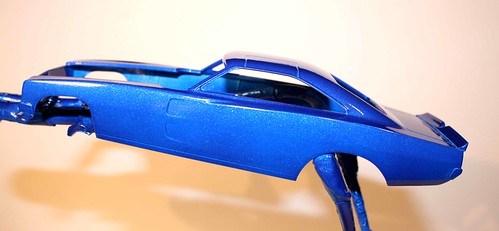
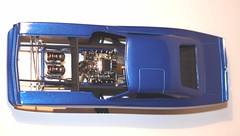
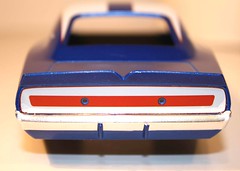
The body was given a coat of Duplicolor™ white primer and allowed to dry for a couple hours. Then a bit of soft cloth was used to remove any dust and dirt nibs. Testors® Star Spangled Blue™ (1843m) one coat lacquer was applied.
#12
This was not done in one coat. Two light coats were applied. The chassis and roll cage were painted the same color. The real car was painted Maui Blue, but that color is very tough to find in small cans. A local automotive paint store will have it, but it’s not cheap and may require using an airbrush. Two coats of Duplicolor® clear were applied to the body only after the paint had dried completely.
#12a
The underside of the body was brush painted with flat black bottle paint.
#13
The interior shroud was painted matte black aerosol. The seat bucket and engine block were painted with aerosol also. When all the parts were dry, they were assembled but not glued yet. Fit and alignment were double checked.
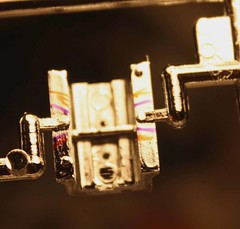
#14, 15
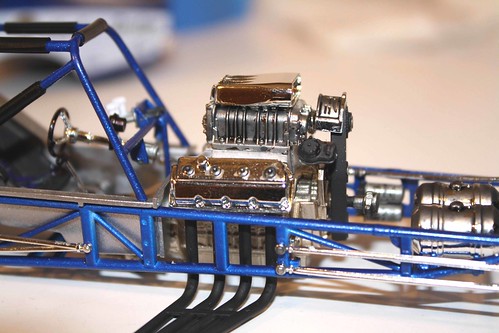
The rocker covers (parts 171, 172) had small raised areas. This was from where they were attached to the tree. It was actually nice since it caused less damage when removing from the tree. These areas must be removed for proper fit. A very sharp blade or file can be used to shape them.
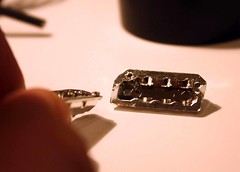
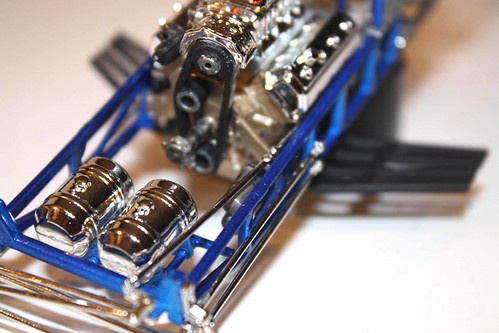
#16, 17
Raised areas were also noticed on the super charger (part 168, 169) and rear end cover (these areas are highlighted on the picture). After removing from the tree, trim or file the raised areas off as noted.

#18
The engine went together smoothly after the parts were cleaned up. Notice the blower belt decal. This is the best time to put it on. The belt was painted black with brush paint, allowed to dry and the decal applied.
#19
The engine was assembled into the chassis and the headers put on per directions.
#10a
The roll cage final assembly was completed at this point. Black electrical tape was wrapped around the bars to look like padding. The seatbelt decals must be applied to the seat tub at this point.
#10b
Then, the bars can be assembled with the seat bucket. This whole assembly can then be glued into the chassis.
#18a
The chrome on the engine, fuel tanks and a few other parts were given a wash of thinned flat black bottle paint. This enhances some of the feature lines and makes them look a little more realistic.
#20
The suspension was truly the toughest part of the build. Make sure the chrome pieces are scraped at the adhesion points and test fit before gluing. Section 7, part 106 (steering link) and part 132 are the most difficult.

#22, 23
Part 132 isn’t really well referenced on the direction sheet. Study the layout. It took about an hour to get this all figured out. Part 132 runs between the chassis and the roll cage and under the left rocker cover and over the headers. At this point you’ll see where it lines up. Use of fast drying glue is suggested here and on the entire front suspension.
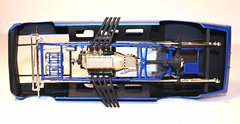
#24, 25
Another mock up was done at this point to make sure the body, engine, suspension and interior lined up.
#28, 29
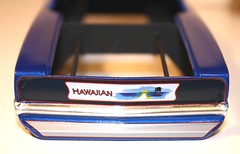
Bare Metal Foil® was applied to the front and rear bumper. Each bumper was done using two pieces of the foil.
#26
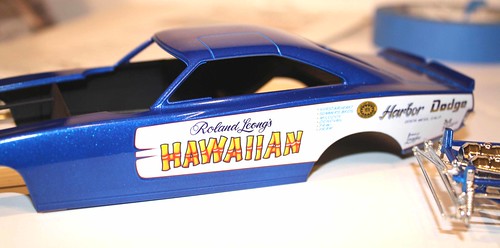
 The decals were AWESOME! The colors were very vibrant and realistic. Over all, the layout was fairly easy. Easy does not mean fast; these decals took a lot of time. They set very quickly, make sure the part is wet before applying the decal in order to give a little more time to move it around. Also, the cloth used to dab the decals should be moist. The roof decals were the hardest to lay down. They kept trying to wrinkle.
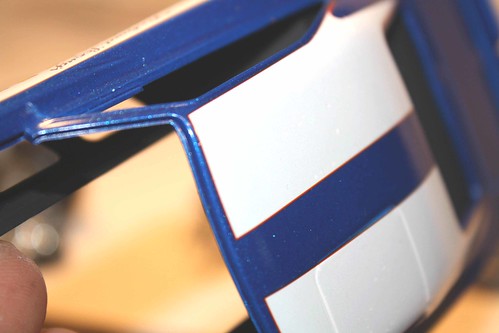
#27
There were also some bubbles under the decal that could not be removed. Also, around the roof hatch the decals did not lay down into the crease. This probably could have been resolved by using after market products, Micro Sol and Solva Set. These are available at hobby stores that sell model kits (Hobby Lobby does not carry these products). The white part of the decals is a little transparent. If the car had been red, the white decals may have looked pink.
#30
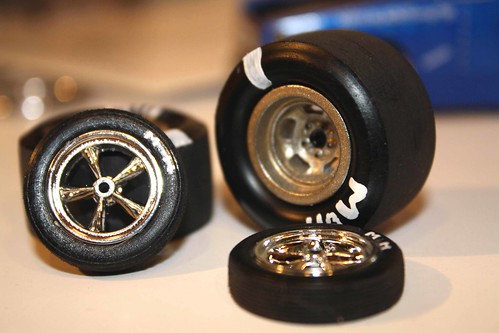
The rear tires were one piece instead of the usual two. Unfortunately, there was no lettering stamped into the tires. An M&H decal was offered for the front, but not the rear. Some hand painting was done on the rear tire with a fine brush to copy the logo. A bead stripe was also added for effect.
#31
With all parts and sub-assemblies completed, the final assembly was done. Tape the hood into place from the underside before putting the windshield in. Not shown here, the windshield, rear glass and half glass assembled into the body beautifully. The box art shows silver outlining the windshield. A silver Sharpie™ was used to do this instead of paint. This may sound like cheating, but it works well for this application. Paint or foil could be used instead. Try the marker. If you don’t like it, a very fine non abrasive polish will remove it. Testors™ glue was used to install the glass. Fast drying glues can cause the clear plastic to frost. The rest of the assembly went as directed. One note: Make sure the rear wheels are pushed all the way onto the metal axle or they will not fit properly into the body.

#33
Over all this was a challenging build, even as a box stock. This kit has a lot of potential for additional detailing. All the parts whet together well with a good fit. There was very little flashing to be cleaned up. The directions were very good except for the one mix up on parts numbers. Skill level 3 is accurate.

#34
Total build time was about 45 hours over a couple weeks. If you’re into dragsters this kit should be in your collection. With a little time and patience this kit can be a real “winner!”
Have fun and keep the glue off the windshield
Tony Gibson
