RoR Review 20110405 – USS Fletcher Destroyer 1:306 Scale Revell Model 85-3021

RoR Review 20110405 – U.S.S. Fletcher Destroyer 1:306 Scale Model 85-3021
Review and Photos by Lonny Dyer  Â
Â
For the modeler this kit features a detailed deck with movable gun turrets and depth charges, plus optional parts to build either the WWII version or the 1949 conversion with rocket launchers. Also includes decals with optional markings and a colorful flag sheet. Rated a skill level 2 kit, there are some areas that need modification and some sequence changes described in the full review that will really help ease construction.
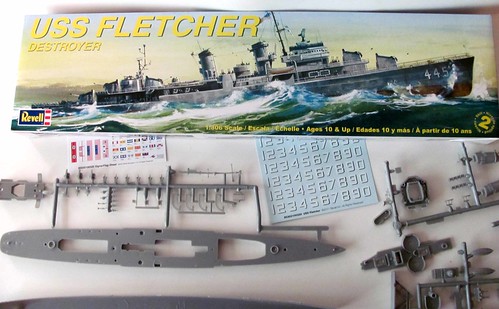
Figure 1
This kit when first opened looked simple enough to construct. But the simplicity of the kit did not turn out to make it easy to build. The sprues are very thick and most of the pieces are very small. Use care when removing them from the sprue to avoid breakage. I recommend cutting the sprues into sections in order to have more room to access the connecting gates for the parts you need.
Step 1:
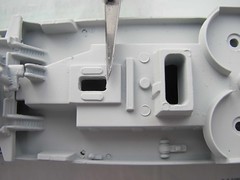
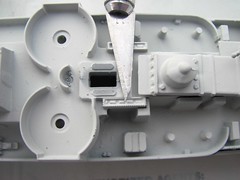
When assembling the main deck to the hull, there are problems with alignment so make sure you test fit the pieces first and after a little sanding you will get a good fit. I had to use a little putty to hide seams and gaps at the stern and on the sides. This eliminates any chance of painting before assemble, unless you want to do touch-up painting after using putty.

Figures 2 & 3
I recommend NOT installing the mast (part#5) in step 1 because it has to line up with the navigation bridge (part#13) in the next step.
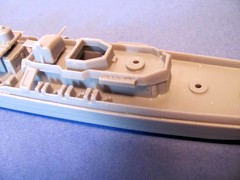
Step 2:
Pay very close attention when installing the davits (part #20) for the main life boats (part #21), they must be set so they hold the boat above the DECK but below the Bridge. Use some tube glue for this because the slow drying time will allow you to twist the pieces to get them in the right position before the glue sets.
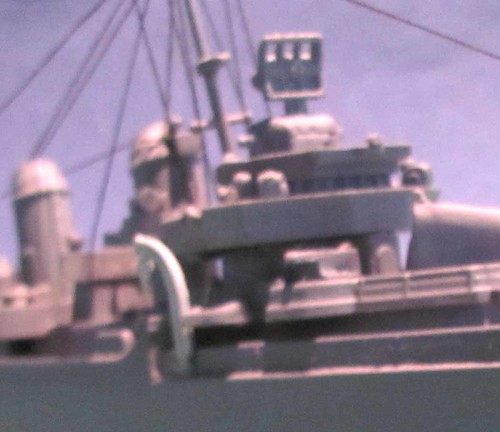
Figure 4a
When attaching the navigation bridge (part #13) and the radio mast (part #5) trim a little off the end of the mast (where it mounts to the deck) in order to align it with the notch in the back of the bridge.
Step 3
The stacks are a very poor fit. Try sanding and filing them and their mounting holes to get a good, flush fit between the stacks and the deck.
Figures 9 & 10
Install the rigging per the instructions for final assembly.
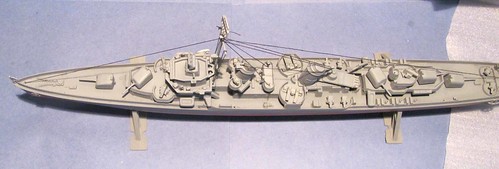
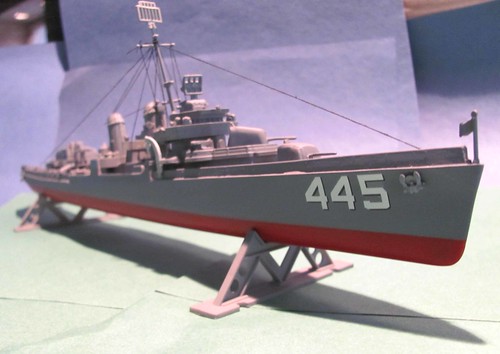
Figure 11
The rest of the ship went together very well, and given its scale of 1:305 it shows a lot of nice details.

Figure 12
