1969 Chevy Nova COPO Review Revell® 85-4274

RoR Review 20110501 – 1969 Chevy Nova COPO Review Revell® 85-4274
Buy This Kit
Review and Photos by Tony  Gibson
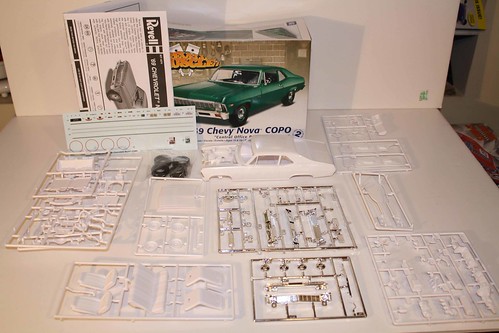
#1 For the modeler this is a Revell® 1969 Nova COPO 1/25 scale model kit. There are 111 pieces molded in white, chrome and clear rated a skill level 2. It has a nice decal sheet with engine labels, speedo gauges and name plate emblems and redline or white wall tire options. A clear direction sheet with good views and options are included. This review includes some great information that you’ll need to consider to get a good fit for the windows glass and some finishing tips to really make this model stand out.
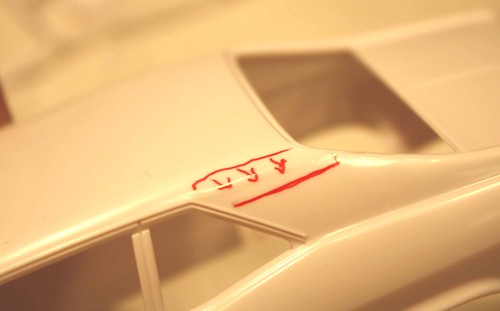
#2 This was a nice, clean kit with hardly any flashing and very little clean up. The die lines from the roof to the quarters were the only areas that needed to be addressed.
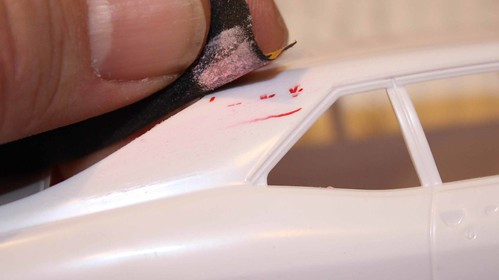
#4 First clean up the die marks from the roof to the quarters, right and left. Â
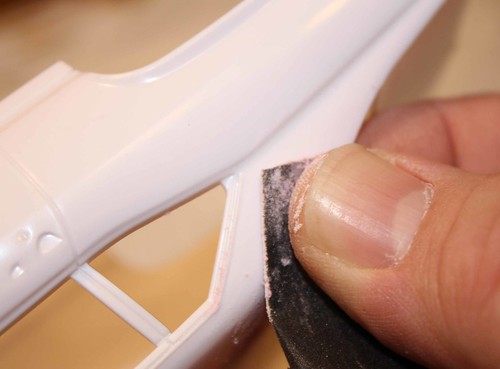
#5 Some 600 grit sand paper with a light touch will take them out easily.
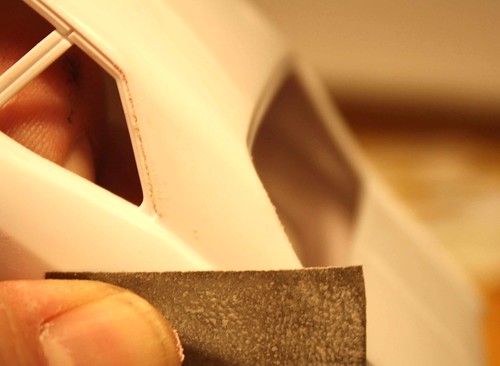
#6 It’s always a good idea to use a finer grit sand paper after clean up. 1000 grit sand paper can be used for the final step. This will help prevent the need for a lot of wet sanding after priming.
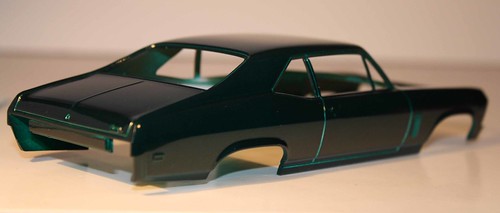
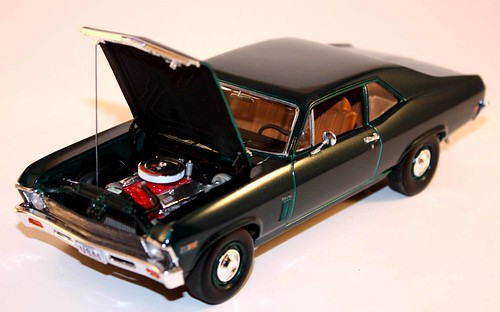
#7 The body was painted with Duplicolor® products. First, a good even coat of white primer was applied. This was allowed to dry for a couple hours in a warm place. Then, three coats of Deep Jewel Greenâ„¢ were put on, each coat a little heavier than the previous coat, 30-40 minutes allowed between coats. 3-4 hours of dry time were given after the last color coat. Two coats of Crystal Clearâ„¢ were then applied with 30-40 minutes between coats and the second coat a little heavier than the first. This was then allowed to dry 24 hours. The wheels were given the same treatment. It’s obvious that there are white lines around the door jams, trunk and other feature lines. This was not on purpose and was left to show what not to do. A darker color sealer should have been used, or semi gloss black should have been applied first. The lines would not have shown through then. This was a major “brain fart†for the builder. When painting a dark color, do not use a light color primer. Even experienced builders have moments where they forget what they’ve learned. It is repairable if you want to take the time and effort without repainting. It’s an easy fix with after market door jam paint that can be found at hobby shops.Â
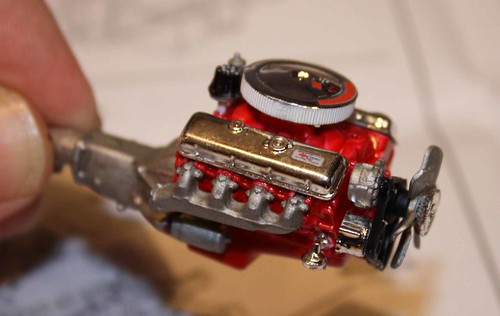
#8 Great little 427 engine in this kit! Straight forward build, everything fits great. Just make sure you test fit, as always.
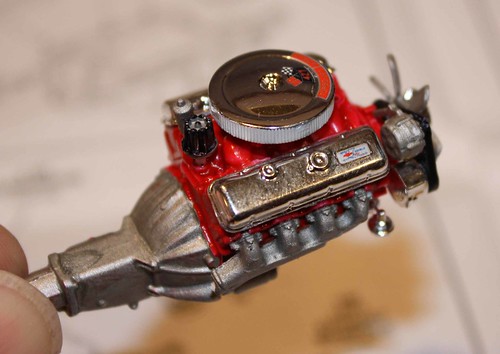
#9 Nice touch with the 427 decal on the air cleaner and Chevy® decals on the valve covers.
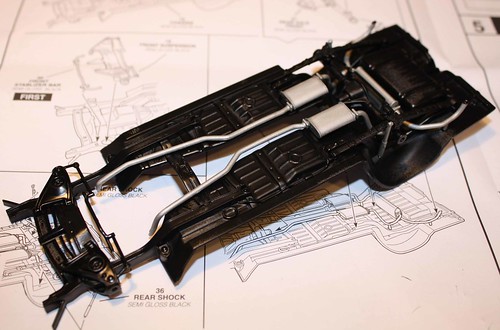
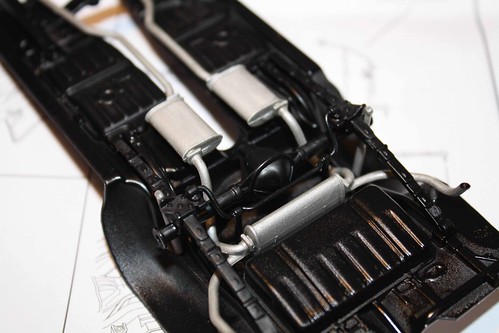
#10 The chassis was a breeze. Nice fit, clear lines and clear placement to the molds. Study the placements and there shouldn’t be any problems. The directions were clear and accurate.Â
#11 One of the cool things was the correct 12 bolt rear end. This was a nice touch. The chassis was painted with rattle can semi-gloss black before assembly.
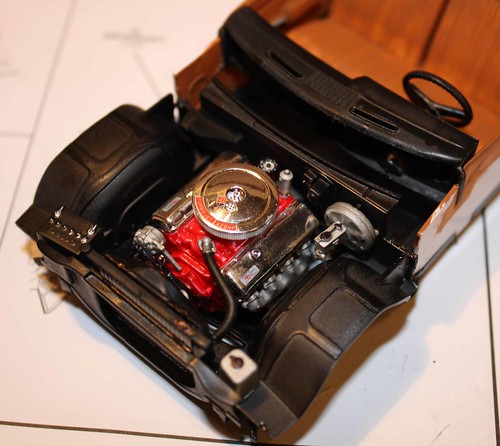
#14 The engine fit into the chassis like a glove.
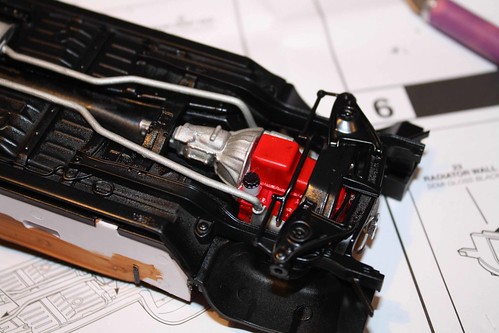
#13 The exhaust pipes lined up perfectly and the radiator support and assembly went in perfectly. Follow the directions and there shouldn’t be any problems.

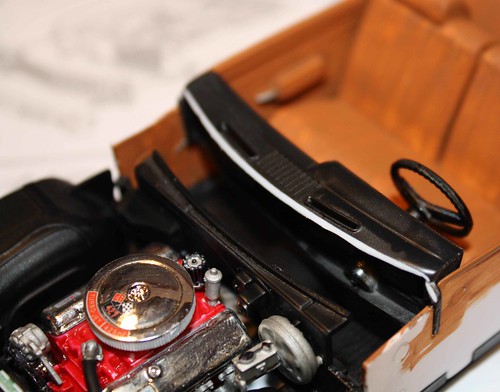
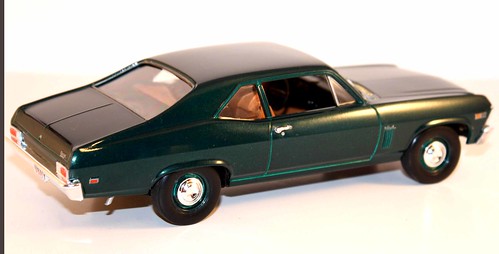
#15 The interior tub went together nicely. The COPO bench seat was used, but there was an option in the kit for bucket seats as well if you choose to build the SS. These were painted with camel brown craft paint and a soft ¼ inch brush.
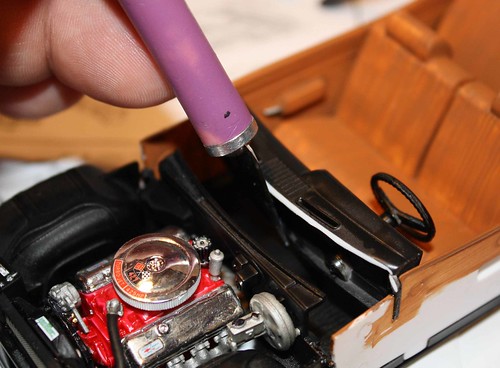
#16 After the body was mocked up with the chassis/interior assembly, it appeared that there wouldn’t be any room for the windshield to fit properly around the dash.Â

#17 Some material was removed at the front edge of the dash. A sharp blade was used to remove a very small amount, about the thickness of the windshield.Â
 #18 This area was then given a quick sanding with an emery board to smooth is all out.
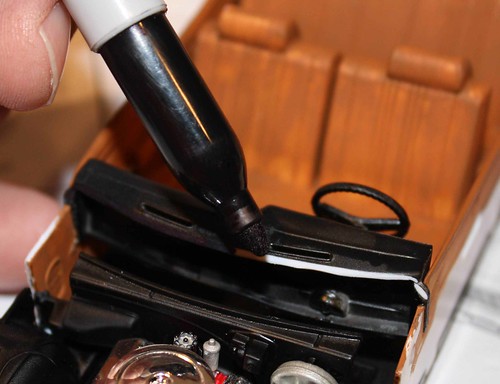
#19 A black permanent marker was used to touch up the repair.
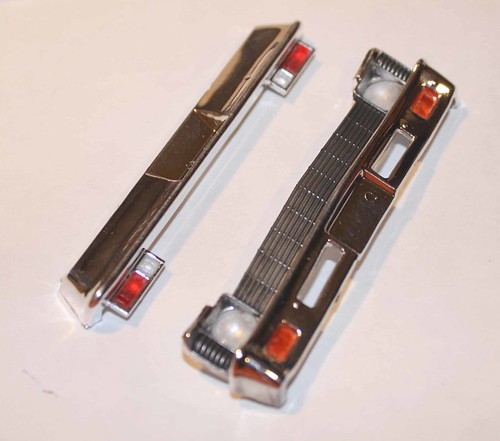
#20 The kit offered two sets of bumpers, COPO or SS™ bumpers. The COPO were used for this build. The rear tail lights were colored with red permanent marker on the chrome surface of the bumper. The clear lens was glued into place using regular model glue. The chrome on the gluing surfaces of the bumpers was scraped just a little to give the glue somewhere to hold onto. The front running lights were given the same treatment as the real lights, but orange marker was used.
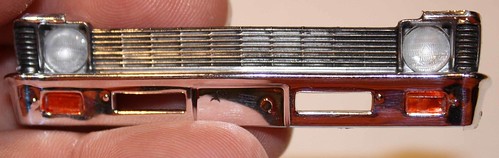
#21 The grill was given a wash of thinned flat black paint to add dimension. Thin the paint a bit, brush over the grill, allow setting a minute or so, then lightly dabbing off the excess with paper towel.
Final assembly of the bumpers, windshield, door handles and chrome went very well. The door handles seemed a bit out of scale, but it was nice that the effort was made by the manufacturer to make the model look more realistic. Everything here fit well and went right into place.
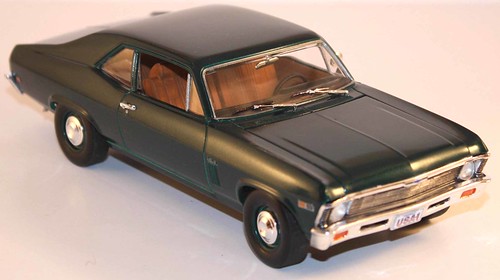
#24 With the exception of the dash/windshield issue, this kit went together extremely well. A little study of the layout, a mock up or two and everything does what it’s supposed to do. The tires were a bit if a disappointment because they are generic, without lettering. This must be a licensing issue and something I hope they can correct. Revell® has hit a home run with this kit. This is an excellent kit for a new modeler or a simple weekend build. This would also be a great kit for a kid. There is a lot of potential for detailing for the more experienced builder but it looks great straight out of the box too. Skill level 2 is right on the mark. Total build time for this was about 30 hours over a couple weekends.
#23
Have fun
Keep the glue off the windshield
Tony Gibson
