Review 20091015 – Rommels Rod #85-4026

RoR Review – Rommel’s Rod
 The Desert Fox is back!
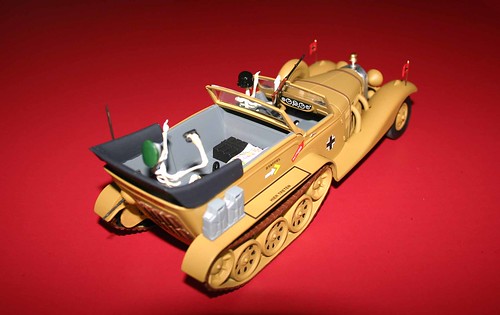
 Figure 1
  Revell has re-released its classic kit, “Rommel’s Rod†to the delight of modeling enthusiasts everywhere. I had a blast putting this kit together but the highlight is detailing the withered bones of “Der General†and his faithful driver.
  This kit was first issued 40 years ago and since that time the original tooling was lost. Kits were selling on the open market for upwards of $500 in recent years but this new version (kit #85-4260) sells for around $20. To make it even better this kit provides excellent part fit from the new tooling and easy to follow instructions. In addition you’ll find yourself researching WWII history for things like accurate colors and you might even learn a few things about Erwin Rommel
Figure 2
 I built this kit straight out of the box with no major variations and I was really impressed by the fit of the parts and sharp clean edges. There was very little trimming and even the sprue connectors required minimal work.
 
Figure 3
After a little cleanup of the parting seems and sprue flash you’re reading to spray the major body parts. I used Model Master FS-30266 “Afrrika Mustard†but even the molded color would come pretty close to that desert sand color with a coat of flat spray. The interior tub is just a medium flat gray

     Now you can start detailing the pieces like the track’s bogey wheel insets.
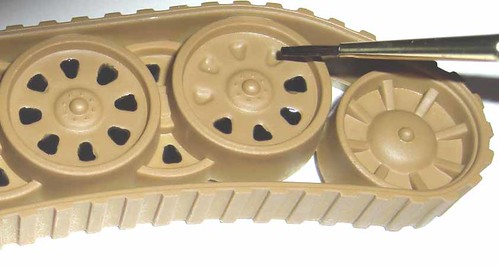
 Figure 5
  From the kit I chose to strip the chrome plating off of most of the parts by soaking them in bleach for a few minutes leaving only the gear shift, spare cover, radiator shell and the engine’s valve cover as chrome. After stripping the plating off of the hand grenades I had to go find out what color they were. Some research showed that the WWII German “potato masher†was usually black at the ends with a wooden stick in-between.
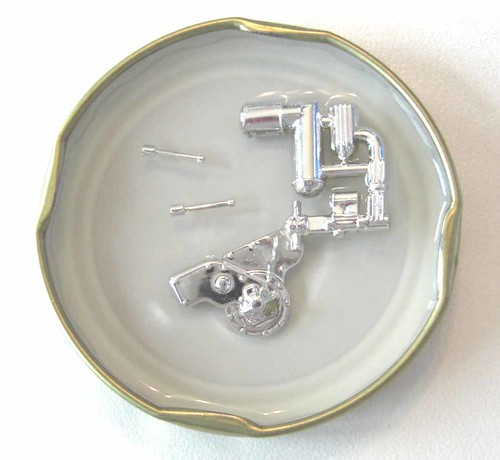
 Figure 6
  Assemble and paint the engine using some metallic colors for the transmission housing and oil pan. I chose a medium steel gray for the lower half of the engine and a medium blue metallic for the cylinder head area. I used a fine point Sharpie to highlight the spark plug wires.
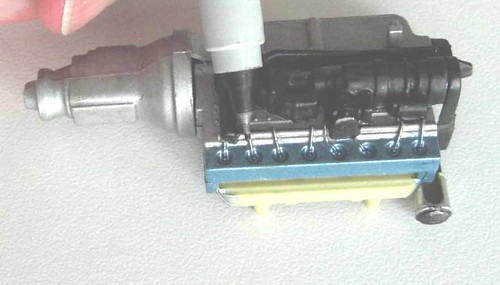
 Figure 7
  The completed engine assembly looks pretty good for the number of parts involved. With a little paint this is a pretty good replica of the old Mercedes motor in the original version.
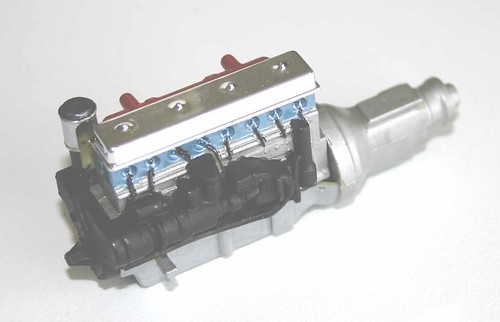
 Figure 8
  Continue adding detail to the various parts like the general’s chair. In this case I used a reddish base coat then applied a darker brown dry brush to the raised area to give it that “used†look. This will all get followed up with a dull coat spray when assembled.
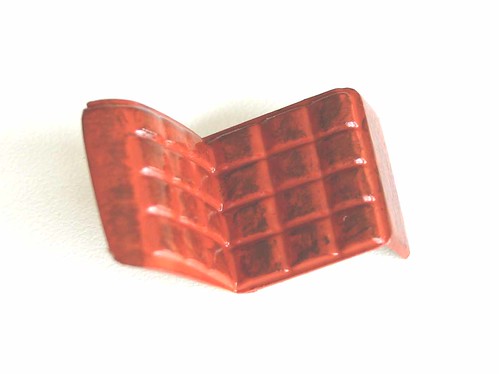
 Figure 9
  Before I assembled the skeletons I had to patch some minor sink holes and irregularities with some plastic filler and sand them off, then just glue the bones together with some 5-minute epoxy.
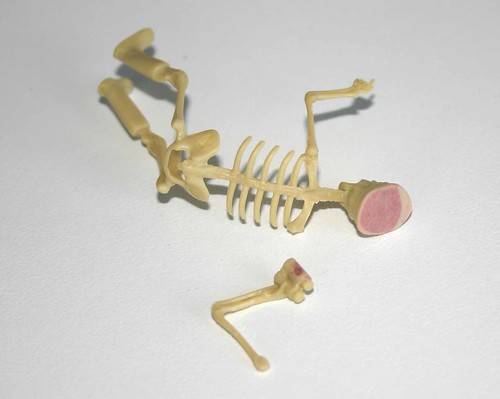
 Figure 10
  I generally followed the suggested paint color guide in the instructions for the kit and I think they were pretty accurate. I used a Sharpie to color the skull sockets and a dry brush with some white paint on the protruding parts of each skeletal bone.

 Figure 11
  Add the major interior pieces to the tub and some detail paint like the driver seat pads. The convertible bonnet is painted a flat dark gray as well.
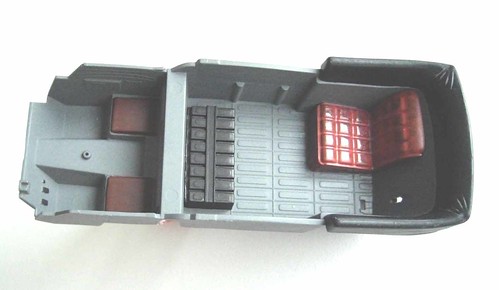
 Figure 12
  The chassis rails are also painted along with the body in Afrika Mustard and the front stabilizer bar and rear axle housing are done in steel with the rear axles and drive shaft in flat black. Glue the interior bucket to the body shell and then glue that assembly onto the frame rails with some super glue.
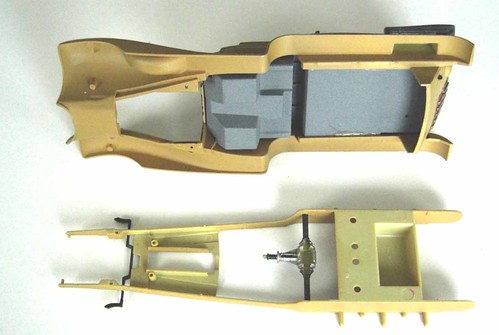
 Figure 13
  In the entire kit there was only one serious flaw and that was the shape of the radiator shell. In kits released after mid-October 2009 this should be corrected but if you got a kit before that you may have this issue. The radiator shell has a “V†shape to it at the top where a corresponding hood line would match but this hood is flat across the face so I had to modify the radiator shell.
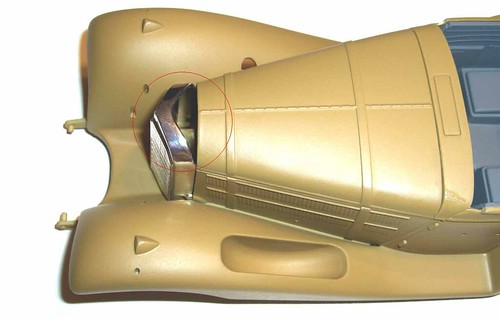
 Figure 14
  I made the modifications by tracing around the radiator shell’s outline then cutting out a matching shape from plastic sheet. I also placed a small piece at the top by tracing the top of the shell on to some plastic stock and gluing it to the upper inside of the radiator shell. Remember that you have to scrape off the plating before you glue parts to it. You’ll also have to cut out a relief area for the engine crankshaft/pulley at the bottom of the backing plate. I used a paper punch to get a nice clean trim ring.
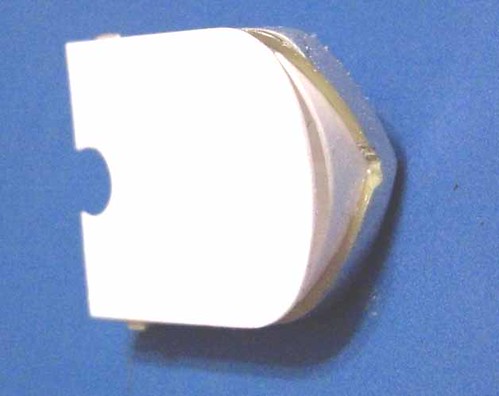
 Figure 15
  Next apply some putty or body filler to the top of the radiator shell in the same general shape to the plastic stock you glued to the back.
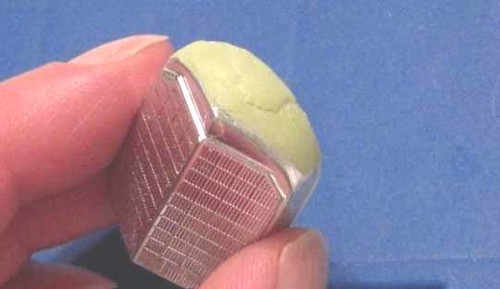
Figure 16
  After it hardens sand it off to shape and then cover it with foil or paint it with some chrome paint.
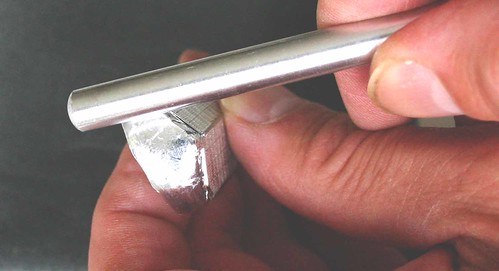
 Figure 17
  With the grill now available you can start adding the other detail pieces and decals to the body shell.
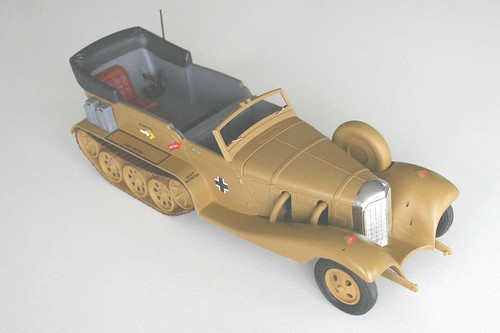
 Figure 18
 A few pieces benefit greatly by applying a black wash to them. This is done by mixing up equal parts of black acrylic paint, water and liquid dish soap and brush painting it on the parts you want to highlight. After the wash dries you just rub it off of the areas you don’t want to leave it on. One caveat though – spray dull parts with a gloss coat first or the wash tends to stick to the entire piece.
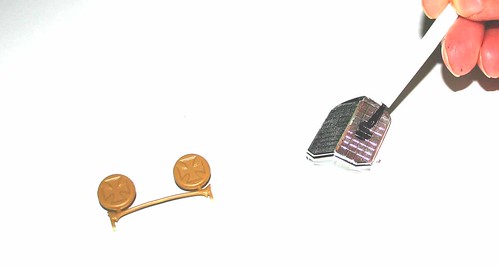
 Figure 19
  You will be close to finished at this point and the results are sure to delight. Follow up the decals with a dull coat and finish assembling the rest of the details.
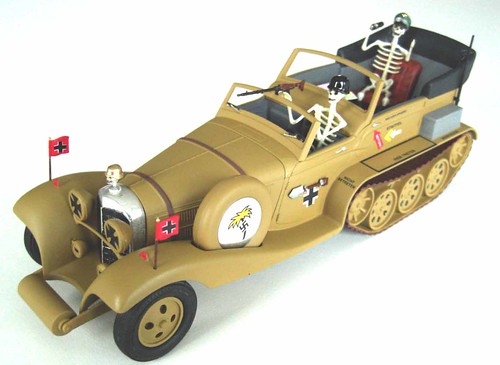
 Figure 20
