Project 20100610 – The Black Knight of Nurnberg

Project 20100610 – The Black Knight of Nurnberg Monogram 85-6523
Model & Review By Jim Church
Buy this model
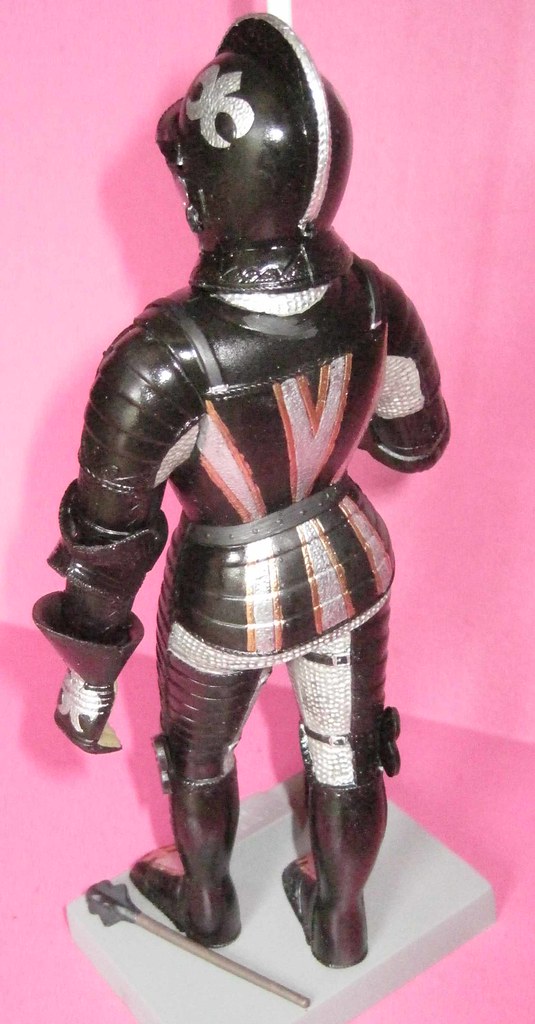
                                          Please keep in mind that the kit’s base is stamped with a 1958 copyright 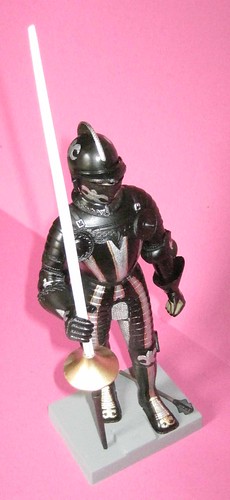 date. It also was a Revell Kit originally. Having said that, it is understandable why the plastic in this kit is so thick! The engravings on the suit of armor are really very good and accurately representative of the period that this kit portrays. I did extra research to compare the authenticity of this model to the time period, and it did check out.
                    The build is pretty straight forward with decent directions to follow. Because of the previously stated fact of the plastic thickness, some trimming was needed. There are gaps and some serious seams that need to be addressed. Part of the fit problem comes from the locater pins on the pieces themselves. I simply removed many of the offending pins and sanded the area to he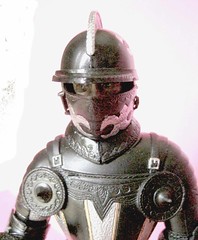 lp with the tightness of the fit. Even doing this did not remove the need for some use of seam filler and more sanding.
 Buy this kit
            Painting was not a problem. Being primarily gloss black made using my air brush a “no-brainer”. After washing the parts and letting them dry for a day, I put the model 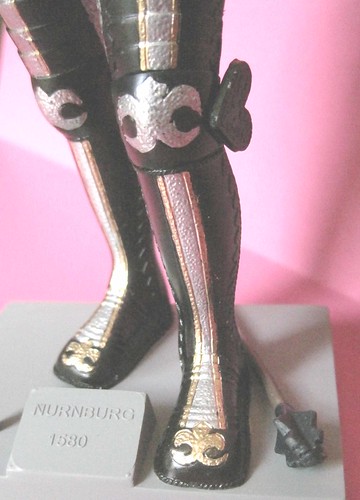 together. Once completed, I air-brushed the suit. I let this dry for a day while the armor was drying, I constructed the head, which is molded in 2 halves. There is a healthy seam that needs to be worked. On the bright side, the helmet does cover the seam for the most part, and once the helmet is built around the head, it won’t come back off. I did do a complete painting of the face and hair just to practice my shading, shadowing, and highlighting techniques.
                  The next step was to hand-paint the silver and gold highlights on the armor. I used the box art as a basic guide and added a few touches that seemed needed. One glaring error, in my opinion, is the painting of the palms of the gauntlets gloss black indicating that they were steel, which they weren’t. My research showed these to be made of lightly tanned leather. I then painted them mid-stone, which is a light tan. The mace I placed on the base because in the posing of the left hand it has been left too open for the mace to realistically stay in the hand, damn gravity!  The base was sprayed light gray to add contrast to the black figure.
                Finally, I air-brushed the lance, which needed much sanding to get it to a more round shape than molded. I used flat white and then hand painted the handle flat black and the hand guard gold.
              Over-all, this isn’t a bad build for someone interest in Medieval Armor and is looking for just that. It come together well, with patience. For the competitive modeler, there really is a lot of seam work to be done and you may very well loose some detail trying to get rid of these seams, especially on the upper thighs. If you can match the photo on the box, consider it a model well done
            To finish up, paint all of the leather straps flat black to give contrast to the gloss black armor, then add some silver buckles.