Honda CB900-F Motorcycle 1:8 Scale Academy Model Kit #1546 Review

2014 January 10
by Doug

Right On Replicas Step-by-Step Review 20140110*
Honda CB900-F Motorcycle 1:8 Scale Academy Model Kit #1546 Review
000
 

Review and Photos by James Yeager James Yaeger II Thumbnail

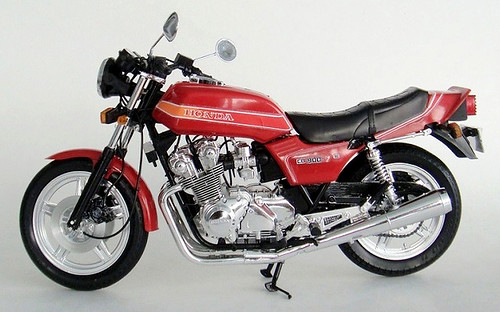
Back in the early ‘80’s there was a war being waged on the streets of America. The principal combatants however, were not against Americans. Rather, they were Asian motorcycle manufacturer’s that were trying to win the hearts and minds (and dollars) of the American consumer. Honda introduced the CB900-F in the USA in 1981 against competition from the likes of Suzuki, Kawasaki and Yamaha whose larger 1000 and 1100 cc bikes were already on the market. Despite being outdone from a displacement perspective the good looks and performance of the CB900 series gained admirable respect from the motorcycle buying public. Running the quarter mile around 12 seconds at 130 MPH, the CB900 was plenty fast enough for most people and one of the chief complaints was that during high speeds the wind pressure caused arm fatigue because of the high handle bars.

For the Modeler: This is an Academy-Minicraft “Super-Deluxe” Series Honda CB900-F Motorcycle 1:8 Scale Model Kit #1546 Review. This kit has been out of production (1987) for some time but they can still be found at garage sales and online auctions. It is a Skill Level 2 kit for the intermediate builder.  The kit has ~100 parts molded in gloss chrome, dull chrome, red, black, clear, clear red, clear orange, black vinyl tires, and waterslide decals. The finished dimensions are; Length: 11″, Width: 5″, Height: 6.25″.

Covered in this Review:  If you want to perfect your build; basic construction; preparing parts for better finishing; alternate assembly sequence suggestions for fit and ease of finishing; complete paint and adhesive selections and applications; engine assembly and detailing; test fitting; tire and wheel detailing; correcting instruction errors; where to avoid glue; how to remove unwanted chrome plating for proper assembly; adhesives to use for transparent parts; identifying and removing excess flash; aligning the headlights supports; repairing seams; installing directional tires; installing cables and wires properly; decal preparation and applications, are all fully examined in this pictorial 20 page, full-color Step-by-Step review in PDF format. The instructions are also available with this review.


100% money back guarantee!

Click the Buy Now link below to purchase the full Step-by-Step review for $4.95 USD.


Important – You MUST click on the “Return to Right on Replicas, LLC” link after you’ve made your purchase to download your review!


 Right On Replicas, LLC ©2013 All rights reserved.

*All registered trademarks are the property of their respective brands.

1949 Mercury “Woody” Wagon 1:25 Scale Revell Model Kit #85-4996 Review

2014 January 8
by Doug

RoR Step-by-Step Review 20140108*
1949 Mercury “Woody” Wagon 1:25 Scale Revell Model Kit #85-4996 Review
000
  

Review and Photos by Alan Mann Alan Mann (Thumbnail)

The original concept of the Station Wagon was used by resorts and hotels as a guest transport to and from the train depot, or a TAXI. The first models were all wood in the passenger area but due to high maintenance costs it was replaced by steel with wood panels later on.  While Chevrolet was the first to use the more conventional steel bodies other manufacturers soon followed. In 1949 Mercury introduced the first major redesign since the war and it greatly boosted sales of all Mercury lines. The new model lineup consisted of Coupes, Convertibles and Wagons and was known as the Mercury Eights. While the Coupe became the “Customizer’s Choice” the Wagon did see some popularity and was even used in the TV series The Mod Squad.


For the Modeler: This is a Revell “California Wheels” 1949 Mercury “Woody” Wagon 1:25 Scale Revell Model Kit #85-4996 Review.  It is a Skill Level 3 kit for the advanced builder.  The kit comes in at a hefty 135 parts molded in White, Clear, and Chrome with vinyl tires. Shelf space is Length: 8-1/2″, Width: 3″, Height: 2-3/4″. At first glance this is a beautiful kit, detail is crisp and nice. This is a new mold overall but does share some parts with the ‘49 Mercury Custom released a few years ago. The motor has 24 parts and is nicely detailed; it is the same Caddy motor from the ‘49 Mercury Custom kit Revell released a few years back. The chassis is molded in completely individual parts and very impressive. The interior is likewise detailed and has all the fine dash details as decals. The body is one piece with separate hood and is straight and well defined. There are few mold lines on the body and the ones it has are light and easy to sand off. The wood panels are handled as a decal and I consider that a plus. Paint colors are standard issue that you should have on hand.  This is another very nice release from Revell and they seem to be setting the standard for quality kits as of late. The finished dimensions are; Length: 8.5″, Width: 3″, Height: 2.75″.


Covered in this Review:  If you want to perfect your build; basic construction; decal preparation and application; detailed engine construction notes; detailed frame and suspension construction and detailing; clarifying suspension contact points from the instructions; detailing the coil springs; using Sharpies for fine detailing; dashboard detailing and decal identification map; interior paint and detailing instructions; chassis alignment cautionary notes; parting line identification and repair; tutone painting techniques; applying woodside decals; foil application and methods for trim; clear coating foil is discussed; trimming the window glass; adhesive selection and applications; how to make and add black washes for authentic looking trim/grill; correctly installing the visor; mounting the spare tire properly, are all fully examined in this pictorial 17 page, full-color Step-by-Step review in PDF format. 


100% money back guarantee!

Click the Buy Now link below to purchase the full Step-by-Step review for $2.95 USD.


Important – You MUST click on the “Return to Right on Replicas, LLC” link after you’ve made your purchase to download your review!


Right On Replicas, LLC ©2014 All rights reserved.

*All registered trademarks are the property of their respective brands.

VW New Beetle SnapTite 1:24 Scale Revell Model Kit #85-1976 Review

2014 January 7
by Doug

RoR Step-by-Step Review 20140111*
VW New Beetle SnapTite 1:24 Scale Revell Model Kit #85-1976 Review

 Fig 000


Review and Photos by Dave Lawniczak Dave Lawniczak Thumbnail

The ubiquitous “Beetle” has been around since the late forties and most sources consider it the bestselling car of all time. The peppy little “Bug” has seen many refinements but the “New Beetle” was a complete overhaul of the venerable car with a modern look and many technical improvements.


For the Modeler: This is a Revell SnapTite VW New Beetle SnapTite 1:24 Scale Revell Model Kit #85-1976 Review.  It is a Skill Level 1 kit for the novice builder.  Don’t let the ease of this kit fool you – it has plenty of possibilities for advanced detailing. The contents of the box consist of 40 pieces including the body and mirrors in bright yellow, one chrome tree for wheels and disc brakes, one clear tree for windows and headlight covers, one clear red tree containing tail lights, one sheet of peel and stick stickers, a bag containing four rubber tires, a bag containing the chrome headlight, the instruction sheet, a small bag of screws and metal axles and four black trees containing interior and chassis parts. The finished dimensions are; Length: 6.625″, Width: 2.75″, Height: 2.5″.


Covered in this Review:  If you want to perfect your build; basic construction; Interior seat sticker issues discussed; instruction errors; detailing the interior with a black wash; micro-detailing the instrument pod script; mastering a raw plastic finish, detailing the grill; alternate assembly sequence for improved fit and finish; a cautionary note on sticker application; adding realism to the taillight assembly; detailing the window insert and headliner; adding detail to the headlight buckets; detailing the undercarriage; detailing techniques for the wheels and tires; Using a Sharpie to outline the window tints; scratch building interior mirrors, are all fully examined in this pictorial 11 page, full-color Step-by-Step review in PDF format. 


100% money back guarantee!

Click the Buy Now link below to purchase the full Step-by-Step review for $2.95 USD.


Important – You MUST click on the “Return to Right on Replicas, LLC” link after you’ve made your purchase to download your review!


Right On Replicas, LLC ©2014 All rights reserved.

*All registered trademarks are the property of their respective brands.