Peterbilt 359 Wrecker 1:25 Scale Revell Model Kit #85-1508 Review

Right On Replicas, LLC SnapShot Review 20140321*
Peterbilt 359 Wrecker 1:25 Scale Revell Model Kit #85-1508 Review
Â
Review and Photos by Dave Mason 
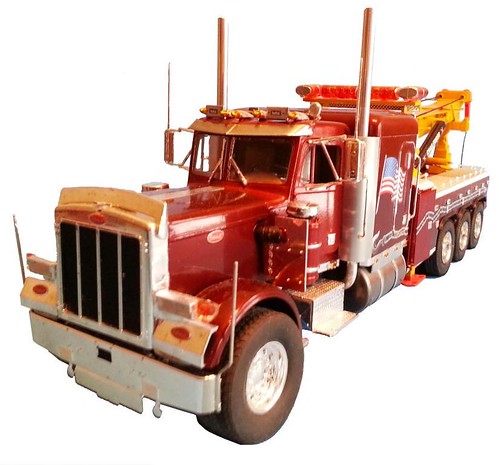
If you’ve ever seen a big rig on the side of the road have you wondered, “How are they going to tow that thing back?â€, well, this is how! As stated on the Revell website, “When a normal car wrecks a normal truck will handle it but if a semi wrecks you need the Herculean power of a Peterbilt 359 to get it back to the repair shop. This four axle, fourteen wheel monster is equipped with a massive crane and deployable load legs for hauling the heaviest loads.
For the Modeler: This is a Peterbilt 359 Wrecker 1:25 Scale Revell Model Kit #85-1508 review and a Skill Level 3 for the advanced builder. The pieces are molded in; white and clear, with chrome plated parts and soft vinyl tires, with waterslide decals. This kit features tons of detailing to add your own style. This bad boy isn’t for the faint of heart but it’s worth the build! This kit features some chrome plated parts, telescoping crane boom, and hinged hood. The finished dimensions are; Length: 19-1/4″, Width: 4″, Height: 6-1/4″.
Overview:Â This is a big model. It has 650 parts, so plan on a big work area and extra supplies. If you plan on using Model Master or similar sized bottles, this will take about 8-10 bottles (6-7 bottles for the cab, hood, sleeper, and wrecker body; 2-3 for the boom assembly if you are doing a different color than the body color). I followed the instructions for the most part. I did leave off most of the chrome pieces until I was done with the painting and most of the assembly to prevent breaking the parts with handling.
My construction started with the motor which is based on the NTC Series Cummins engine that you could 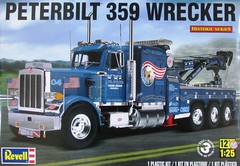 choose to power your Peterbilt. The engine looks good and has a good level of detail on the parts. The one thing that “bugged me†was the lack of a starter so I made one but once the motor is installed into the frame you can’t see it, so adding that detail is up to the builder.
Next came the chassis frame. The kit came with two sets of frame rails. For the wrecker, the pair for the tri-axle will be needed. Follow the instructions for which cross members to be used. Also, a sub frame that needs to be made from 2 parts, (upper and lower), is located between the rear suspensions. Some of the cross members are joined to the sprue by the ends, so careful removal and clean up is needed to ensure a square chassis. The fuel tanks have the seam through the middle, so you will have to fill and sand the seams. I suggest stripping the plating and painting to more resemble aluminum.
The cab and sleeper were assembled next. The cab and hood come joined with thick sprue, use caution separating them to prevent damaging the parts. I suggest sawing the sprue close and then filing to finish. The level of detail on the parts is very good with some subtle rivets and other detail on the parts, and the shape of the cab and hood is well captured. The instructions say to fill and sand the fender turn signal mounting holes. This is where the saved ejector pin pieces are needed. They fit into these holes with a little glue. Just sand it smooth and prime.
The interior assembly went together without any problems or fitment issues. The floor was slightly warped. The sleeper components have the greatest detail of any out-of-the-box truck kit I’ve seen. The only issue is that it’s hidden when assembled. If you don’t glue the sleeper roof on you will be able to lift it off for display.
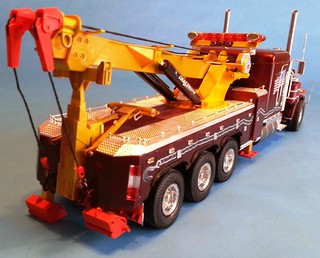
The wrecker body is last on the major assembly order. This went together as per the instructions. The only discrepancy I noticed was that in step #30. On my kit, the right and left stabilizer legs needed to be swapped to fit correctly after assembly.
After everything was assembled I added the decals I chose to use and then all the chrome trim ,mirrors and exhaust . This was a fun build, time consuming because of the size of it, but enjoyable. With a few added details, like hydraulic hoses, engine compartment wiring and some air lines on the chassis to compliment an outstanding wrecker kit.
About the Author: When Dave isn’t busy earning a living you’ll find him at the bench putting together prize winning big rigs. Some have taken home top awards at national and regional IPMS contests
 Â
Â
Â
Right On Replicas, LLC ©2014 All rights reserved.
*All registered trademarks are the property of their respective brands.
Â
Â
Â

how did u deal with the sling bar with the pins that go right throw the back of the wrecker I put mine in and it moved a couple swivles and broke the whoile on the wrecker back
I reamed the holes a little so it would move but still have enough resistance to hold it in the position I wanted. The frame lift I lost one of the pins so I used a piece of evergreen rod that fit the hole fairly tight but not enough to bind. Once together you can’t see that it isn’t a kit part.