Japanese Zero A6M5 1-48 Scale Revell Model Kit #85-5267 Review

Right On Replicas, LLC SnapShot Review 20140722*
Japanese Zero A6M5 1-48 Scale Revell Model Kit #85-5267 Review
Review and Photo by Kevin Lawton 
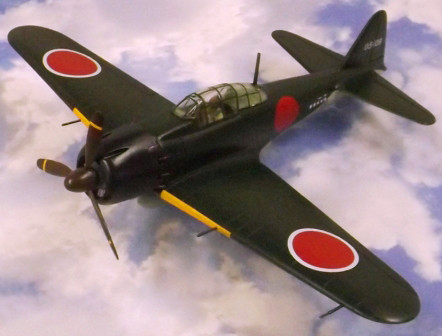
The Revell A6M5 Zero (kit # 85-5267) is best described as simplistic with folding landing gear. As such it is aimed squarely at the novice builder. The kit is a reissue of the 1962 mold and as such shows it’s age in a number of places. The interior (such as it is) comprises a pilot figure w/seat (I call them ‘pilot on a stick’ – since the pilot has a stick molded into one side that is inserted into a fuselage half) and an instrument panel. There is no cockpit floor, sidewalls, stick, rudder pedals etc. The wheel wells are completely devoid of any detail and the landing gear itself is simplified to allow it to fold. The kit consists of 25 parts molded in grey plastic with one clear piece (a closed canopy). Despite its age there was very little flash and the parts fit together surprisingly well.
The first stage in construction is to paint the pilot figure since the pilot and seat must be installed before the fuselage halves are closed up. The same goes for the instrument panel and the radio antennae. The instrument panel presented the first ‘issue’ with this kit in that there is no decal included for the panel, however there are two decals provided for radio boxes or side consoles (neither of which appear in the kit). So I simply used a punch set to punch out some gages from the decals and applied them to the instrument panel. Once the pilot, instrument panel and antennae are installed the fuselage was closed up. I need just a little bit of filler to clear up the upper & lower seams. Next came the wings. Here the landing gear, guns, and pitot tube must be installed before the wing halves are joined together. So I painted the inside of the wings Tamiya metallic blue, the landing gear struts Model Master steel, and the tires Floquil weathered black. In looking at the wing I also decided it would be much easier to paint the lower wing half now rather than try to mask it later with all the parts installed. So the lower wing received a coat of Tamiya IJN grey.
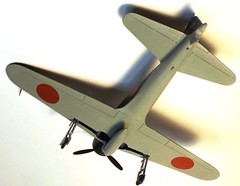
The landing gear doors must also be painted and installed at this time so the interiors were painted metallic blue and the exterior IJN grey. Then the parts were installed in the wings (I glued the landing gear in permanently since I had no interest in the folding option). I also cut about 1/8†from the top of the landing gear struts since they prevented a close fit along the wing leading edge seam). From now on extreme care must be taken in handling wing as it is very easy to break off one of the guns or the pitot tube (surprisingly I did not break any parts during construction & painting). Once the wing was assembled I glued the wing to the fuselage and was surprised at the lack of filler required at the wing root.
Once the fuselage and wing were together I masked the canopy, glued it in place and proceeded to paint the lower half of the fuselage IJN grey. While this was drying I painted the cowl inside metallic blue, picked out cylinder details with steel, and then sprayed the outside of the cowl using White Ensign models paint called “Mitsubishi Cowling Blue/Black†(a very impressive paint I might add!). A also sprayed the propeller/spinner combination using a new (for me) paint Mr. Hobby “Propeller Color†(C131). Finally, I masked the lower fuselage and along the bottom to the wing leading edge and sprayed Tamiya IJN green.
Once all the paint had dried, the cowling was attached followed by the propeller and then the whole airframe was given a couple of coats of Future before the decals were added. There are very few decals and then went on with no problems at all. Once the decals had dried I sprayed another coat of Future followed by Model Master semi gloss clear. The final step was to add the antennae wire using AeroClub elastic thread colored black using a Sharpie. I like using the AeroClub elastic thread for antennae wire (and rigging bi-planes) because it is very flexible and will not break like stretched sprue.
In conclusion: this is a very simple kit aimed squarely at the young model builder who might be interested in the folding landing gear option. It is also very suitable for someone moving from the snap together style kits into a kit that can be assembled with glue and paint. The detail is extremely simplified and construction can be completed in just a few hours.
Right On Replicas, LLC ©2014 All rights reserved.
*All registered trademarks are the property of their respective brands.
