IJN Yamato and Zuikaku (2-Pack) 1:1200 Scale Lindberg Model Kit #HL424 Review

Right On Replicas, LLC SnapShot Review 20150708*
IJN Yamato and Zuikaku (2-Pack) 1:1200 Scale Lindberg Model Kit #HL424 Review
Review and Photos by Alan Mann 
The origins of the Imperial Japanese Navy go back to early interactions with nations on the Asian continent, beginning in the early medieval period and reaching a peak of activity during the 16th and 17th centuries. The navy’s history of successes, sometimes against much more powerful foes as in the Sino-Japanese war and the Russo-Japanese War, ended in almost complete annihilation during the concluding days of World War II, largely by the United States Navy (USN).
Yamato was the lead ship of the Yamato class of Imperial Japanese Navy battleships. She and her sister ship, Musashi, were the heaviest and most powerfully armed battleships ever constructed, displacing 72,800 tons fully loaded. Named after the ancient Japanese Yamato Province, Yamato was designed to counter the numerically superior battleship fleet of the United States. She was laid down in 1937 and formally commissioned a week after the attack on Pearl Harbor in late 1941.
Zuikaku was a ShÅkaku-class aircraft carrier of the Imperial Japanese Navy. Her complement of aircraft took part in the attack on Pearl Harbor that formally brought the United States into the Pacific War, and she fought in several of the most important naval battles of the war, before being sunk during the Battle of Leyte Gulf. One of six carriers to participate in the Pearl Harbor attack, Zuikaku was the last of the six to be sunk in the war (four in the Battle of Midway and ShÅkaku in the Battle of the Philippine Sea).
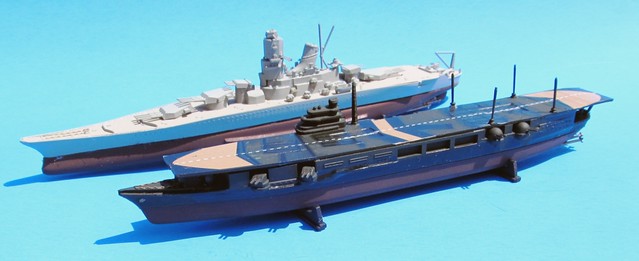
For the modeler: This review covers the Lindberg Value Pack # HL424 re-released (Re-Popped) by Round2. This is a Skill Level 2, for the intermediate builder. It is a 1:1200 scale kit and is released under Round2’s Table Top Navy Series. Each ship is bagged 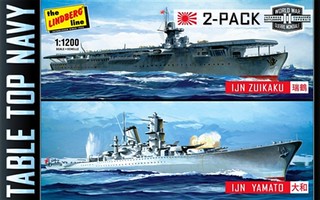 separately with the Yamato molded in Gray and the Zuikaku molded in Pale Green. The idea is you can build these unpainted and get a nice somewhat correct look. I prefer to use Tamiya paint as they have JAPANESE NAVY GREEN and JAPANESE NAVY GRAY for more accurate colors. Each also includes a one-page instruction sheet and a waterslide decal sheet for the Zuikaku. The kits are well detailed at 1200 scale and can be assembled as either a waterline or full hull version. Also included is a seascape platform for a waterline diorama. Overall dimensions are: Yamato: Length: 9â€, Width: 1â€, Height: 2â€. Zuikaku: Length: 8â€, Width: 1â€, Height: 1-1/2â€.
Â
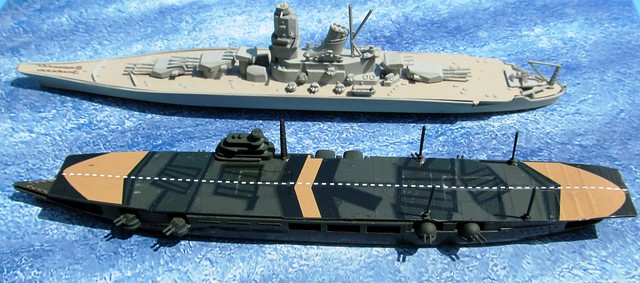
The Models: The Yamato construction begins with the lower hull section which has mating tabs in the base to line up the two halves and glue along the edge. The Zuikaku hull is solid. Paint the hulls with Hull Red. Next, carefully assemble the two halves of the upper hull sections in the same manner making sure all the edges match up. There are some seams on the hull section ends that you should  clean up and fill with some putty. You can leave the upper sections unpainted or use Japanese Navy Green on all of the other parts on the Zuikaku trees. On the Yamato the parts trees are Japanese Navy Gray and the deck is Deck Tan. If you’re building the full hull version attach the lower and upper hull sections together. Use some rubber bands to keep them in place and set aside until dry. On the Yamato assemble the superstructure first with all the parts and add them on the deck surface. Add all the other parts to the top decks with some superglue starting around the superstructures and moving outward. On the Zuikaku attach the deck and superstructure to the hull. Now add all the remaining parts to the hull. Now apply the decals on the Zuikaku using plenty of water to ensure proper placement. Use some decal setting solution to soften them up for better conformance to the surface features. Carefully, turn the ships over and set them into a stand that won’t damage the topside details and add the props and rudders with some gel type superglue. Touch those up with the hull red paint. Paint the display stands black or place the waterline model on your sea surface diorama and you can display the ships proudly.
Overall: This set is a bargain as you get two complete kits in one box. The detail is very good and the decals are excellent. Assembly goes well because all the parts fit together very nicely. Some parts are very small so use superglue and a pair of tweezers to help with placement. There are some parts without positive contact points but the instruction’s diagrams make placement pretty clear. The decals float easily and adhere nicely, as they are fairly thin the detail does show through. Micro-Sol will help out with the deck decals greatly. These are a simplistic build and take about a day to construct. For the size and simplicity of these kits you get a very nice looking build. I think these rate a 9 on scale of 1 to 10 for a ship builder.
Right On Replicas, LLC ©2015 All rights reserved. *All registered trademarks are the property of their respective brands. Follow the manufacturer’s safety recommendations for any product mentioned here.

I found these kits to be very good, as kits. I was rather dismayed at the historical accuracy. The triple anti-aircraft emplacements scaled out at 8 inches high. On the Yamato, these were either about 3 or 7 feet high. The locations were entirely fictional. It appears the sculptor put them anywhere he felt they would look good. There is a gun battery on the starboard side which has absolutely no basis in reality. The bow on the deck should be about three times as wide. The secondary guns are totally unlike the originals which were dome shaped. The seaplane recovery crane is totally wrong. I could go on, but you get the idea.
This had the potential to be a really good depiction of the Yamato in a very useful scale for wargaming, if only a little research were done while planning the model.
Bill
Bil
Bill – Thanks for that historical perspective on this replication. It’s up to the buyer now to determine whether or not to make the changes!