Honda Super Hawk Motorcycle 1:8 Scale Revell Model Kit #H-1233 Review

Right On Replicas, LLC Step-by-Step Review 20151205*
Honda Super Hawk Motorcycle 1:8 Scale Revell Model Kit #H-1233 Review
Review and Photos by Alan Mann 
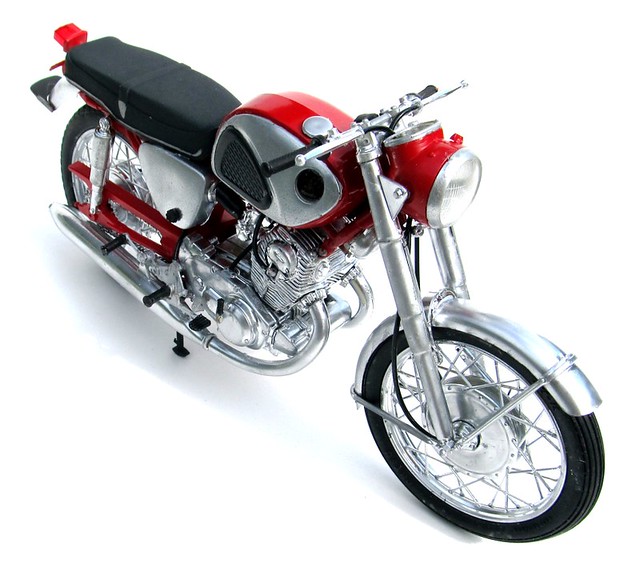
The Honda CB77, or Super Hawk, was a 305 cc straight-twin motorcycle produced from 1961 until 1967. It is remembered today as Honda’s first sport bike. It is a landmark model in Honda’s advances in Western motorcycle markets of the 1960s, for its speed and power as well as its reliability, and is regarded as one of the bikes that set the standard for modern motorcycles. The CB77 had, at only 305cc, a relatively big engine in comparison to most other Japanese bikes of the period, although it had performance to rival much larger motorcycles from other countries. It quickly built a reputation for reliability, and was equipped with luxuries such as an electric starter. The CB77 was built on the experience Honda had gained in Grand Prix racing, and differed greatly from previous models. It had a steel-tube frame instead of the pressed frames of earlier Hondas, and a telescopic front fork. The parallel twin engine, the biggest then available in a Honda, was an integral element of the bike’s structure, providing stiffness in a frame that had no downtube, and was capable of 9,000 rpm. It could propel the bike at over 100 mph; as fast as British parallel twins with higher displacements, and with great reliability. Cycle World tested its average two-way top speed at 104.6 mph, and its 1â„4 mile time in 16.8 seconds at 83 mph.
Â
For the Modeler: This review covers the Revell ORIGINAL 1966 release of the Honda Super Hawk motorcycle in 1/8 scale. Although this kit has been discontinued you can still find them for sale at online auction sites. A similar kit was issued as well.  The kit 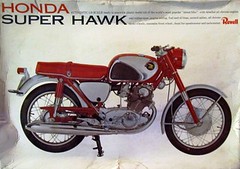 has over 125 parts molded in Red, Chrome, Clear and Clear Red with Rubber tires and Tubes for running lines and cables. The motor and exhaust are multiple parts and all chrome. The frame and front forks are multiple parts and build around the motor. There is not much detail to this kit being it is so old and not on par with the newer releases. But this is a nice kit to build. The only decals are the speedometer and tank logo. As this was an older opened kit I had no instructions. I found instructions for a similar kit online. Those are typical of the issues you can run into with a vintage kit but thanks to the internet and some great hobby products, like Alclad II Lacquer, that’s no longer a show stopper. Overall finished dimensions are: Length: 10â€, Width: 3â€, Height: 2-1/4â€.
NOTE:Â Being a Vintage kit this one has a few issues. The Chrome has faded and needs re-chroming. There are multiple options available from Electroplating and Spray Chemical coating where you send the parts away. Or, there are products on the market from Alclad II that will reproduce a realistic Chrome surface on the parts. This review will feature the use of Alclad II Chrome Lacquer.

Covered in this Review:Â If you want to perfect your build; basic construction; using Alclad II Lacquer to repair lost chrome; preparing parts for better finishing; alternate assembly sequence suggestions for fit and ease of finishing; complete paint and adhesive selections and applications; test fitting; suspension build sequence; techniques for stripping chrome plating; front wheel construction; engine wiring details; fender and gas tank construction and finishing; fork assembly and installation methods; decal preparation and application; removing unwanted logos are discussed; mounting the directional tire properly; how to repair missing hose/cable attachment points; tire differentiation; cable and hose routing methods; cowl installation; repairing glue seams; using the stand as a construction aid; detailed frame construction; engine installation technique; hose and cable creation and installation; where NOT to use glue; cautionary notes for using decal setting solution on aged decals; exhaust construction and installation; complete engine construction and finishing; suspension construction and detailing; are all fully examined in this 13 page, full-color Step-by-Step review in PDF format.
Click the Buy Now link below to purchase the full Step-by-Step review for $3.95 USD.
Important – You MUST click on the “Return to Right on Replicas, LLC” link after you’ve made your purchase to download your review!
Â
Right On Replicas, LLC ©2015 All rights reserved. *All registered trademarks are the property of their respective brands. Follow the manufacturer’s safety recommendations for any product mentioned here.

Hi:
I bought this model last year.
I am looking for instructions for this kit.
Wondering if you can point me in the right direction?
Is the review you have done here meant to replace the instructions?
Thanks very much.
Kevin – Our Premium Step-by-Step reviews are indeed intended to be used as a tutorial to complete your model! -doug