P-40 Warhawk Eggplane Series Hasegawa Kit TH9

Right On Replicas, LLC Step-by-Step Review 20160408*
P-40 Warhawk Eggplane Series Hasegawa Kit TH9

Review and Photos by Alan Mann 
The Curtiss P-40 Warhawk is an American single-engine, single-seat, all-metal fighter and ground-attack aircraft that first flew in 1938. The P-40 design was a modification of the previous Curtiss P-36 Hawk which reduced development time and enabled a rapid entry into production and operational service. The Warhawk was used by most Allied powers during World War II, and remained in frontline service until the end of the war. It was the third most-produced American fighter, after the P-51 and P-47; by November 1944, when production of the P-40 ceased, 13,738 had been built, all at Curtiss-Wright Corporation’s main production facilities at Buffalo, New York.
Â
For the Modeler: This review covers the Hasegawa Hobby Kits “Eggplane Series†Kit TH9 P-40 Warhawk. This is a Deformed Shape design kit that creates a plane based on the P-40 Curtiss Plane but in the basic shape of an EGG. There is a complete series of planes 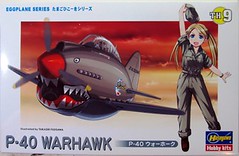 available and this kit is dated 2008. The kit is a glue and paint kit so I would rate it at least Skill Level 2. There are 24 parts molded in Olive Drab and Clear. The decals are waterslide with multiple designs and are very crisp. The instructions are simplistic and written in Japanese with English subtext. Assembly is simple and this is an average of a weekend build. There is no true SCALE to this as it is deformed and not to shape. It does have the basic elements of the real plane and is a fair representation of a cartoonish version. Consider this a Caricature of the plane. Overall dimensions are: Length from nose to tail: 3-1/4â€, Wingspan: 5â€, Height: 2â€. Scale: Egg-ish…
Covered in this Review: If you want to perfect your build; basic construction; preparing parts for better finishing; complete paint and adhesive selections and applications; test fitting; front suspension build; mating the chassis to the body; complete engine construction and finishing; chassis installation; using decal setting solutions for that “painted on†look; dashboard detailing; making realistic looking tires; proper brake caliper orientation; window trim and engine bay detailing; using “clear†glue for glass installation; decal preparation and application; make “carpeting†from craft flocking; tire and wheel differentiation; making custom floor mats and license plates; using Gravity Colors for a top-notch finish; brake caliper finishing and orientation; making heavy window tint with Alclad products; proper directional tire orientation; making crystal clear “glass†with floor wax; removing the copyright script; a gauge decal map; undercarriage construction and finishing; using spare decals to create gauge faces; expanded car and designer history; suspension construction and detailing; are all fully examined in this 10 page, full-color Step-by-Step review in PDF format.

Click the Buy Now link below to purchase the full Step-by-Step review for $1.95 USD.
Important – You MUST click on the “Return to Right on Replicas, LLC” link after you’ve made your purchase to download your review!
Right On Replicas, LLC ©2016 All rights reserved. *All registered trademarks are the property of their respective brands. Follow the manufacturer’s safety recommendations for any product mentioned here.
