Right On Replicas, LLC Step-by-Step Review 20160502*
Klingon Bird of Prey 1:350 Scale AMT Model Kit #949 Review

Review and Photos by Alan Mann 
Pity the Warrior That Kills All His Enemies! – Klingon Proverb
The Klingon Bird-of-Prey (BoP) was a type of warship utilized by the Klingon Empire serving the Klingon Defense Forces from the 22nd century, when they were first encountered by Earth Starfleet, during a short confrontation on the edge of the Sol system in 2153. This type of craft, initially descended from its counterpart from a century earlier, was one of the most versatile warships employed by the Empire, serving a variety of mission roles, including that of a scout, raider, patrol ship, and cruiser. A well-publicized encounter with a Bird-of-Prey occurred in 2285 when a Bird-of-Prey, commanded by Kruge, conducted a mission to uncover the secrets of Project Genesis. After acquiring the information, the ship destroyed the Merchantman, and later the USS Grissom, before facing off against the USS Enterprise in orbit of the Genesis Planet. Kruge ultimately lost the battle, and his ship, allowing James T. Kirk the privilege of making Starfleet’s first Klingon Bird-of-Prey capture. This was well documented in the events leading up to the court martial of Admiral Kirk, and the ship was thereafter utilized for time travel back to Earth’s 20th century. A few years later, the first Bird-of-Prey to ever breach the Great Barrier was commanded by Captain Klaa in 2287.
FOR THE MODELER: This review covers the recent re-release (Re-Pop) of the AMT kit of the Klingon Bird of Prey in 1/350 Scale by Round2. This is Kit #AMT664 in the current catalog and has been released in this version with the current contents since January 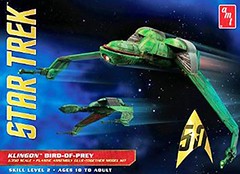 2011. AMT has rated this as a Skill Leve 2 kit for ages 10 and up as it requires paint and glue. The kit contains about 70 parts molded in Green, Clear and has Pewter landing gear. The stand is Black with a Steel rod. It includes Waterslide decals. Some of the major revisions in this version compared to the original release of this kit are the revised wing baffles that allow you to pose the wings properly in your choice of three modes, Attack, Cruise or Landed. The other major addition was the landing gear based on what was seen in the move “Star Trek III: The Search for Spockâ€. The original display base that was quite unstable has been replaced with a very nice Steel pole base also. The overall build color is Green and the molded color is close, most modelers could leave it as is and with detail painting and weathering you will still have a fairly accurate display. But the instructions do have a full list of MODEL MASTER Colors to help you with paint options. There are tons of pictures on the internet and videos of the movies to get references of the actual Bird of Prey. Do a little research and you will have a no problems with your color selection. Overall dimensions are: 14″ wide x 10″ long x 4.5″ tall (in landed pose).
Covered in this Review: If you want to perfect your build; basic construction; preparing parts for better finishing; alternate assembly sequence suggestions for fit and ease of finishing; abrasive choices; complete paint and adhesive selections and applications; test fitting; using white glue for the clear pieces; detailing the model with highlights; adding blackwash detailing to the exterior for depth; explaining instruction errors; detailing the engine with transparent paint; landing gear door construction modifications for accuracy; installing the gear doors; weathering the exterior with rust tones; detailing the wing cannons; finishing the metal landing gear parts; stand construction; dry brushing techniques; mounting the wings; additional episode specific markings; command pod accessories and highlighting; identifying and reviewing display mode version options; identifying leftover kit parts; decal preparation and application; using decal setting solutions for that “painted on†look; are all fully examined in this 18 page, full-color Step-by-Step review in PDF format.
Click the Buy Now link below to purchase the full Step-by-Step review for $2.95 USD.
Important – You MUST click on the “Return to Right on Replicas, LLC” link after you’ve made your purchase to download your review!
Â
Right On Replicas, LLC ©2016 All rights reserved. *All registered trademarks are the property of their respective brands. Follow the manufacturer’s safety recommendations for any product mentioned here.