1978 Corvette Indianapolis 500® Pace Car 1:24 Scale Revell Model Kit #85-2168 Review

Right On Replicas, LLC Step-by-Step Review 20160420*
1978 Corvette Indianapolis 500® Pace Car 1:24 Scale Revell Model Kit #85-2168 Review
Review and Photos by Alan Mann 
The Corvette, known colloquially as the Vette, is a sports car manufactured by Chevrolet. The car has been produced through seven generations. The first model, a convertible, was introduced at the GM Motorama in 1953 as a concept show car. Myron Scott is credited for naming the car after the type of small, maneuverable warship called a corvette. The third generation Corvette, patterned after the Mako Shark II concept car, was introduced for the 1968 model year and was in production until 1982. C3 coupes featured the first use of T-top removable roof panels. It introduced monikers that were later revived, such as LT-1, ZR-1, Z07 and a Collector Edition. In 1978, the Corvette’s 25th anniversary was celebrated with a two-tone Silver Anniversary Edition and an Indy Pace Car replica edition of the C3. This was also the first time that a Corvette was used as a Pace Car for the Indianapolis 500. The 1978 25th Anniversary model introduced the fastback glass rear window and featured a new interior and dashboard. The Indy 500 race is called “The Greatest Spectacle in Racing” and the Corvette, “America’s Sports Car”. It’s a dream matchup! During the 62nd Indy 500, for the first time ever, a Corvette brought the racers to the line. The selected ’78 Vette was powered by a 350 cubic inch V-8 engine. It probably could have given some of the racers a run for their money.
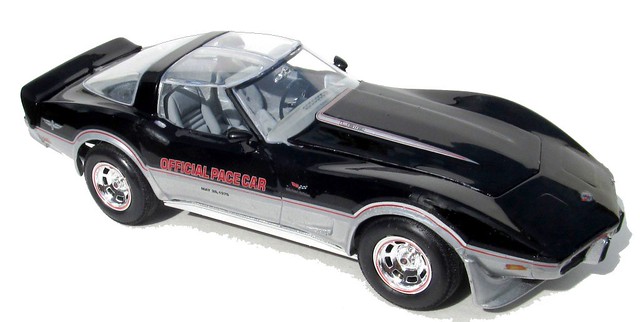
For the Modeler: This review covers the Revell 1:24 scale ’78 Corvette Indianapolis 500 Pace Car release. This is a Re-release (Re-Pop) dated from 2004 and has been since re-released in a more current version. This kit is number 85-2168 but the current catalog number is 85-4188. Revell placed this version as a Skill Level 3 in 2004 but now places it as a Skill Level 2 for the intermediate builder. This kit features separate T-top clear panels, a detailed 5.7 liter V-8 engine and complete Indy 500 Pace Car decal graphics. The build consists of 70 parts molded in White, Chrome and Clear with Vinyl tires. The decals are the waterslide type and gives you dash details and stripes for the body plus the Indy specific decals. The instructions are typical Revell book format. The buildup is quite simple with a nice motor that can benefit from some aftermarket touchups. The chassis is multiple parts and looks good when finished. The interior is a tub style and detailing is difficult, but most everything is Gray. The body needs the front and rear fascia installed and it is best to do this before painting. Overall the dimensions are: Scale: 1/24, Length: 7-3/4″, Width: 2-7/8″, Height: 2″.
Covered in this Review: If you want to perfect your build; basic construction; preparing parts for better finishing; complete paint and adhesive selections and applications; exhaust detailing; test fitting; front and rear suspension construction; mating the 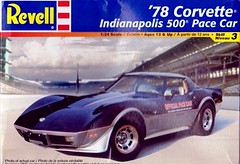 chassis to the body; complete engine construction and finishing; chassis installation; using decal setting solutions for that “painted on†look; dashboard detailing; making realistic looking tires; interior detailing; gauge decal map; engine bay detailing; using “clear†glue for glass installation; decal preparation and application; make “carpeting†from craft flocking; tire and wheel differentiation; making crystal clear windows with floor wax; interior tub orientation and installation; detailing the taillights; installing a homemade set of spark plug wires; removing the copyright script; a gauge decal map; identifying and removing the copyright script; masking techniques for tutone painting; undercarriage construction and finishing; identification and repair of parting line seams; are all fully examined in this 16 page, full-color Step-by-Step review in PDF format.
Click the Buy Now link below to purchase the full Step-by-Step review for $2.95 USD.
Important – You MUST click on the “Return to Right on Replicas, LLC” link after you’ve made your purchase to download your review!
Â
Right On Replicas, LLC ©2016 All rights reserved. *All registered trademarks are the property of their respective brands. Follow the manufacturer’s safety recommendations for any product mentioned here.