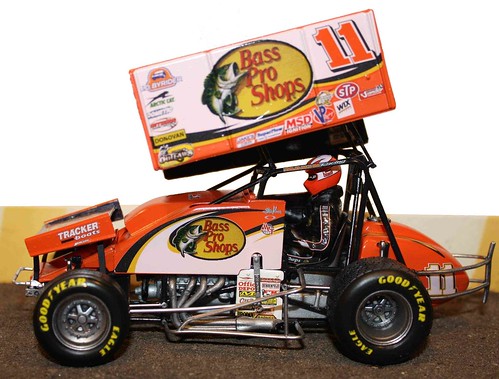
Steve Kinser Bass Pro Shop Sprint Car 1:24 Revell Model Review #85-4942

RoR Step-by-Step Review 20120717 – Steve Kinser Bass Pro Shop Sprint Car 1:24 Revell Model Review #85-4942 Click Here to Buy This Kit
Â
Click on the Buy Now button below to see the Step-by-Step review by Tony Gibson 
Â
Most people wouldn’t argue that Steve Kinser is “King†of the dirt track! With 20 World of Outlaws Championships, ESPN named Steve one of the top 25 drivers of all time. The popularity of American sprint car racing continues to gain new fans and has been a staple of weekend racing entertainment for years. Reaching speeds near 140 MPH these weekend warriors are attaining hero status among their fans.
For the Modeler: I was really happy with this build. In the pictures you’ll notice the Goodyear lettering on the tires. These were from an older NASCAR kit and they worked just fine. After the decals dried completely, I noticed that the orange bled through the white decals. It wasn’t too bad, but there are ways to correct it if you’re not satisfied. This kit is for an experienced builder. A novice build could complete it, but it cannot be rushed and takes a lot of finessing. Enjoy and hopefully we’ll see more sprints from Revell in the future. All of the changes and upgrades from the previous release, cautionary notes regarding the build sequence, test fit procedures, tire conditioning and marking tips, figure (driver) placement, use of black wash for detailing, header placement sequence, using black foil for the wing finish, and decal procedures, are all fully examined in this Step-by-Step review.
To see the full build and review – just select one of these payment methods for $2.99 USD.
Â
Â
 Important! – You MUST click on the “Return to Right on Replicas, LLC” link after you’ve made your purchase to download your review!
Â
Right On Replicas, LLC ©2012 All rights reserved.
*All registered trademarks are the property of their respective brands.
Â