Jawbreaker Wild Rail Dragster 1:25 Scale MPC Model Kit #821 Review

2016 January 25
by Doug

Right On Replicas, LLC Step-by-Step Review 20160125*
Jawbreaker Wild Rail Dragster 1:25 Scale MPC Model Kit #821 Review
000

Review and Photos by Alan Mann Alan Mann (Thumbnail)

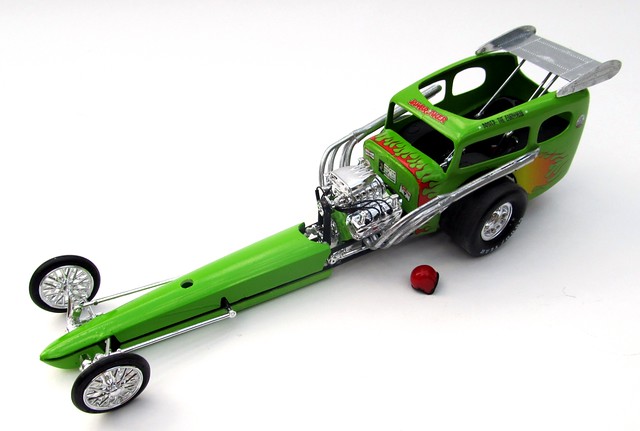
The front engine dragster is a type of race car built for drag racing in the 60’s. Commonly known as a “rail”, “digger”, or “slingshot”, it is now considered obsolete, and is used only in nostalgia drag racing. Models ranged in wheelbase length from 150 to 225 inches. They did not use any form of active suspension. Because of this, these types of vehicles were prone to becoming unstable at high speed. This is due to their making 2,000–3,000 horsepower, and having poor tire technology, short wheelbases, and very light weight.  The “Jawbreaker” is a creation by the MPC model company using the original chassis and nose from the Ramcharger Rail kit and mating it to a 32 Ford body shell for the cockpit. While not an actual car seen on the track it would be typical of what could have been seen on the track during the 60’s and 70’s.


For the Modeler: This review covers the Round2 re-release (Re-Pop) of the Jawbreaker Wild Rail Dragster in 1/25 scale. This is Kit # MPC821 and is branded under the MPC line in the current Round2 catalog. The kit has seen multiple releases over the years and this 1 
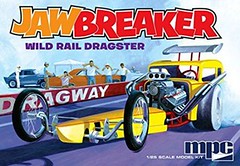
release has the original parts with new decals. The overall kit quality is typical of the 70’s with few parts and simplistic detail. You get 90 pieces molded in White and Chrome with Tampo printed soft vinyl tires. The motor is a majority of the build and is mostly chrome plated. With some wiring the motor does look good.  The frame consists of multiple parts and fits well, my sample was straight with no issues. The rear drive system is simplistic and fits properly but the motor has no positive attachment to the transmission. The front suspension is all chrome and can be touchy, so take your time. The worst part is the body, it is also multiple parts and needs putty and repair to fit properly and look good. Round2 includes a really nice set of Tampo-print slicks. Final assembly size is: Length: 8”, Width: 3”, height: 2-1/5”.

Gravity Finish

Covered in this Review:  If you want to perfect your build; basic construction; preparing parts for better finishing; complete paint and adhesive selections and applications; test fitting; detailing the engine; front suspension build sequence; kit extra items described; complete engine construction and finishing; mold seam and sink mark identification and repair; assembly and finishing the body halves; correct header orientation and installation; chassis installation; using a homemade wired distributor; engine wiring details; clamping methods; using decal setting solutions for that “painted on” look; cockpit detailing; using Gravity Colors paints; making realistic tires; frame construction; modifying the nose cover for fit; finishing and installing the rear wing; modifying the body halves for strength; decal preparation and application; using decal setting solution for that “painted on” look; suspension construction and detailing; are all fully examined in this 14 page, full-color Step-by-Step review in PDF format.


100% money back guarantee!

Click the Buy Now link below to purchase the full Step-by-Step review for $2.95 USD.


Important – You MUST click on the “Return to Right on Replicas, LLC” link after you’ve made your purchase to download your review!


Right On Replicas, LLC ©2016 All rights reserved. *All registered trademarks are the property of their respective brands. Follow the manufacturer’s safety recommendations for any product mentioned here.

1972 Oldsmobile Indianapolis 500 Pace Car 1:25 Scale Revell Model Kit #85-4197 Review

2016 January 19
by Doug

Right On Replicas, LLC Step-by-Step Review 20160119*
1972 Oldsmobile Indianapolis 500 Pace Car 1:25 Scale Revell Model Kit #85-4197 Review
000


Review and Photos by Alan Mann Alan Mann (Thumbnail)

The Oldsmobile Cutlass is a mid-size car that was produced by GM and had multiple trim packages. The 1972 Hurst/Olds was based on the Supreme trim level two-door hardtop and convertible. The H/O convertible also served as the Indianapolis 500 Pace Car in 1972. The 1972 H/O was actually developed by Hurst Performance, and not Oldsmobile. Due to a tragic accident involving the 1971 Indy Pace car, a Dodge Challenger, the major auto manufacturers were reluctant to provide the pace car for the 1972 Indy race. Hurst Performance stepped up and volunteered to sponsor the 1972 Pace car. Oldsmobile provided the Cutlass Supreme coupe and convertible, and the rest is history. It was the only time an Indy Pace car was sponsored by a manufacturer other than an automobile manufacturer, and first time to include a major supplier’s name in the title. The 1972 edition of the Hurst/Olds had some of the lowest production numbers of any produced with a total of 629 made; 130 Convertibles, 220 hardtop with sunroof, and 279 hardtop cars. The only color available was Cameo White with reflective 3M gold stripes that were stickers, not paint. All of the cars had the W-25 Ram Air Hood and gold SS III Rally Wheels with a chrome bolt-on center cap and chrome beauty ring. The tires were Goodyear Polysteel Radials. The standard Hurst/Olds engine was a 455ci Rocket V8 mated to a Turbo Hydra-matic 400 transmission with console-mounted Hurst Dual-Gate shifter. All of the 1972 Hurst/Olds had the black Strato-bucket interior with a center console. Special Hurst/Olds Pace Car badging adorned the glove box door and all 1972 Hurst/Olds were identified with a W-45 Code on the cowl tag.


For the Modeler: This review covers the Re-release (Re-Pop) of the Revell kit# 85-4197, a ’72 Oldsmobile Indianapolis 500 pace Car kit in 1:25 scale. Previous versions of this kit have been rated as Skill Level 3 but this is now rated as Skill Level 5 leading me to question if Revell USA is using Revell of Germany Skill Level ratings now. The kit has 143 parts molded in White, Chrome, Clear and Clear 1 Red and includes Vinyl tires and Metal pins. This is a true 2 in 1 kit as you can replicate either the Indy 500 version or an Olds 442 version with decals, body panels, motor and interior differences. The only true new part is a Resin fully painted figure of Linda Vaughn to sit on the car. This has always been a great build and made a beautiful car. The decals in this version are even nicer than past versions. The parts are crisp and flash free. The instruction book is typical book style Revel has been releasing and builds the car in a standard frame up fashion. The tires are generic no name sidewalls and Revell did not include decals for the tires. The motor is well detailed and adding aftermarket accessories will enhance it even more. The chassis is crisp and has good detail. The suspension looks good when assembled. The interior is detailed nicely with decals of wood details and dash details are decals. Flocking the floor will finish the details as well as custom floor mats. The body is solid and straight with almost no blemishes. Fit and finish is tight and the overall look is good. Final dimensions are: Length: 8-3/16″, Width: 3″, Height: 2-1/8″.


Covered in this Review:  If you want to perfect your build; basic construction; preparing parts for a better finish; alternate assembly sequence suggestions for fit and ease of finishing; complete paint and adhesive selections and applications; removing copyright script; test fitting; engine construction and detailing; detailed suspension construction and detailing; making realistic tires; interior detailing; optional 442 version parts; constructing and detailing the chassis; installing the driveline; decal map for the dashboard; optional engine wiring methods; making realistic coil springs; proper GM color details; identifying and repairing mold seams; making optional floor mats; where NOT to use glue; mating the chassis to the body; engine bay details; how to detail the interior; making a realistic looking dashboard; using floor polish for crystal clear “glass”; a method for damage-free chassis installation; how to use Bare Metal Foil for outstanding trim; using setting solution for decal application and that “painted on” look; using “clear” glue for windows; detailing the instrument panel; decal preparation and application; are all fully examined in this extensive 20 page, full-color Step-by-Step review in PDF format.


100% money back guarantee!

Click the Buy Now link below to purchase the full Step-by-Step review for $2.95 USD.


Important – You MUST click on the “Return to Right on Replicas, LLC” link after you’ve made your purchase to download your review!


Right On Replicas, LLC ©2015 All rights reserved. *All registered trademarks are the property of their respective brands. Follow the manufacturer’s safety recommendations for any product mentioned here.

Time Machine Mark III (Back To The Future III) 1:25 Scale Polar Lights Model Kit #POL926 Review

2016 January 15
by Doug

Right On Replicas, LLC Step-by-Step Review 20160115*
Time Machine Mark III (Back To The Future III) 1:25 Scale Polar Lights Model Kit #POL926 Review
000

Review and Photos by Alan Mann Alan Mann (Thumbnail)

Marty: “Wait a minute. Wait a minute. Doc, uh… Are you telling me that you built a time machine… out of a DeLorean?”

Doc: “Yes, the way I see it, if you’re gonna build a time machine into a car, why not do it with some style?

The DeLorean time machine is a fictional automobile-based time travel device featured in the Back to the Future trilogy. In the feature film series, Dr. Emmett Brown builds a time machine from a DeLorean DMC-12 with the intent of gaining insights into history and the future but instead winds up using it to travel across 130 years of Hill Valley history (from 1885 to 2015) with Marty McFly, undoing the negative effects of time travel. In the first film, the 1.21 gigawatts are supplied by a plutonium-powered nuclear reactor. At the end of the first film, and for the remainder of the trilogy, the plutonium nuclear reactor is replaced by a “Mr. Fusion” Home Energy Reactor. The “Mr. Fusion” device apparently converts household waste into electrical power.

Doc: “Great Scott. It’s me! Then, it “is” true. All of it. It is me who goes back there and gets shot.”

Marty: “It’s not gonna happen, Doc. After you fix the time circuits and put new tires on the DeLorean, I’m gonna go back to 1885 and I’m bringing you home.”

In the third film we find the DeLorean was hidden in an old mine in 1885 waiting for the 1955 Doc and Marty to get it. But the Time Circuits are blown and there are no replacements in 1955, so to get the Time Machine to work yet another conversion is made to the car. Using tubes and TV parts Doc builds a Time Circuit and replaces the rotten tires with ones from 1955.


For the Modeler: This review covers the Snap-It kit # POL926 from Polar Lights/Round2 of the Time Machine Mark III from the Back to the Future III movie. The kit is 1/25 scale and listed as a Skill Level 2 although it is a Snap Together kit, but, the kit requires 1 paint. The model includes about 60 parts molded in Gray, Clear, and Chrome, Brushed Steel and Metal axles. This is a Re-Release (Re-Pop), SORT-OF, as it was released in the original movie version earlier and now as seen in the final movie. Polar Lights has updated the moldings to include a “Brushed Steel” looking body that more accurately depicts the Stainless Steel body. As with the previous versions this one includes the original Plutonium Reactor as well as the Lightening Rod and “Mr. Fusion”. So in effect you can replicate multiple versions of the car with this one kit. The 1955 tires are all that is included but a simple tire swap for other styles can be done. The build is simplistic but painting is very tedious and detail specific. Go to the internet and download reference photos to give you a better idea as to how to properly paint it. The only decals are the license plates in the OUTATIME and BAR CODE versions. There are both decals and stickers of these in the kit. Overall dimensions are: Length: 7”, Width: 3”, Height: 2-1/4”.


Covered in this Review:  If you want to perfect your build; basic construction; preparing parts for better finishing; alternate assembly sequence suggestions for fit and ease of finishing; complete paint and adhesive selections and applications; test fitting; complete rear panel detailing; chassis detailing; adding and detailing the external wiring harnesses; making realistic wheels; constructing the wheels and axles; dashboard detailing and sourcing; front and rear suspension build sequence; chassis installation; detailing the back panel, interior and time circuit electronics; building and detailing the Mr. Fusion power plant; correct power plant version choice; removing unwanted copyright script; using “clear” glue for the windows and glass; using floor polish to make crystal clear windows; using optional “clock story” props; comparative kit history; detailing the exhaust stacks; identifying and removing mold lines; license plate decal or sticker application; improvising dash gauges; are all fully examined in this extensive 15 page, full-color Step-by-Step review in PDF format.


100% money back guarantee!

Click the Buy Now link below to purchase the full Step-by-Step review for $2.95 USD.


Important – You MUST click on the “Return to Right on Replicas, LLC” link after you’ve made your purchase to download your review!


Right On Replicas, LLC ©2016 All rights reserved. *All registered trademarks are the property of their respective brands. Follow the manufacturer’s safety recommendations for any product mentioned here.